Install Kali Linux with Easy Step by Step Guide
Install Kali Linux by downloading the official ISO and creating a bootable USB. Boot from the USB, follow installation prompts, and complete setup for a secure testing environment.
🤖AI Overview:
Install Kali Linux by obtaining the official ISO file and creating a bootable USB drive. The installation process involves configuring language, storage, user credentials, and installing additional tools. Kali Linux is a Debian-based OS tailored for penetration testing and security evaluations.
If you are intermediate in Linux, Kali Linux is exactly great for you. Join us with this article to learn How to Install Kali Linux. Buying Linux VPS allows you to work with Kali Linux and use its lots of advanced hacking tools.
Prerequisites to Install Kali Linux
To let this tutorial work correctly, consider the below requirements:
- At least 20 GB Hard Disk space, 2 GB RAM, Intel Core i3 or AMD E1 equivalent)
- At least 6 GB USB stick.
- A Kali .iso file.
- Rufus (To create a bootable drive that will be explained more in the following of this guide)
Tip: Kali needs at least 20 GB of hard disk space, so if you want to dual boot your computer, partition your hard due to this requirement and then install Kali on it.
Tutorial Install Kali Linux
This will be one of the most straightforward installation processes you have ever learned. Let’s go through this article. To install Kali Linux on your computer, you must pass some required steps.
Step 1
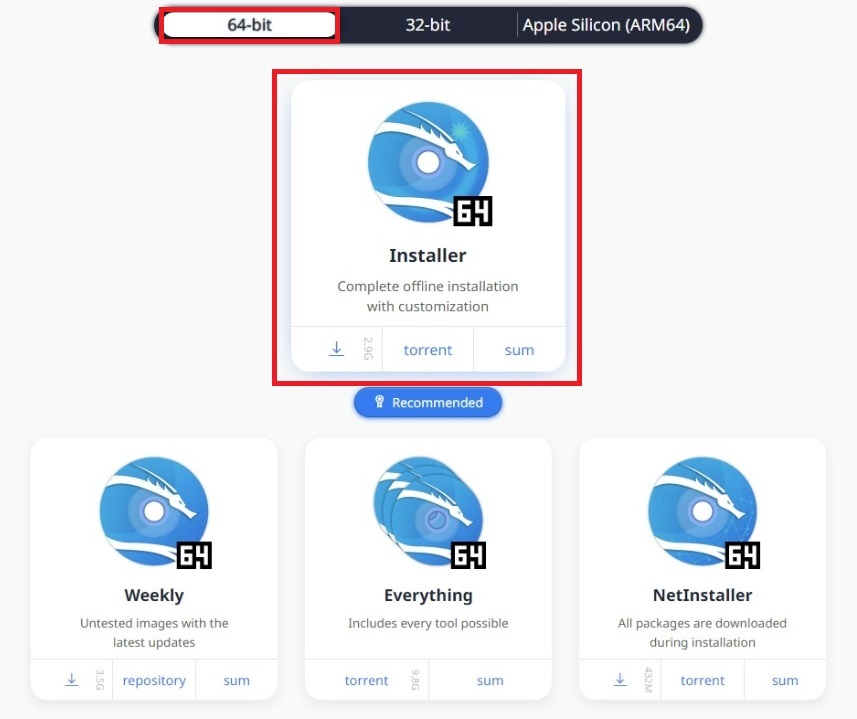
Firstly, you need to download Kali Linux to let the installation start. So, go to the Official Website of Kali and hit the download button to have an iso file for packaging software.

According to your system, choose between 32-bit, 64-bit, and Apple M1 to download the Installer. Also, torrent is available if you like it.
Step 2
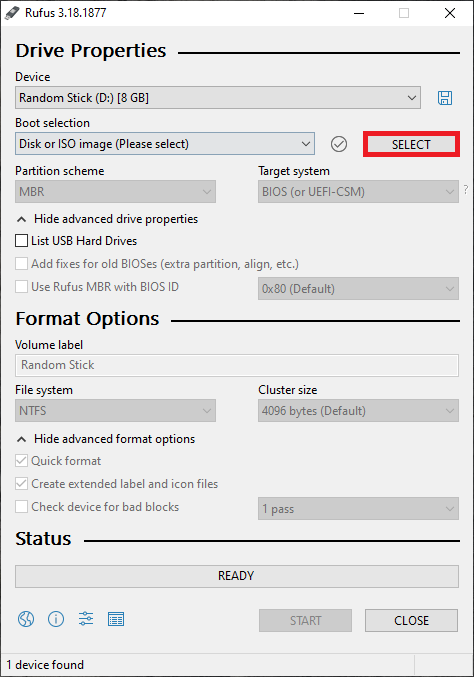
As we mentioned in the prerequisites section, you need to download Rufus.ie and make some changes after running it to make the stick bootable. You may find other methods like CD/DVD, network, and USB. Since we promised to present the easiest way of installing Kali Linux, the USB Drive will be explained as the easy and reliable method.
Connect the stick and select it under the ‘Device’ options. Under ‘Boot selection’ select your newly downloaded Kali iso file.
Once the bootable USB drive is made, insert it into your system’s USB port and power on your computer.
Step 3
In this part, to access the Kali Installer Menu, you need to boot the computer. So, disable secure boot if it is enabled in the BIOS settings. As you read earlier, notice the partition size you make for Kali if you are dual booting.
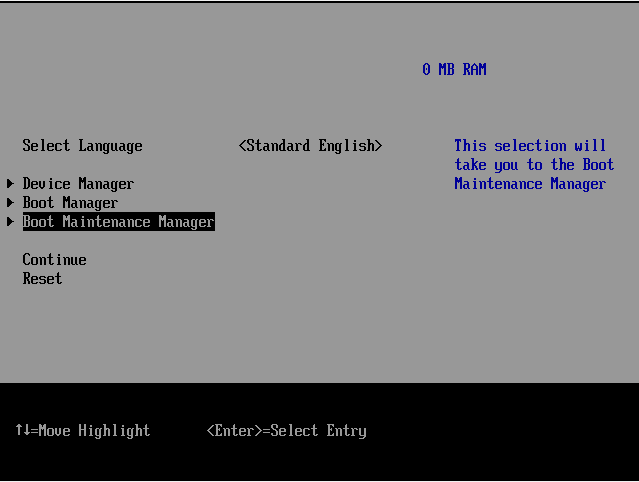
You can boot to the drive when disabling secure boot is complete. To choose the stick you have made, access to the boot menu at startup.
It is possible to edit the boot menu configuration in the BIOS menu which is permanent, but you might prefer to change post-installation. While in the startup process, you may need to access the boot menu as this will only be a temporary configuration. Since the installer menu allows the keyboard for input, use the arrow keys, Enter, and Esc to navigate it.
Step 4
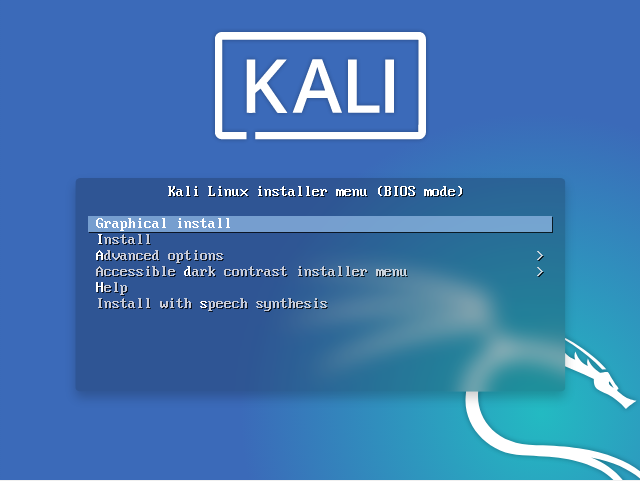
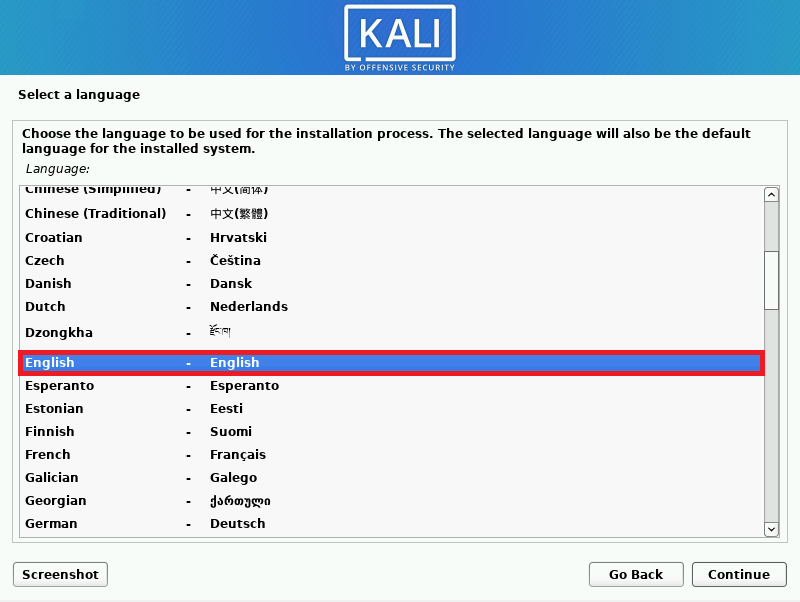
Now, you are ready to complete the installation of Kali on your system. Once the screen below appears, choose the default language you prefer to use during the installation and also region, and keyboard layout.
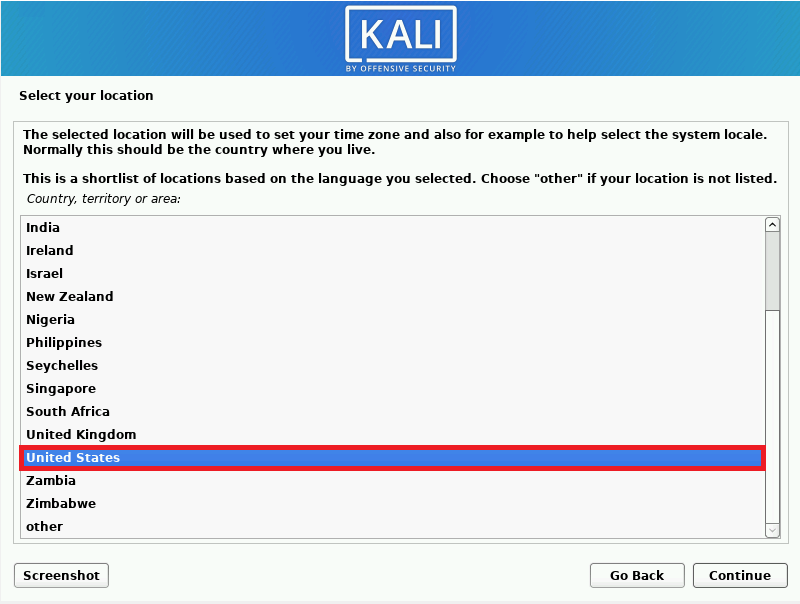
Select your location.
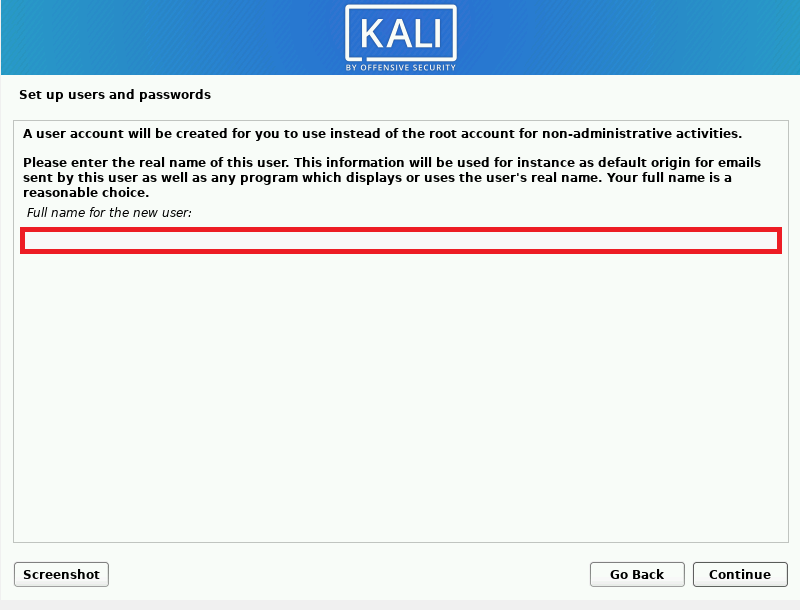
Since you do not need to do the network configurations for an offline install, you can skip the relevant steps. Then, to identify your computer, fill in a hostname, but you can skip the domain name part. Finally, type in your full name for your new user account.
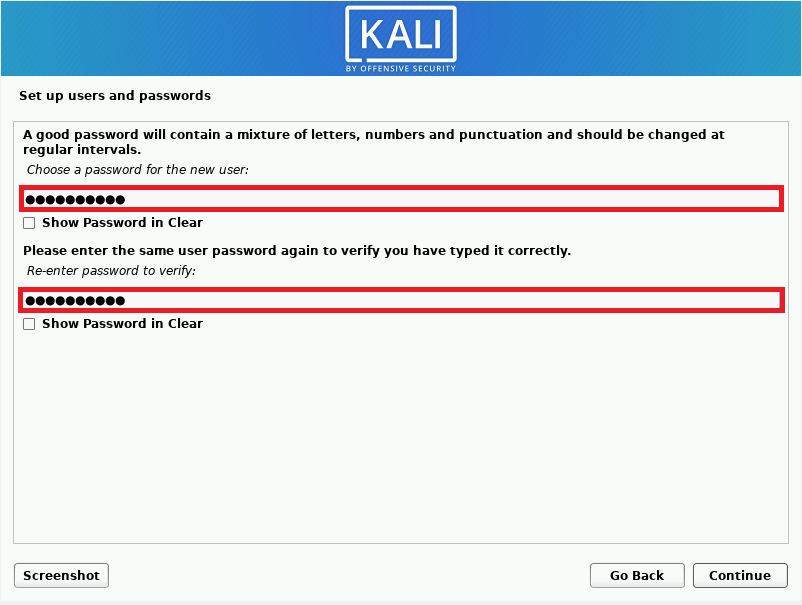
Next, after typing in your username, set a strong password for your new user account and press Continue to proceed with the installation.
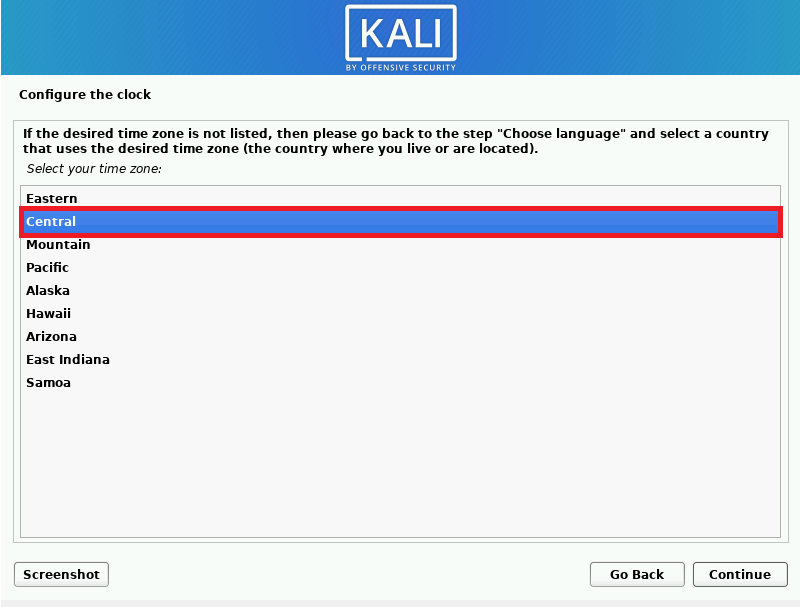
When creating a user is complete, you should select your time zone. Choose the region according to your country and be aware that it might affect your network configuration post-installation.
Step 5
To set up the storage, selecting the partitioning method would come next. The Guided options are best if you wish to format the entire hard drive for Kali.
The LVM (Logic Volume Management) capability enables you to create divisions that are reasonably versatile. This means that while the OS is running, you can extend, decrease, or even merge partitions. It’s a fairly cool function.
In the event that someone unauthorized gains access to your hard drive, the encrypted LVM feature protects your data. Just keep in mind that there is a cost associated with using encryption: your hard disk will typically operate more slowly. Thus, the “Guided – use entire disk” option is chosen by the majority of users.
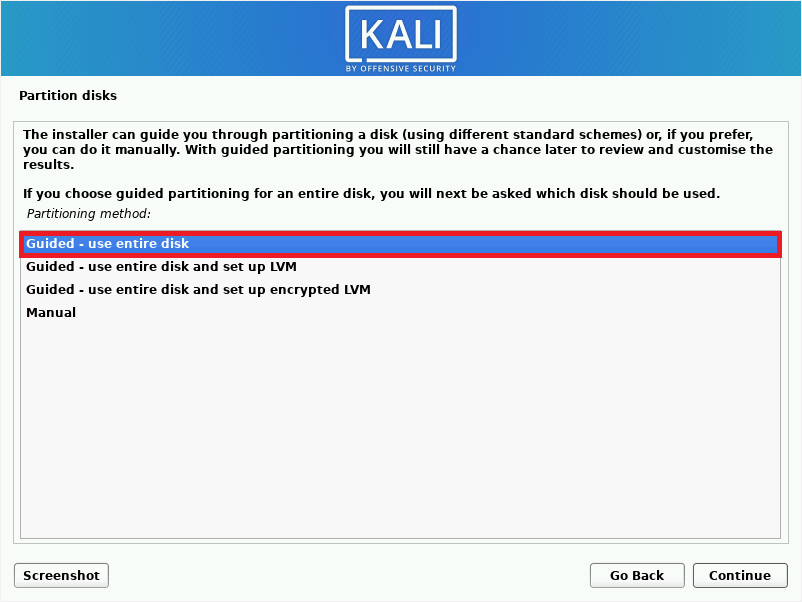
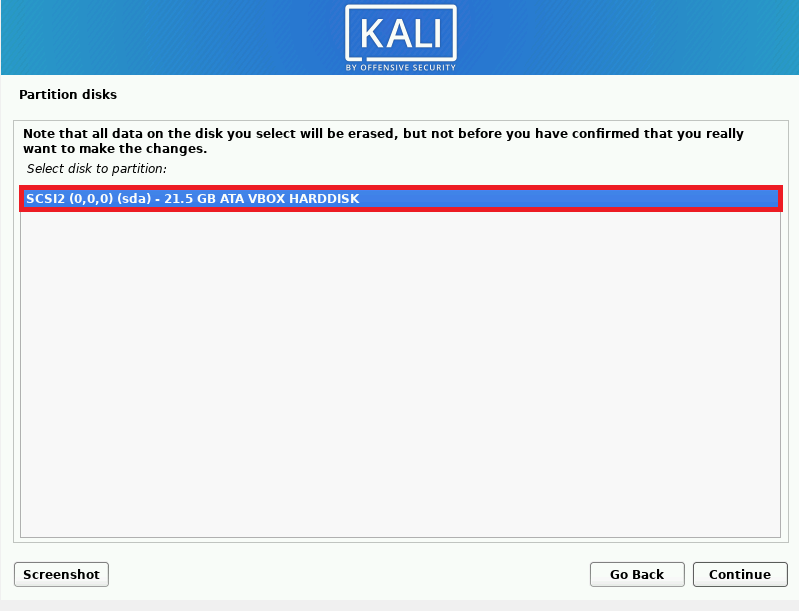
However, if you are dual booting, you will need to select the manual option and make the required adjustments. Choose the hard drive on which you wish to install Kali. If you are using a virtual machine, a small 21 GB drive is ideal.
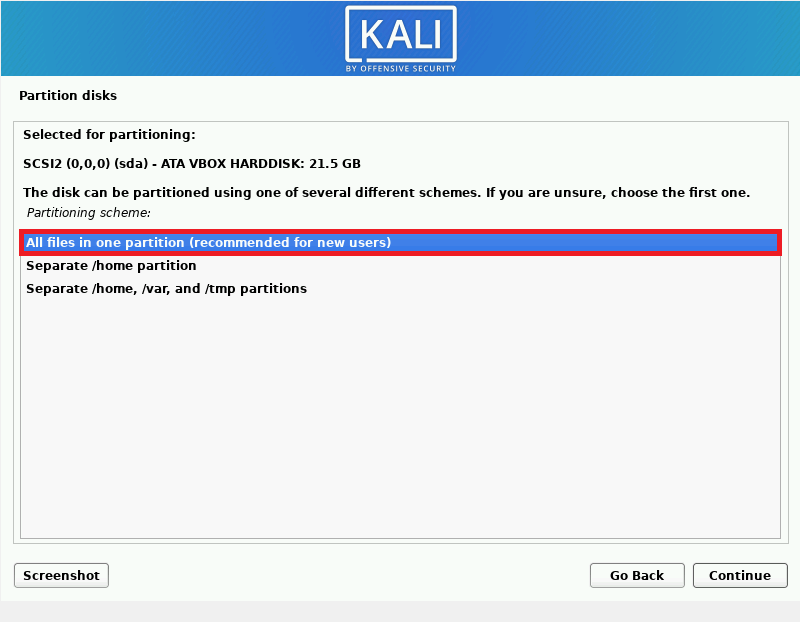
Choose the partitioning scheme for your files. Each option differs from the others by creating different partitions for a few key critical directories.
Now, you can complete the partitioning changes.
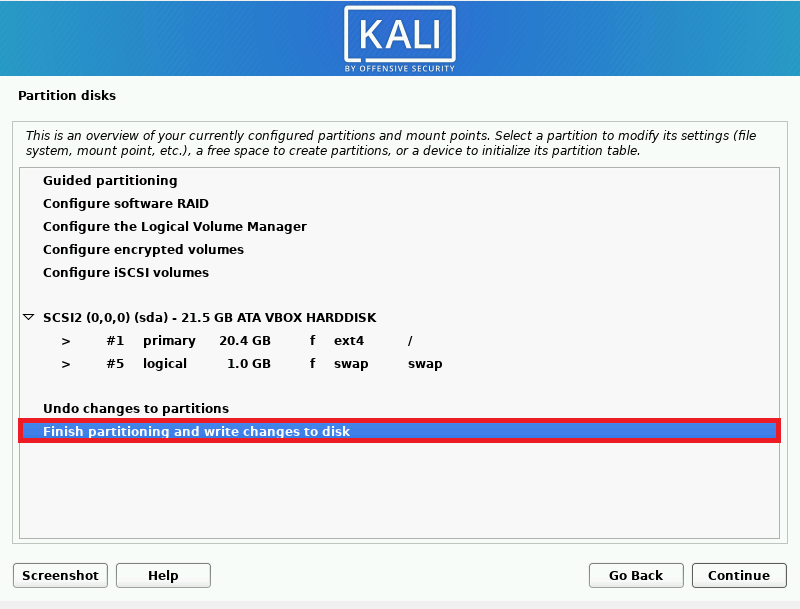
And finally, to write the changes to the disk, you select ‘Yes’.

Step 6
It is time to choose the software you consider installing. To provide the desktop look you want, check the desktop environment and collection of tool options. Desktop environments are essentially how a person sees their desktop. The most popular options are Xfce, Gnome, and KDE in Kali. Installing all three is an option, and you can later configure your computer to select the one you want.
Note: In the case of choosing the xfce desktop environment, you will have to put in your username, and enter your password on the login screen.
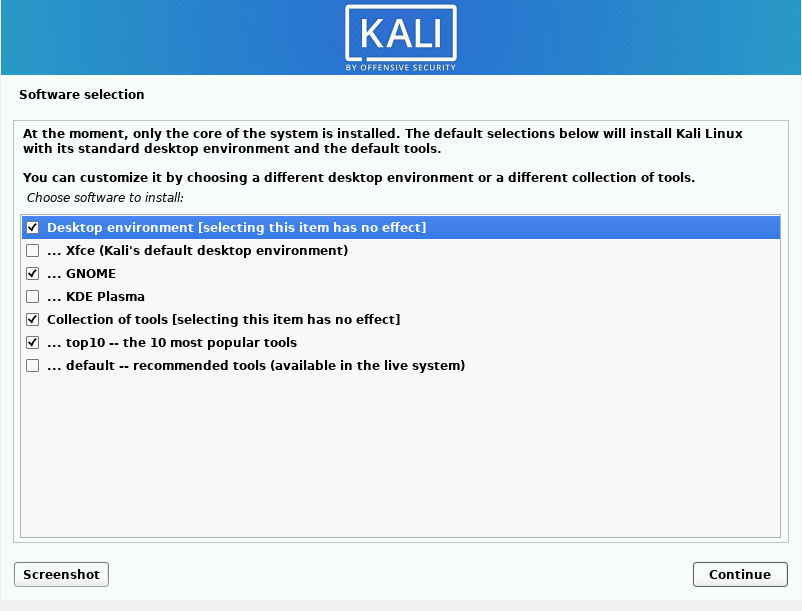
As you see, you can check the box of the top 10 most popular tools on Kali. However, you are recommended to check that box as a hacker, since you will need them soon. If you need to know what this list is including, have a look at the below names:
Aircrack-ng, Burpsuite, Crackmapexec, Hydra, Johntheripper (jtr), Metasploit, Nmap, Responder, Sqlmap, and Wireshark.
Step 7
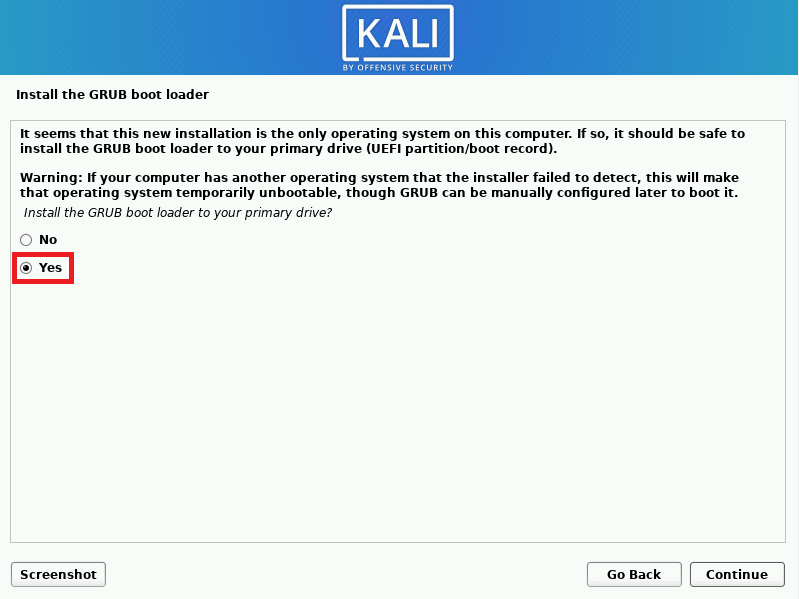
The required steps of installing Kali Linux are really easy. You just need to take time. In the last and the 7th step, you will install the GRUB bootloader. As a piece of software, you can use the GRUB boot loader to choose which OS to start the computer. The best response here is “Yes,” for both single-boot readers and dual-boot readers.
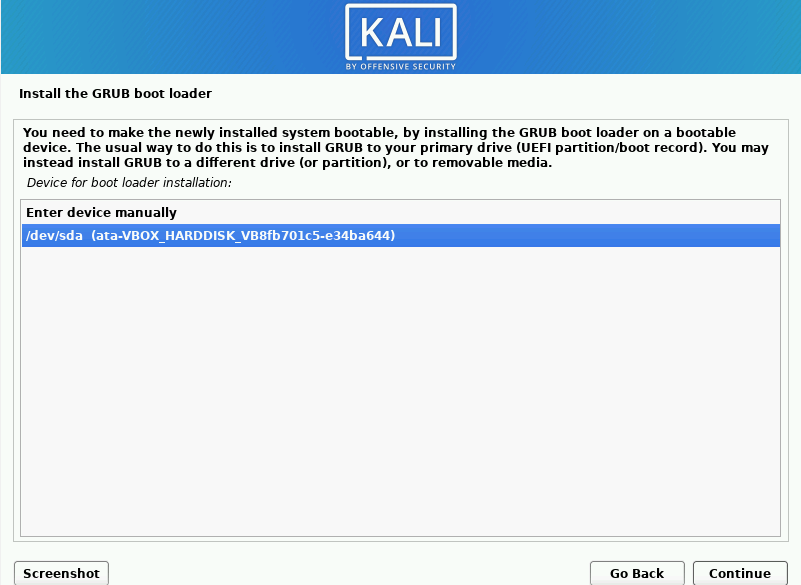
Next, select your hard drive.
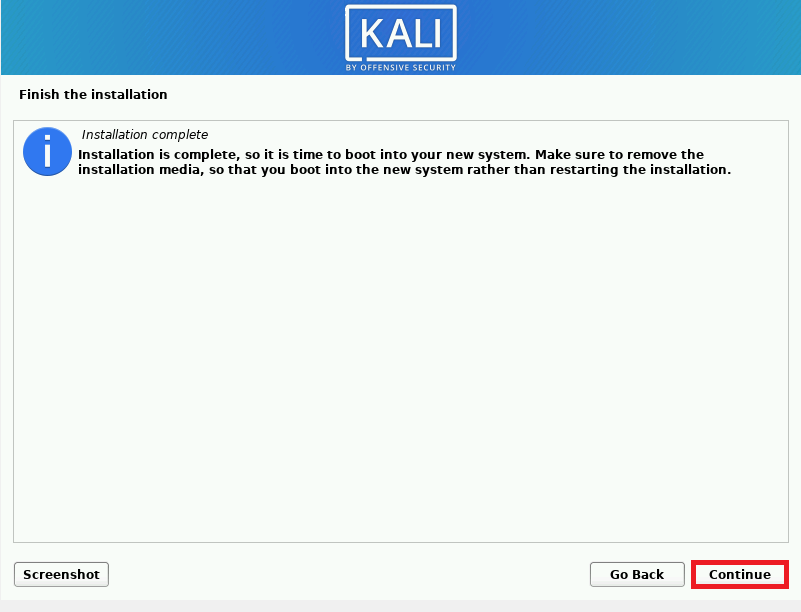
That’s it! If you have passed all the recent steps correctly, the installation must be completed successfully at this moment. So, just press Continue to clean up and reboot your computer.
If you are dual booting, change the boot menu to load Kali before Windows. In this way, you can choose which OS you want to use.
Once you see the Kali Linux desktop, you have successfully logged in.

Have a good Hack!
How to use default Kali Linux credentials
You will be asked for your username and password when you log out or the screen turns off (When using the Live version of Kali Linux). So, you can use the default Kali Linux credentials. To do this, run:
Username: root
Password: toor
To open your command shell to upgrade and update common packages after installation, use the following commands:
sudo apt update //Update Kali Linux
sudo apt upgrade //Upgrade Kali Linux
That is all you need to do to use the Kali Linux default password.
Conclusion
Installing Kali Linux is an empowering step for anyone interested in cybersecurity. By preparing your system, downloading official files, creating bootable media, correctly configuring BIOS/UEFI, and following the installation steps carefully, you will have a fully functioning Kali Linux environment.
Always verify downloads and keep your system updated to maintain security. This beginner-friendly guide provides a clear path to install Kali Linux confidently and efficiently.
If you encounter any problems, please do not hesitate to contact us. Our technical support team will try their best to solve your problems.
FAQ
2. Where can I download the Kali Linux ISO file?
Download the ISO from the official Kali Linux website, selecting the version matching your hardware architecture.
3. How do I create a bootable USB drive for Kali Linux?
Use Rufus or Balena Etcher to create a bootable USB by selecting your USB device and the Kali Linux ISO file.
4. Can I dual boot Kali Linux with another operating system?
Yes, use manual partitioning during installation to allocate space for Kali Linux alongside your current OS.
5. What are the default user credentials for Kali Linux?
Since Kali 2020.4, a standard user is created during setup; root login is disabled by default for security.
6. How do I update Kali Linux after installation?
Run "sudo apt update" and "sudo apt upgrade" in the terminal to keep the system current.
7. What desktop environments are available during Kali Linux installation?
You can choose GNOME (default), Xfce, KDE, and others based on your preference.
8. What is the role of the GRUB bootloader?
GRUB manages multiple operating systems at boot, necessary for dual boot setups.
9. How do I troubleshoot installation issues?
Ensure proper USB creation, disable Secure Boot, verify hardware compatibility, and consult Kali forums if problems persist.
10. Can Kali Linux be installed on Apple M1 devices?
Yes, Kali provides an ARM64 version supporting Apple M1 hardware with specific installation instructions.