How To Open A Port On The Windows VPS Firewall
To let the app or process work through a port, we need to open a port on the windows VPS firewall. As their name implies, ports are the gateway for server input and, therefore, should be monitored. Also, due to the possibility of gaining unauthorized access to the server, only the required ports should be inside the server.
Different firewalls manage ports on different operating systems. In Windows VPS, this is done by the Windows built-in firewall.
Ways To Open A port On The Windows VPS
There are 3 ways to open a port on the Windows VPS firewall, and they will be checked on this topic one by one.
- Windows Firewall GUI
- CMD (Command Line)
- Windows PowerShell
Open A Port On The Windows VPS Firewall Through The Windows Firewall GUI
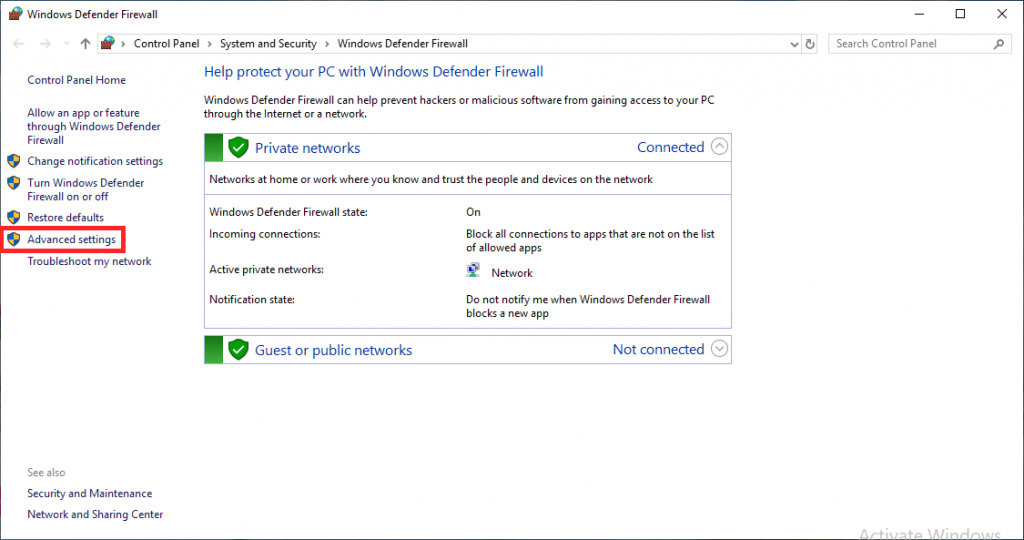
- At first, execute run using Windows key + R keys and type firewall.cpl and then press OK.

- On the new page, click on the Advanced setting at the left.
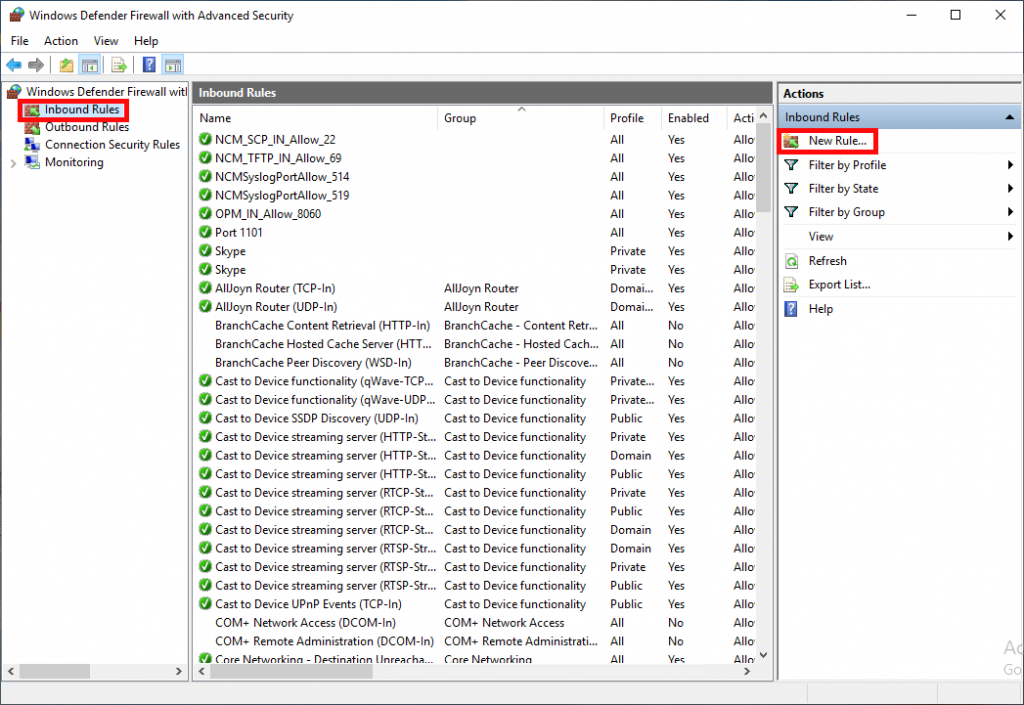
- Once the new page is opened, choose Inbound Rules and then click on the New Rule…
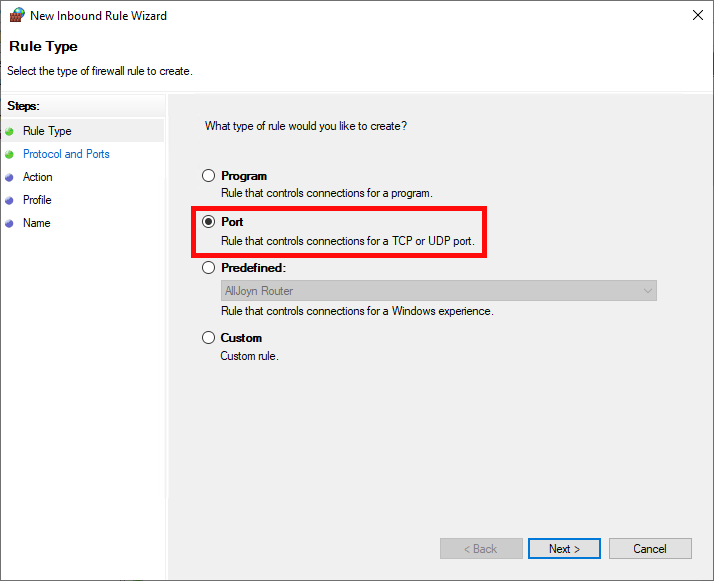
- Select the port on this page and then click on the Next.
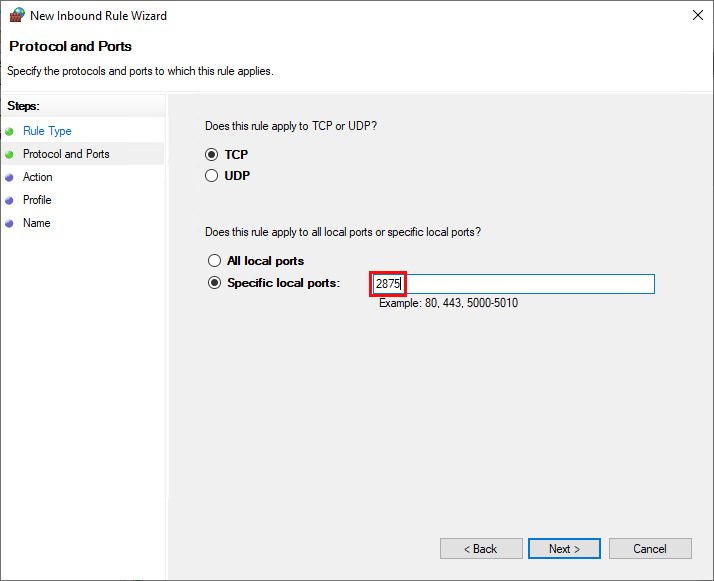
- Write the port number that you want to be opened and click Next.
Note: You should write the number that you want to open. In this topic, we have used 20875, for instance.
- In this section, choose to Allow the connection and then click Next.
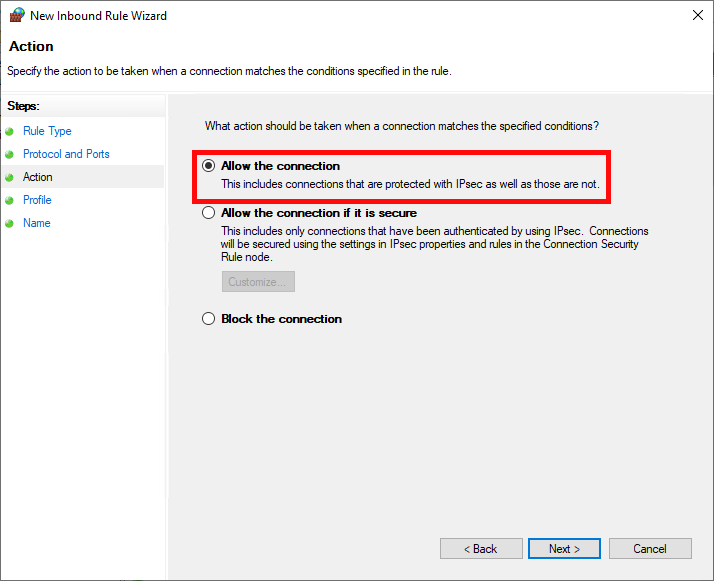
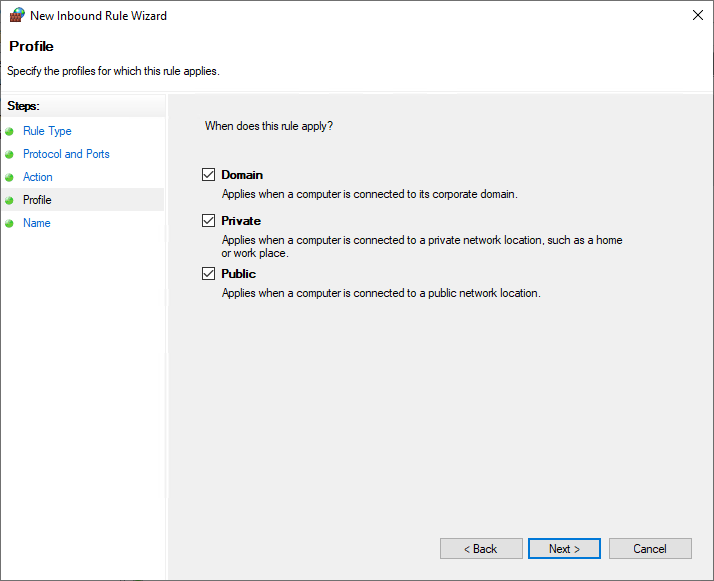
- Choose in which situation the port should work, and then click Next.
- In this part, write your desired name for the number you want to open and then click Next.
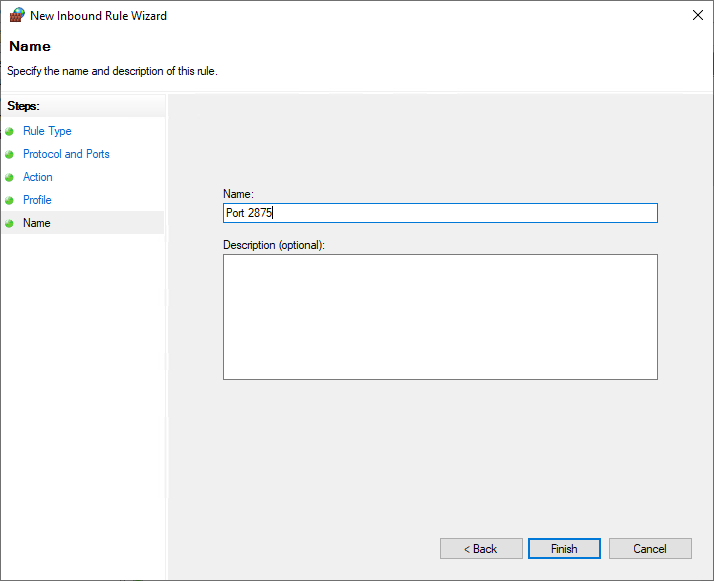
- You’re already done. You have successfully opened your desired number.
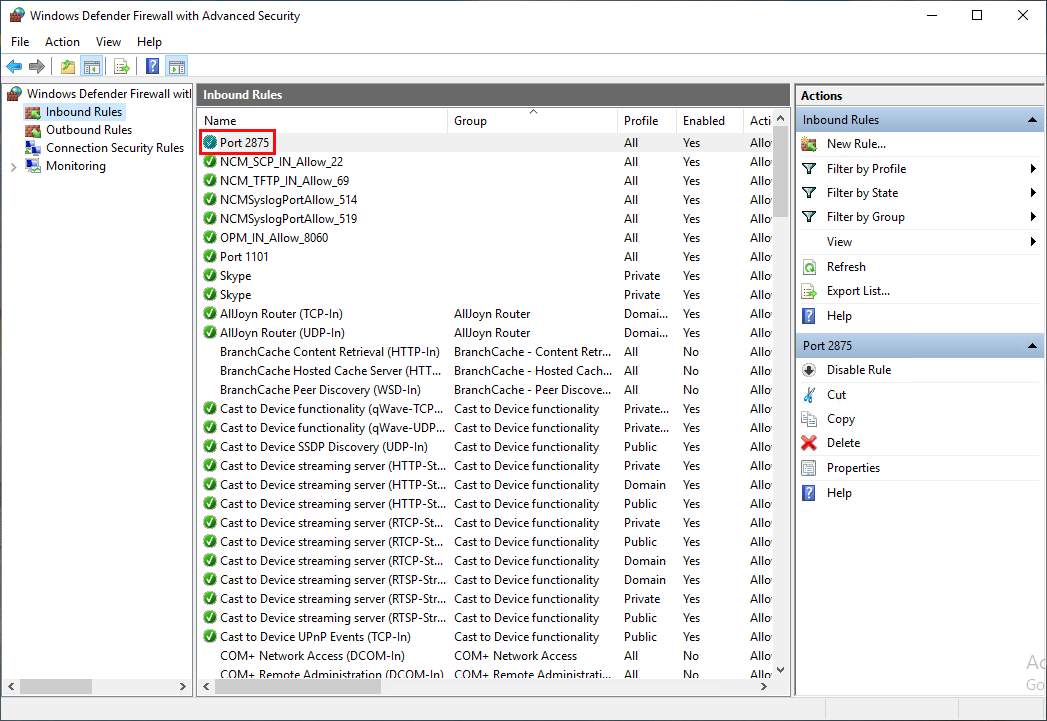
To see the result, you can check it on inbound rules.
- Finally, reboot the server for the setting to be applied.


Open A Port On The Windows VPS Firewall Through CMD
- Open run using Windows key + R and type CMD and then press OK.
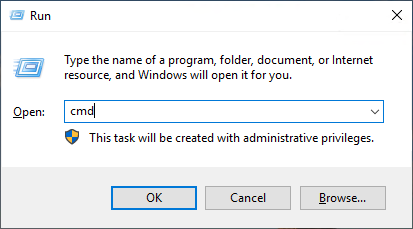
- Now, try this code.
netsh advfirewall firewall add rule name="Port 20875" dir=in action=allow protocol=TCP localport=20875Note: On the name section, you should write your desired port name, and on the local port section, you should write the number of the port you want to open.

- Reboot the server for the setting to be applied.
Open A Port On The Windows VPS Firewall Through PowerShell
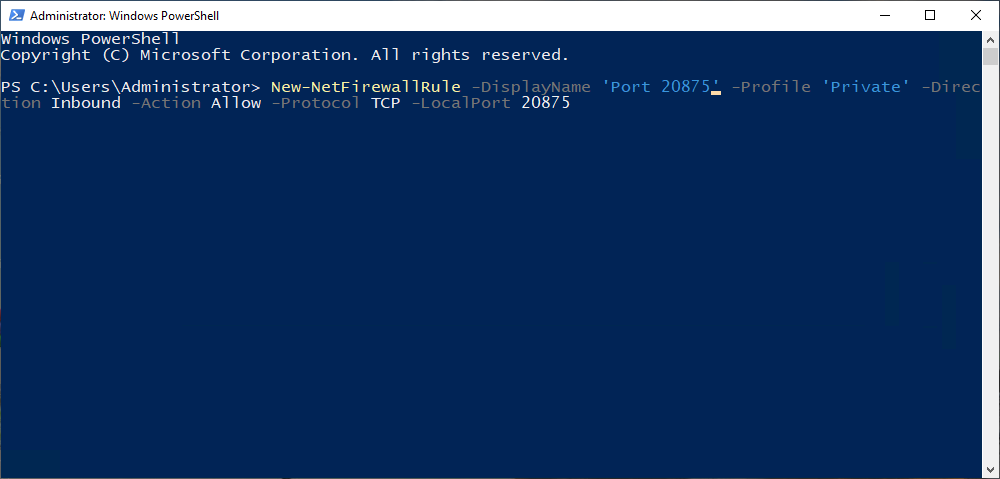
- At first, execute run using Windows key + R, type PowerShell, and then press OK.

- You should use this command to open the port.
New-NetFirewallRule -DisplayName "Port 20875" -Direction inbound -LocalPort 20875 -Protocol TCP -Action AllowNote: On the -DisplayName section, you should write your desired port name, and on the -LocalPort section, you should write the number of the port you want to open.
- Then reboot the server to apply the changes.
Summary
There are 3 ways to open a port on the Windows VPS firewall. You can use any of the above steps for this purpose. Consider that ports are sensitive gateways on the server, so be sure to secure any port that you open and close the ports that you don’t need, so check the network port requirements in Windows.