
How To Install LEMP On CentOS 8
LEMP is Linux, Nginx (Engine X), MariaDB/MySQL, and PHP. In this article, we will check how to install LEMP on CentOS 8. Lemp includes a set of free and open-source tools for using high-traffic dynamic websites.
Nginx is a free, powerful, high-performance web server that can also be used as a reverse-proxy.
MariaDB is a database used to store user information, and PHP is a server-side programming language used to develop and support dynamic web pages.
There are 5 steps to install LEMP:
- Update Software Packages
- Installation Of Nginx Webserver
- Install MariaDB
- Install PHP 7
- PHP Data Testing
Step 1: Update Software Packages
To get started, update your repository and software packages on CentOS 8 using the dnf command.
$ sudo dnf update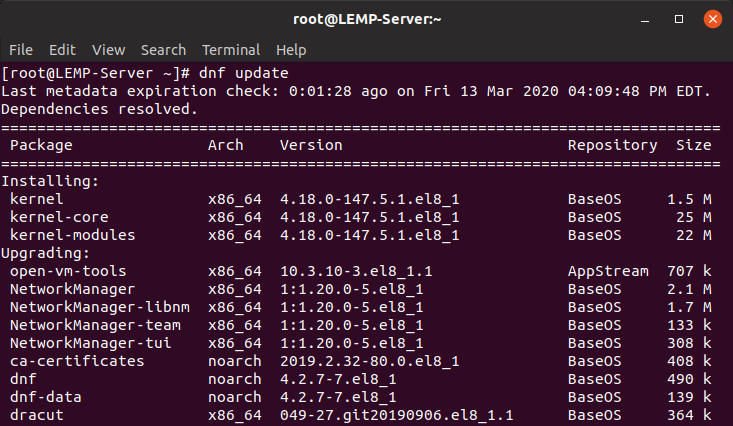
Step 2: Install Nginx Web Server
After completing the software package update, install the Nginx using the following command.
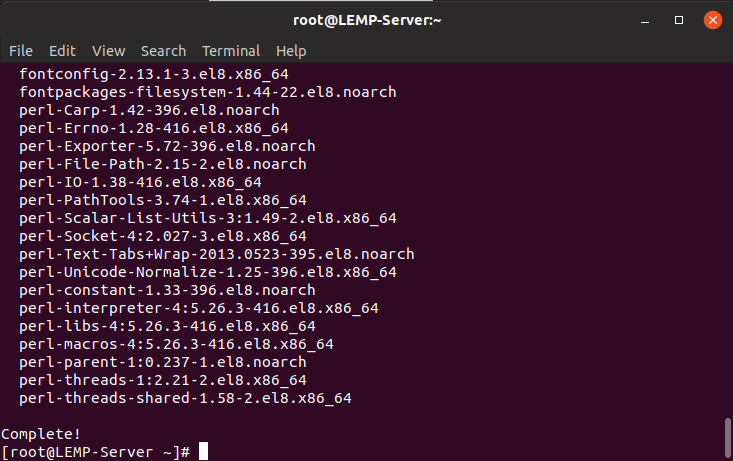
$ sudo dnf install nginx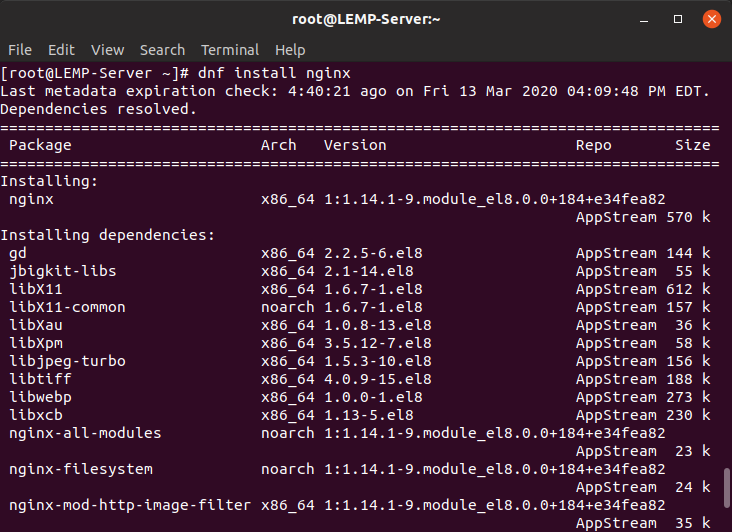
The photo below shows that the Nginx installation was done without any problems.
Once the installation is complete, please run the following commands to automatically boot the Nginx engine during system boot and confirm its functionality.
$ sudo systemctl enable nginx
$ sudo systemctl start nginx
$ sudo systemctl status nginx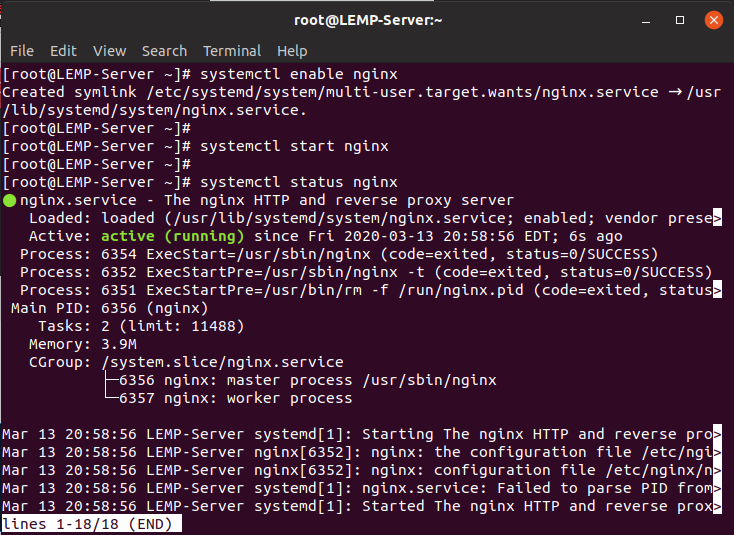
To check the Nginx version installed, run the following command.
$ nginx -v
If you are curious to learn more about Nginx, run the rpm command as below.
$ rpm -qi nginx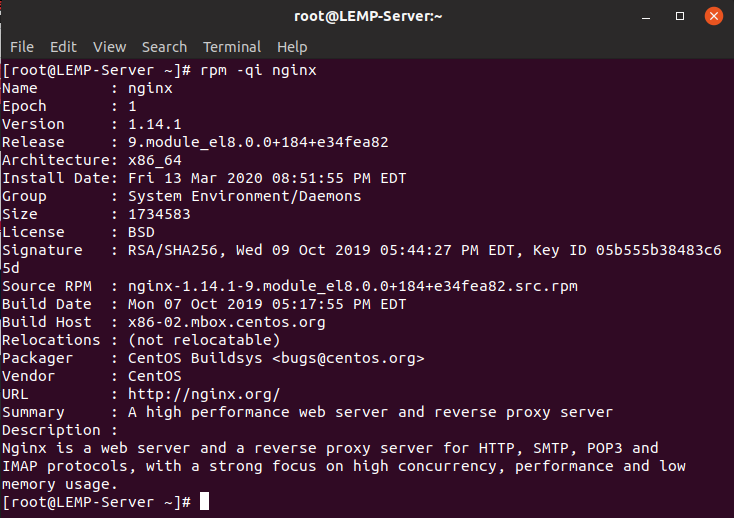
Now add the Apache service to your operating system firewall for access. To do this, use the following command, then reload the firewalld service.
# firewall-cmd --permanent --zone=public --add-service=http
success
# firewall-cmd --reload
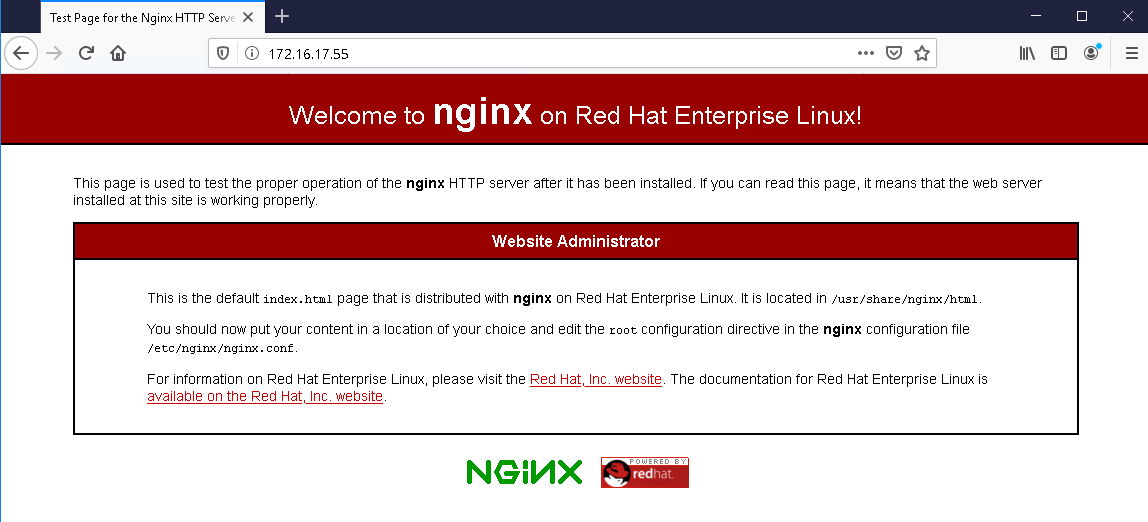
successTo make sure the Nginx server is up and running, enter your server’s IP address in a browser and press ENTER.
"http://server-IP"
If you see the Welcome to Nginx page, your server is up, and you can make the rest of the settings.
Step 3: Installation Of MariaDB On CentOS 8
MariaDB is free and open-source, a branch of MySQL, and has the latest features that make it a better alternative to MySQL. To install MariaDB, run the following command.
$ sudo dnf install mariadb-server mariadb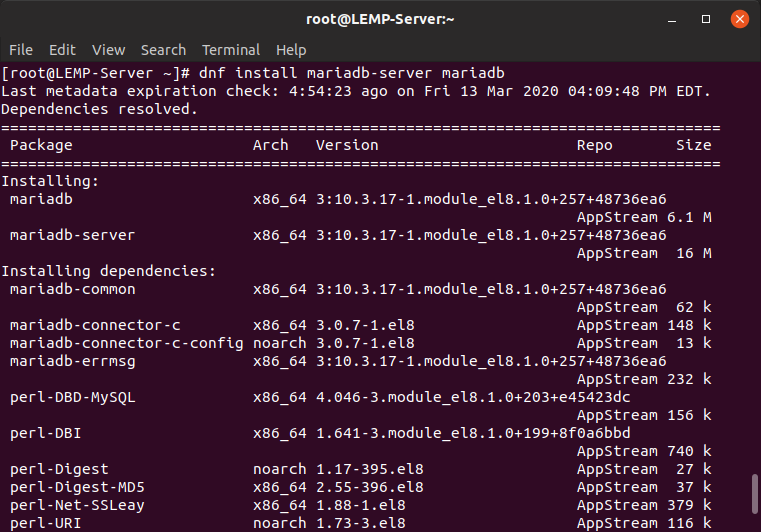
To activate the MariaDB service in the system boot, run the following command.
$ sudo systemctl enable mariadbRun the following command to start the MariaDB server.
$ sudo systemctl start mariadbThen use the following command to check the MariaDB service’s status, which should be in the active (running) mode.
$ sudo systemctl status mariadb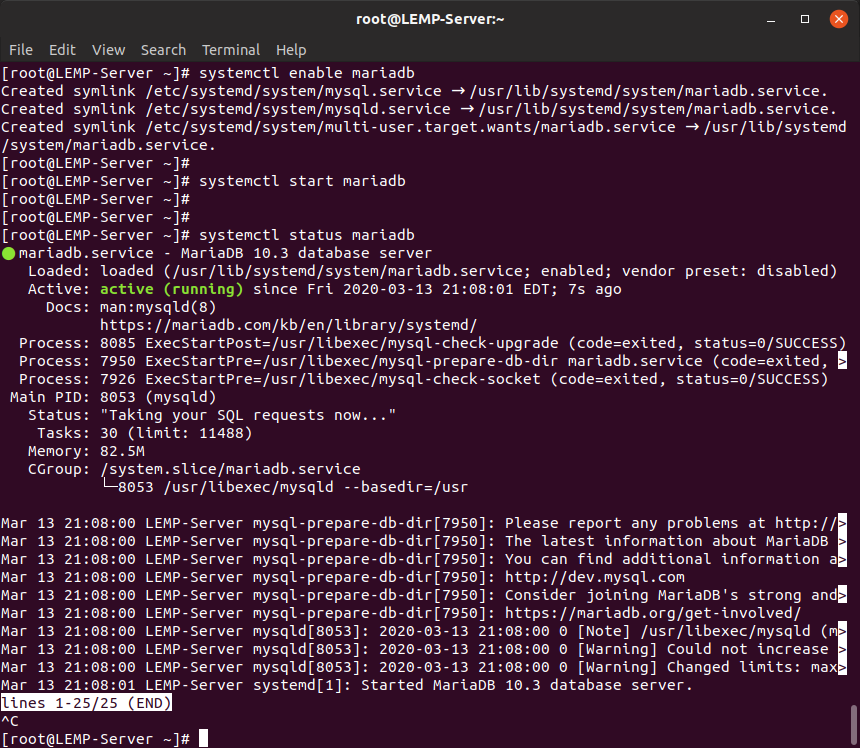
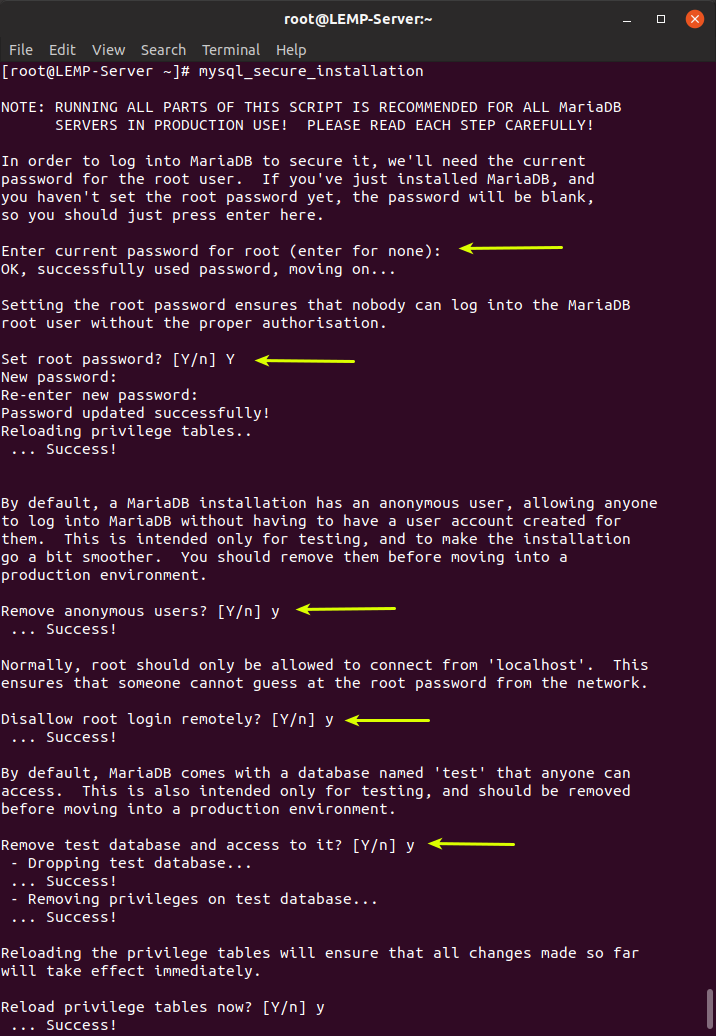
The MariaDB database engine is not secure, and anyone can log in to it without authentication. To secure MariaDB to reduce the chances of unauthorized access, run the following command.
$ sudo mysql_secure_installationAfter executing the command, a series of questions are asked. The first question asks you to define a root password. Press Enter and select Y to select yes to specify the root password.
After defining the root password, answer the remaining questions to delete the anonymous user, delete the test database, and disable root remote access.
As soon as you have completed all the above steps, you can log in to the MariaDB server and check the MariaDB server version information. (To log in to MariaDB, enter the password you created in the database security step)
$ mysql -u root -p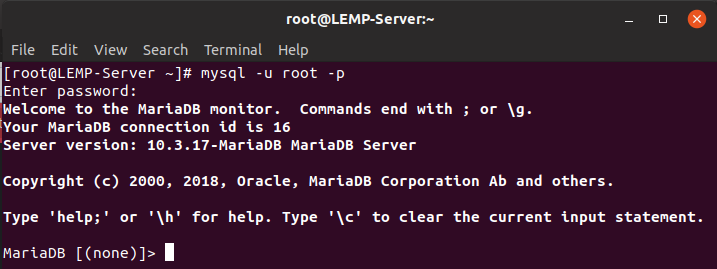
Step4: Installation of PHP 7
Finally, we install the last component of the LEMP server, which is PHP, which is actually a web programming language commonly used for programming dynamic web pages.
Currently, the latest version is PHP 7.4, which we plan to install using the Remi repository. Remi is a free repository that contains the latest versions of advanced software that are not installed by default on CentOS.
First, run the following command to install the EPEL monitor.
$ sudo dnf install https://dl.fedoraproject.org/pub/epel/epel-release-latest-8.noarch.rpmThen continue and install yum-utils and activate the Remi repository using the following command.
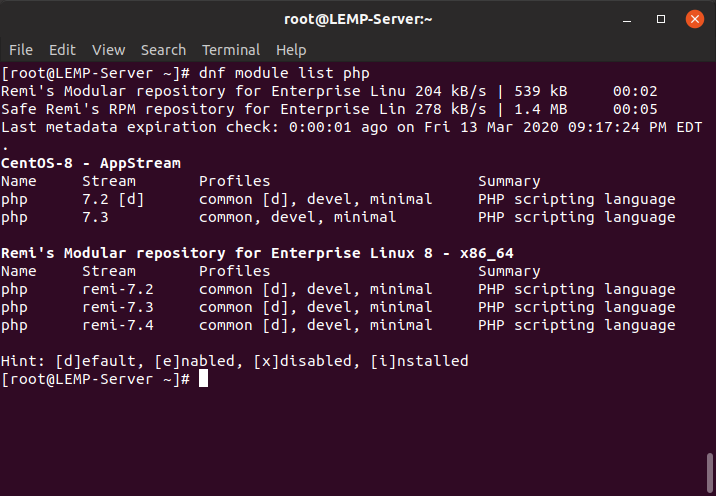
$ sudo dnf install dnf-utils http://rpms.remirepo.net/enterprise/remi-release-8.rpmThen, search for available PHP modules available for installation.
$ sudo dnf module list phpAs you can see below, it shows the output of the command, modules, stream, and PHP installation profiles. From the output below, we can detect the existing PHP version written with a letter d inside the bracket close to the PHP version (PHP 7.2).
From the output, we can also see that the last PHP module is actually PHP 7.4, which we will install, but first, we need to reset the PHP modules. As a result, we execute the following command.
PHP code.
$ sudo dnf module reset phpThen, by running the following command, we activate the PHP 7.4 module.
$ sudo dnf module enable php:remi-7.4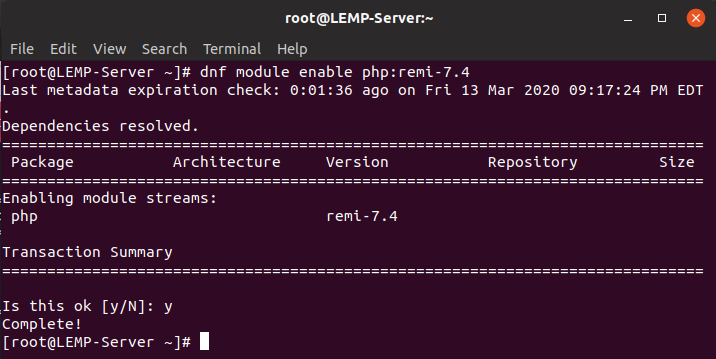
Finally, by activating the PHP 7.4 module, we install the PHP and PHP-FPM packages (FastCGI Process Manager) and the corresponding PHP modules using the following command.
$ sudo dnf install php php-opcache php-gd php-curl php-mysqlndNow, check the installed version.
$ php -v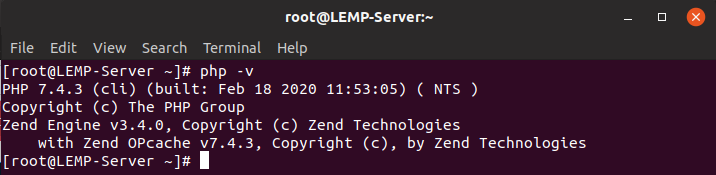
Then launch PHP-fpm and enable it to run during system boot.
$ sudo systemctl enable php-fpm
$ sudo systemctl start php-fpm
Please run the following command to check its status.
$ sudo systemctl status php-fpmAnother case in point is that PHP-FPM is configured by default to run under the Apache user. But since we run it on the Nginx web server, we need to change it to the Nginx user.
As a result, open the “/etc/php-fpm.d/www.conf file.”
$ vi /etc/php-fpm.d/www.confThen find the following two lines in it.
user = apache
group = apache
Now change their value to Nginx.
user = nginx
group = nginx

Save and close the configuration file.
Then restart Nginx and PHP-FPM services to apply the changes.
$ sudo systemctl restart nginx
$ sudo systemctl restart php-fpm
Step 5: PHP Data Testing
By default, the Nginx engine root folder is in / usr / share / Nginx / html /. To test PHP-FPM, we can create a PHP file called info.php and paste the following lines.
<?php
phpinfo();
?>
Save the file and exit.
Open your browser and enter your web server in the IP address bar as shown below.
"http://server-ip-address/info.php"
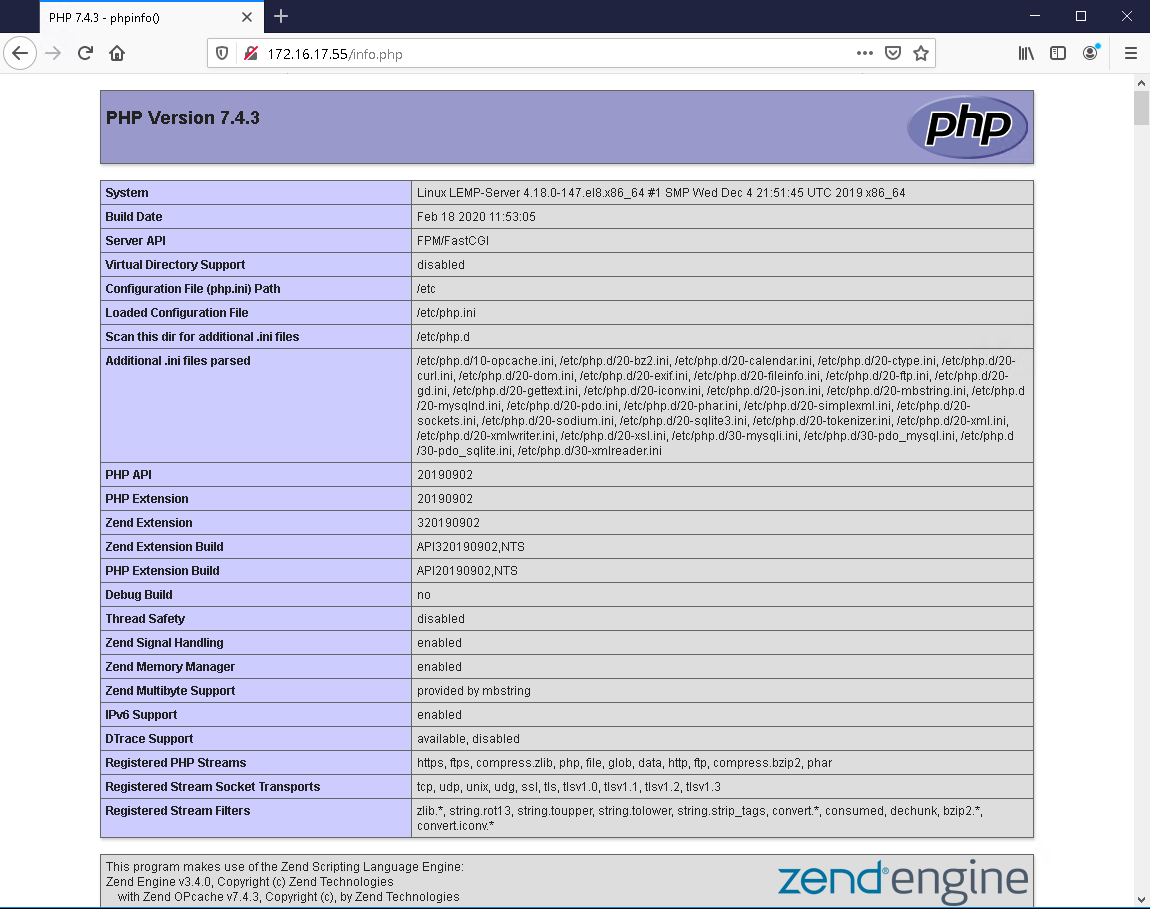
If you did everything right, you should see the running PHP version information and other parameters.
We have now successfully installed LEMP Server on CentOS 8 Linux VPS. It is recommended that you remove the info.php file for security reasons and prevent hackers from accessing your Nginx server information.
Nice post. I learn something new and challenging on websites I StumbleUpon every day. It will always be exciting to read through articles from other writers and practice a little something from other websites.
I read this piece of writing fully on the topic of the resemblance of newest and earlier technologies, it's amazing article.