How To Install WordPress On Ubuntu VPS
WordPress is the most popular content management system (CMS) on the Internet. WordPress allows you to set up flexible blogs and websites in the MySQL database by processing PHP. WordPress has an incredible selection and is a great option to increase site traffic and speed. In this article, we will teach you how to install WordPress on Ubuntu 18 with the Apache webserver on Ubuntu 14.04.
The PHP language runs on both Linux and Windows operating systems. But a higher speed and lower cost Linux operating system is a better option for this language. Since many content management systems, including WordPress, are built-in PHP, the Linux operating system is a good choice for hosting WordPress. Among the Linux distributions, the 3 expression distributions, Debian, Ubuntu, and CentOS, are the best for launching a website or web application, and we will use the Ubuntu distribution in this tutorial.
Requirements
You must prepare the following prerequisites before you install WordPress on Ubuntu 18.
A Linux VPS With Ubuntu 18 OS
You can order a Linux VPS with ubuntu 18 operating system through the below link:
LAMP Installed On The VPS
The LAMP is the brief of Linux, Apache, Mysql, and PHP which is also called a web stack.
You can check how to install LAMP on Ubuntu 18 through the below link.
How To Install Lamp On Ubuntu VPS

Step 1: Create MySQL Database And Username
After preparing the mentioned prerequisites, the first step is to create a database and username for WordPress in MySQL to manage and store website information. To get started, log in to MySQL with this command.
# mysql -u root -pWhen you install this software, you will be prompted for the password you set for your MySQL account. You will then be given a MySQL command character. First, you should create a separate database that WordPress can manage. You can put any name you like on it; Like “WordPress” which is descriptive and simple.
To create a database, enter this command.
MariaDB [(none)]># CREATE DATABASE wordpress;Note: Each MySQL statement must end with a semicolon; So check to avoid any issues while entering the commands.
Next, we want to create a separate MySQL account that runs exclusively on your new database.
You can call the new username as “newuser” and assign the word “@NewPass1” to it as a password. You can choose whatever you like.
Here is the command you need to create the user and connect the user to the database that we created.
MariaDB [(none)]># GRANT ALL ON wordpress.* TO 'newuser'@'localhost' IDENTIFIED BY '@NewPass1';Now we have created the user and it has access to the database account. You must flash the special privileges so that MySQL be aware of recent changes to the special privileges.
MariaDB [(none)]># FLUSH PRIVILEGES;Now everything is set. You can exit MySQL by typing the exit word.
MariaDB [(none)]># exit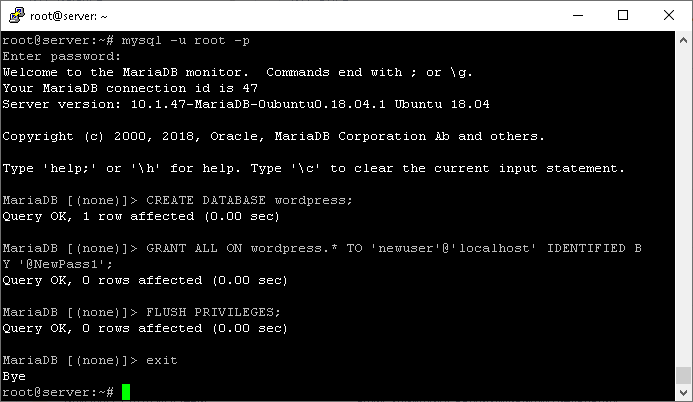
Step 2: Install PHP Extensions
WordPress uses several PHP modules and plugins that we need to install. Use the following command to install them:
# apt install php-curl php-gd php-mbstring php-xml php-xmlrpc php-soap php-intl php-zipStep 3: Download WordPress
Download WordPress files from the WordPress project website. Fortunately, the WordPress team always links to the latest version of their software with the same URL, so you can get the latest version of WordPress by typing the following command.
# cd /tmp
# curl -O https://wordpress.org/latest.tar.gz
This will download a zip file containing the archived WordPress content in the website home directory.
You can decompress files to restore the WordPress folder by typing the following command.
# tar xzvf latest.tar.gzThis will create a folder called WordPress in your site’s home directory.
Create .htaccess File
Use the following command to create the .htaccess file.
# touch /tmp/wordpress/.htaccessWe should also copy the sample configurations file with the main configurations file that apache actually reads.
# cp /tmp/wordpress/wp-config-sample.php /tmp/wordpress/wp-config.phpNow that WordPress is configured, you need to copy it to the Apache documents folder, where it can be shared with our website visitors.
One of the easiest and safest ways to transfer files from one place to another is with the CP command.
The location of the documentation folder in the LAMP in UBUNTU 18.04 is / var / www / html /.
We can transfer our WordPress files by typing this command.
# cp -a /tmp/wordpress/. /var/www/html
Step 4: Enable .htaccess Rewrites And Permissions
Enable .htaccess Overrides
The .htaccess file is an Apache web server configuration file that can control access to the site or how it works. This file can change the default settings of the Apache server. Due to the special features that this tool provides us, it is better to activate it in Apache. Now open the Apache configurations file.
# nano /etc/apache2/sites-available/wordpress.confAnd add the following lines, then save it.
<Directory /var/www/html/>
AllowOverride All
</Directory>
Enable mod_rewrite
The mod_rewrite module manages the URLs requested by the browser and delivers the desired content to the browser. This process is performed entirely on the server-side and the browser does not know the details. The function of this module is completely different from the redirect. In a redirect, only the browser is moved to a different location from the server.
The mod_rewrite module hides the way and source of content and therefore is very effective in increasing the security of the site. This module also increases the efficiency of the website from the point of view of search engines, because it provides users with static URLs. The mod_rewrite module eliminates the variable aspect of URLs and, by static, reduces incompatibility and increases website visibility.
Use the following command to enable mod_rewrite.
# a2enmod rewrite
# systemctl restart apache2
Step 5: WordPress Configuration
Most of the configurations will be done later by a web interface. However, before you start and get this done, you need to do some things using the command line.
Navigate to the /var/www/html path where our WordPress files are inside it.
# cd ~
# cd /var/www/html
Open the configuration file in a text editor.
# nano wp-config.phpThe changes we need to make depend on the parameters that our database information holds.
In order for WordPress to connect properly and authenticate the created database, we need to find the settings for DB_NAME, DB_USER, and DB_PASSWORD.
Fill in the values of these parameters with the information created for the database. It should look like this.
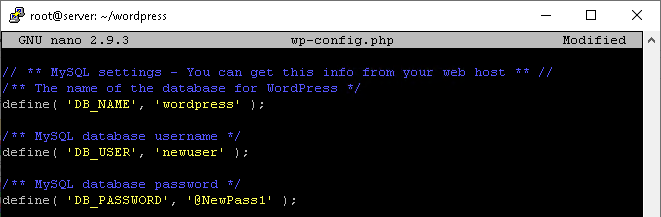
Now, save the configurations file.
Step 6: Updating Permissions On Apache
Apache runs as the www-data user, so we should grant the permissions to the mentioned user, by entering the following command.
# chown -R www-data:www-data /var/www/htmlAnd set the correct permissions on the files and directories of the Wordpres using the following commands.
# find /var/www/html/ -type d -exec chmod 750 {} \;
# find /var/www/html/ -type f -exec chmod 640 {} \;
And remove the index.html file to stop loading instead of our Wordpres 🙂
# rm index.htmlStep 7: Finish The Installation In The Web Interface
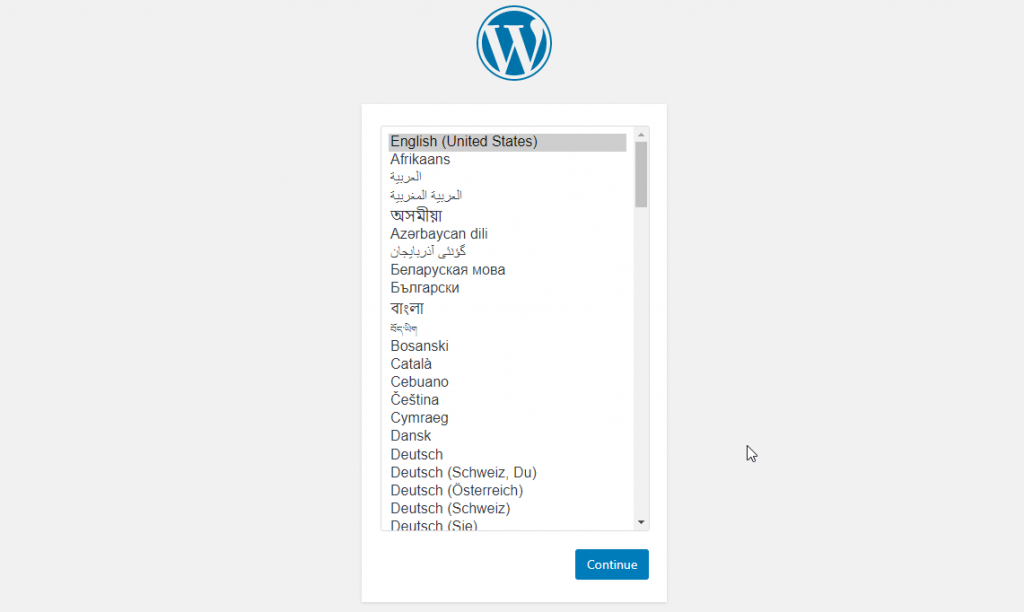
At this stage, the installation of WordPress from inside the server is completed and we continue the installation in the browser. Enter the IP of the server or the domain name that is connected to the server in the browser. The following page will load for you asking you to select the WordPress panel language. Select the desired language and follow the steps.
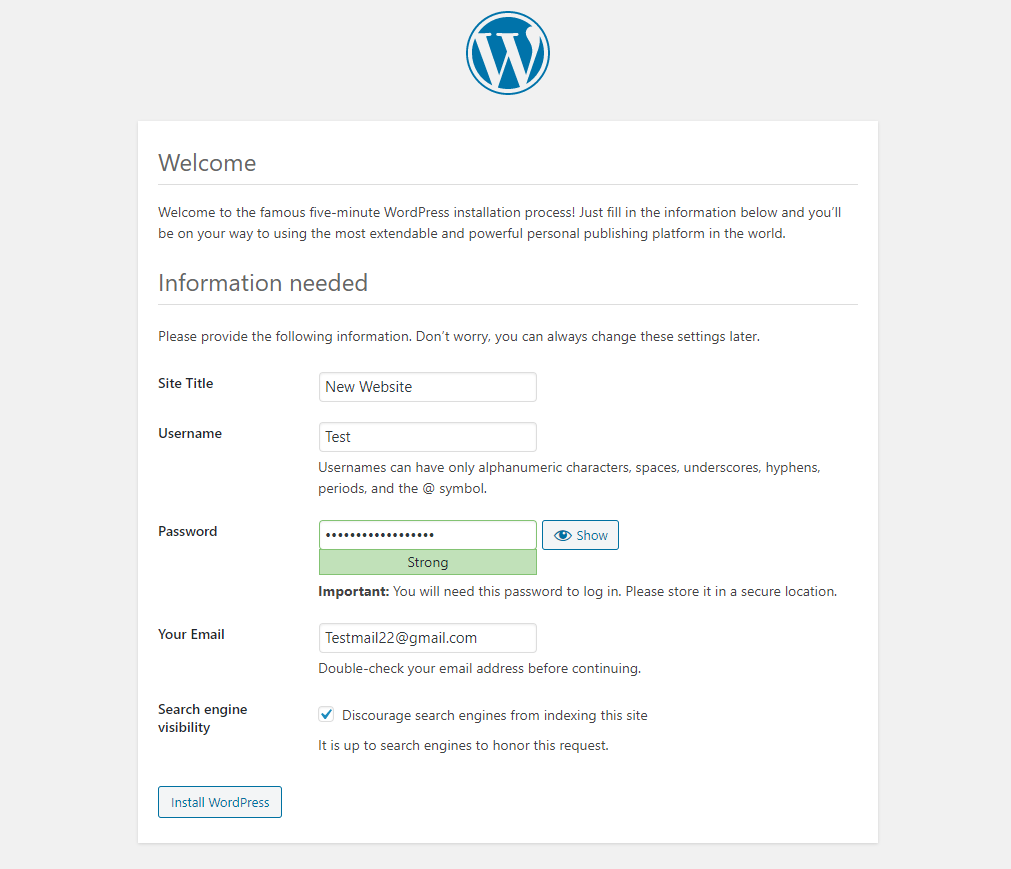
Next, you will be asked to define your website capability, username, password, and email. Also, if you check the Search Engine Optimization option, search engines will block your website. If your website is not ready and you are just launching the website, it is better to select this option and after the complete design of the website, you can disable it from the settings inside the WordPress panel so that your website is indexed by search engines.
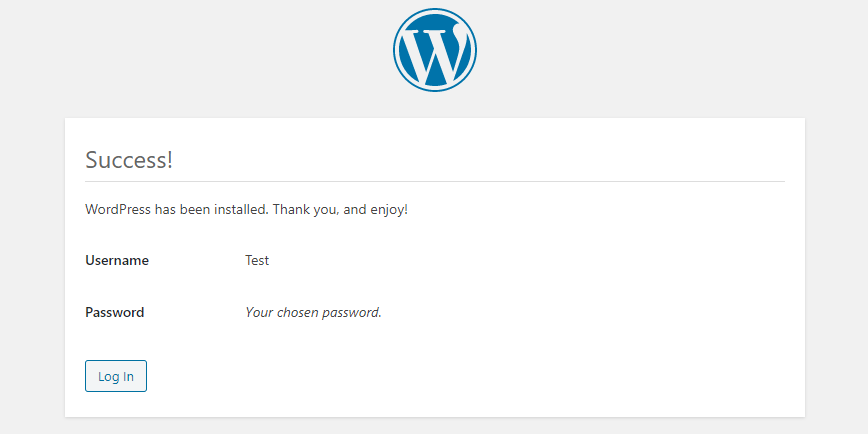
In the next step, you will see a message that the WordPress installation has been completed successfully and you can enter the user panel and enjoy using WordPress. Select the login button and enter the next page.
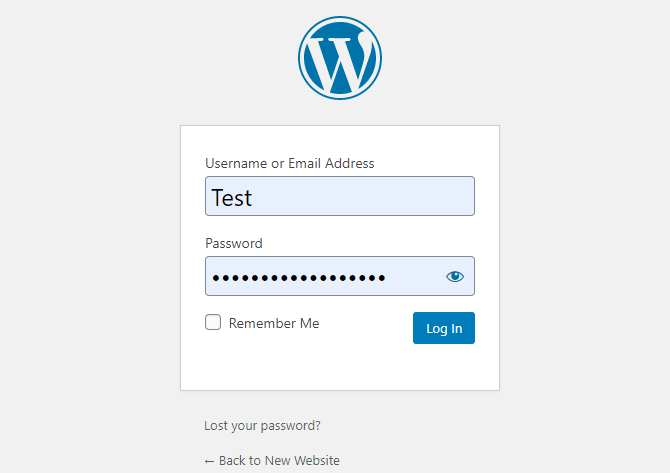
On this page, you will be asked for your username and password that you specified in the previous step so that you can enter the WordPress user area.
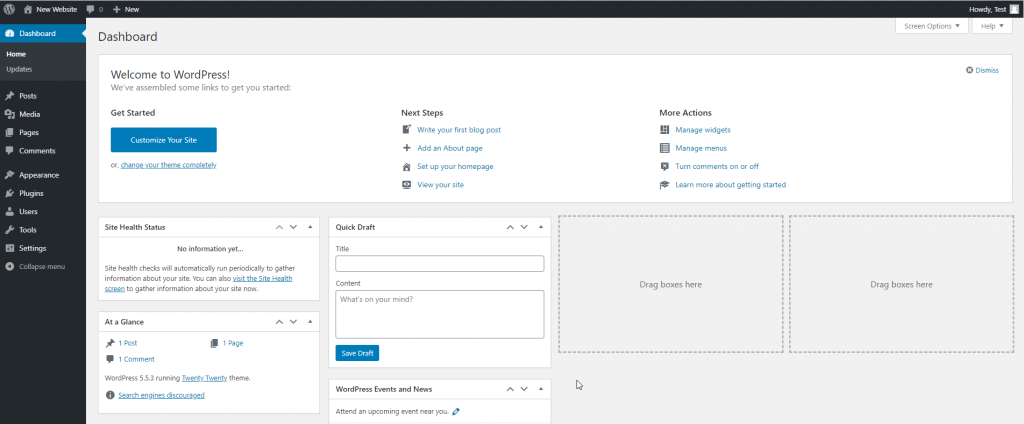
Congratulations, now you have entered the WordPress user panel and you can manage your website from this section.
Summary
As it turned out, we were able to install WordPress on Ubuntu 18 VPS in a few simple steps. Keep in mind that in order to shorten and simplify the installation, we have removed several steps, each of which will be explained in later posts. Steps such as installing SSL and so on.
We hope you find this tutorial useful and enjoy it.
Also, if you have any problem with this installation, you can share it with us in the comments section, and we will be happy to help you find the issue.