Setup OpenVPN on Ubuntu in Simple Steps
Setup OpenVPN on Ubuntu involves using an installation script to create a secure VPN server that encrypts internet traffic with SSL/TLS protocols. The process includes downloading the script, running it with root access, configuring server settings, creating user profiles, and adjusting firewall rules to enable VPN connections.
🤖AI Overview:
To setup OpenVPN on Ubuntu, use an installation script that automates the process of configuring the VPN server and client certificates. The setup establishes a secure VPN by encrypting internet traffic using SSL and TLS protocols. After installation, configure firewall rules to allow OpenVPN traffic and use the generated .ovpn file to connect client devices securely.
Pre-Requirements
- Linux VPS running Debian / Ubuntu (Ubuntu 16.04/ 18.04/ 19.04/ 20.04/ 22.04, Debian 8 or 9)
- Root access
- Static IP
- Log in to the Debian/Ubuntu server through SSH access
- Set CA and server/client certificates on your domain because OpenVPN authentication requires certificates and keys.
Comprehensive guide to configure OpenVPN in Linux
Run the following commands with root privileges:
1. Download script
Download the OpenVPN setup script and make it executable by running the following command and pressing Enter:
wget https://raw.githubusercontent.com/angristan/openvpn-install/master/openvpn-install.sh -O openvpn-ubuntu-install.sh2. Verify script installation
Confirm that the script has been successfully downloaded by receiving the file name in the output of the following command:
lsOutput:
openvpn-ubuntu-install.sh snap3. Install and Configure OpenVPN server
Run the script as root to enable OpenVPN on the Ubuntu/Debian server :
bash [file name]
bash openvpn-ubuntu-install.shNote: To run the script, ensure the TUN module is enabled.
The OpenVPN installation steps on the Ubuntu/Debian server begin with a few questions to set up your VPN server. Follow the assistant’s instructions:
- First, you should verify your server’s IP address by pressing Enter. (IP address: <IP>)
- Answer “No” to the “Do you want to enable IPv6 support (NAT)?” question by typing “n” in the terminal.
- Change the default port (1194) to the custom port you want OpenVPN to listen to (e.g.443, as it is ideal for preventing censorship) by selecting the “Custom” option and typing your port.
- Select your protocol between UDP and TCP. (TCP is recommended for reliability)
- Choose the DNS resolvers you want to use with the VPN. (AdGuard DNS, Cloudflare DNS, and Google DNS are good choices.)
- Answer the question about packet compression depending on your preference. ( we prefer to answer No)
- Answer the question about the customized encryption settings according to your needs. (Since OpenVPN offers the best encryption, you do not need to enable this option if your server sources are not powerful.)
- Press any key from your keyboard to continue the OpenVPN configuration process.
It takes some time to complete the OpenVPN installation and configuration process on the Linux server.
4. Create user
After completing the installation process, you will be asked to specify the client name to add the first user to the OpenVPN configuration:
Client name: <Username>Then, you can set a password for your client or add a passwordless client by choosing the related option, although it is better to set a password for secure access.
To set a password for your client, you should enter a unique and strong password and hit Enter:
Enter PEM pass phrase: <Password>Then verify the password that has been set by retyping it and pressing the Enter key again:
Verifying - Enter PEM pass phrase: <Password>As a result, you have successfully created your first client.
Note: The OpenVPN configuration file has been written to /home/ubuntu/<client name>.ovpn. You need to download the .ovpn file and import it to your client device to connect to the OpenVPN server from the client device.
To create multiple users, rerun the OpenVPN setup script:
bash openvpn-ubuntu-install.shSelect “add new user” to answer the “What do you want to do” question.
Then, specify a new name for a new client and set the password for it by repeating the previous steps.
5. Configure Firewall
Before starting the OpenVPN, the Firewall must be configured to allow OpenVPN traffic. To do this, Open the port on your Firewall via running the following command:
sudo ufw allow 1194/udpIf you use the default OpenVPN port and protocol, run the previous command without any changes. But if you’ve changed the default port and protocol, replace OpenVPN’s port with 1194/udp in the previous command.
After you have finished configuring UFW rules, enable Firewall (If you haven’t already):
sudo ufw enableCongratulations, you have successfully setup OpenVPN on Debian/Ubuntu.
How do I start OpenVPN from command line?
Knowing the path or filename of the .ovpn, run the following commands based on your information to start OpenVPN from the command line:
openvpn --config sample.ovpnOr
openvpn <your_ovpn_file.ovpn>Another option to manually connect to OpenVPN is to right-click on a.ovpn file (OpenVPN configuration file ) and choose the “Start OpenVPN on this configuration file” option from the drop-down menu.
How do I know if OpenVPN is working Ubuntu?
There are several ways to test the OpenVPN service:
1. Run the following command, and if you see “Active: active (running)” in the output, it means OpenVPN is active:
sudo systemctl status openvpnOr
sudo systemctl status openvpn@NAMENote: Replace the name of your actual OpenVPN configuration file without .conf in the previous command.
2. Check your VPN connection list and verify your VPN is connected or active.
3. Go to whatismyip.com website in the browser and verify your IP address change.
Where is the OpenVPN config in Ubuntu?
OpenVPN config file is usually located in /etc/openvpn/*.conf.
OpenVPN configuration filename typically ends with .conf.
How do I run an ovpn file in Linux?
- Via Network Manager:
Navigate to “Add Connection” > “Import a saved VPN configuration” > select your ovpn file.
Note: If your certificates/keys in the ovpn file are not automatically detected, you can manually set them in the Edit VPN window of Network Manager.
Note: To direct all your internet traffic over the VPN without facing challenges and regardless of your .ovpn settings, you can set the “Automatic (VPN) Addresses Only”as IPv4 Settings.
- Via command line:
Run the following command according to the actual path to your .ovpn file:
sudo openvpn /path/to/your/file.ovpnHow to install OpenVPN client in Ubuntu terminal?
To install OpenVPN 3 Client, follow the below steps:
1. Add OpenVPN repository key:
sudo mkdir -p /etc/apt/keyrings && curl -fsSL https://packages.openvpn.net/packages-repo.gpg | sudo tee /etc/apt/keyrings/openvpn.asc2. Detect OS distribution and apply it automatically in command of the next steps:
DISTRO=$(lsb_release -c | awk '{print $2}')3. Add proper repository source:
echo "deb [signed-by=/etc/apt/keyrings/openvpn.asc] https://packages.openvpn.net/openvpn3/debian $DISTRO main" | sudo tee /etc/apt/sources.list.d/openvpn-packages.list4. Update Ubuntu system and install the latest OpenVPN 3 client to start the OpenVPN client on Ubuntu:
sudo apt update && sudo apt install openvpn3How to install OpenVPN GUI in Ubuntu?
To install OpenVPN GUI in Ubuntu, follow the below steps:
1. Install OpenVPN and requirement extensions for Network Manager.
2. Download the OpenVPN configuration file and save it in the Download directory.
3. Right-click the Network Manager icon in the System Tray and choose ” Edit Connections…”
4. Select the “Add” option.
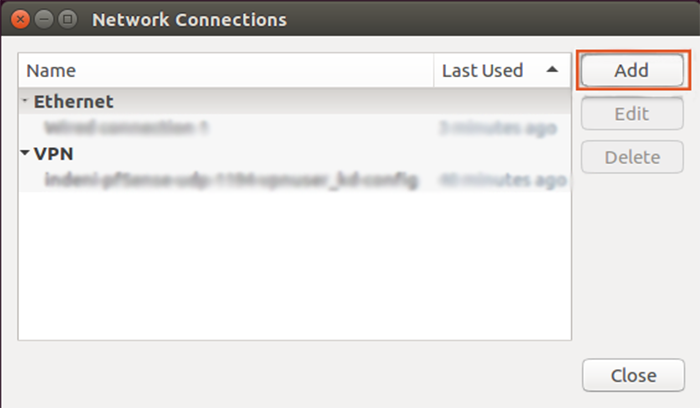
5. Click ” Import a saved VPN configuration…” to import OpenVPN config file.
6. Choose your .ovpn config file from your file system.
7. Enter your Username and Password in related fields.
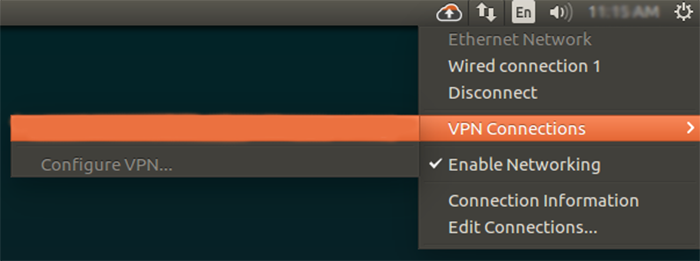
8. After completing setting up OpenVPN for Ubuntu, right-click on Network Manager, and you can select a VPN connection to connect to the OpenVPN server.
How do I import OpenVPN?
After downloading and installing the OpenVPN connect application on your device, go through these step-by-step instructions:
1. Obtain and download your .ovpn configuration file.
2. Launch OpenVPN Application.
3. Click on the “+ ” icon or choose the “Import Profile” option from the menu.
4. Go to the “Upload File” tab and import your .ovpn file by dragging, dropping, or browsing in the download directory.
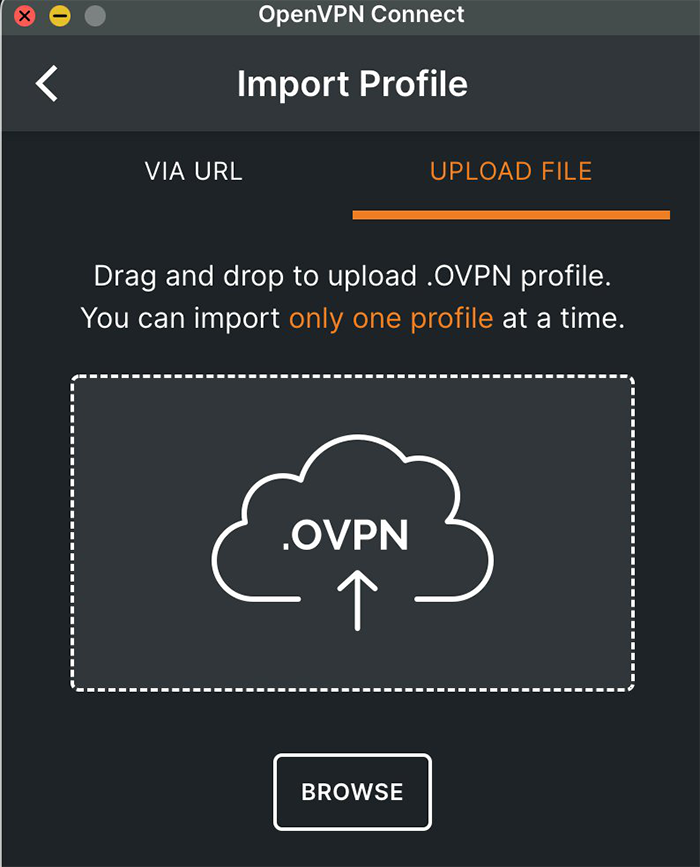
5. The OpenVPN profile should be displayed, and by switching the OpenVPN toggle to on, you can connect to the OpenVPN server.
How to connect to OpenVPN without ovpn file?
You can connect to OpenVPN through the URL:
- Download and Launch the OpenVPN connect app.
- Click “+” icon.
- Select the OpenVPN connect URL and enter your server URL in HTTPS format.
- Enter your user credentials(username and password).
- Select the Import button.
- Select the newly created OpenVPN profile on the VPN list and turn it on to connect to the OpenVPN server.
How do I know if OpenVPN is installed?
To check the OpenVPN connection status, navigate Status and choose OpenVPN. That screen displays your VPN connection status, connected, disconnected, reconnected, etc., indicating that OpenVPN is installed.
Also, you can run the following command to check if OpenVPN is installed:
sudo openvpn --versionIf this command displays OpenVPN version information, you can ensure that OpenVPN is installed.
Why can’t I connect to OpenVPN?
The main reasons for this issue are: 1. Not setting up Access Server on a proper DNS name, 2. Neglect to open the necessary ports (3 ports such as TCP 443, TCP 943, and UDP 1194 by default) to connect to the OpenVPN server.
Therefore, the first method to fix this problem is to configure a suitable DNS name for the access server, delete the OpenVPN Connect Client program, and reinstall it.
In addition, you can try other ways, including validating credentials, verifying OpenVPN configuration, checking the accuracy of the server address, port, etc., and checking firewall settings for OpenVPN port, updating clients, and confirming server availability.
Uninstall OpenVPN Ubuntu
To uninstall the OpenVPN and remove all its essential files and dependencies on Ubuntu, run the following command:
sudo apt purge openvpnNote: Before removing OpenVPN files and configuration, you must ensure there are no active connections by running the sudo systemctl stop openvpn command.
Conclusion
Setting up OpenVPN on Ubuntu provides you with a powerful and secure way to protect your internet traffic and access your network remotely. While the process may seem complex at first, following these step-by-step instructions makes it manageable even for beginners.
Remember to keep your system updated, use strong certificates, and configure your firewall carefully for the best security and performance. This setup gives you full control over your VPN server, which is excellent for privacy-conscious users and anyone who needs secure remote connections.
By completing this guide, you have learned how to install OpenVPN, create essential security certificates, configure server and clients, adjust network forwarding, and troubleshoot common problems.
You can now confidently secure your online activities and remotely access resources with peace of mind by using OpenVPN on Ubuntu.
FAQ
2. How do I install and configure OpenVPN on Ubuntu using a script?
Download the OpenVPN setup script using "wget", make it executable, then run the script as root. The interactive script will guide you through setting the IP, port, protocol, DNS, and encryption options to complete the OpenVPN server setup.
3. How can I create new users for OpenVPN on Ubuntu?
After setting up OpenVPN, rerun the setup script and choose the option to add new users. Specify the client name and set a strong password to create additional clients for secure VPN access.
4. How do I configure the firewall for OpenVPN on Ubuntu?
Open the firewall port that OpenVPN listens to using "sudo ufw allow" with your chosen port and protocol. Then enable the firewall with "sudo ufw enable" to allow OpenVPN traffic.
5. How do I start OpenVPN from the Ubuntu command line?
Run "openvpn --config" followed by your .ovpn configuration file path to start OpenVPN from the terminal.
6. How can I check if OpenVPN is running correctly on Ubuntu?
Check the OpenVPN service status with "sudo systemctl status OpenVPN". You can also verify your IP address through an external website to confirm the VPN is active.
7. Where is the OpenVPN configuration file located on Ubuntu?
OpenVPN config files are usually stored in "/etc/openvpn" with a ".conf" extension.
8. How do I connect to OpenVPN on Ubuntu without using an ovpn file?
Use the OpenVPN Connect application and enter your server URL in HTTPS format along with your credentials to connect without needing an ovpn file.
9. What are common issues that prevent successful connection to OpenVPN on Ubuntu?
Common issues include improper DNS name setup, firewall blocking necessary ports (TCP 443, TCP 943, UDP 1194), incorrect credentials, or misconfigured OpenVPN settings.
10. How do I uninstall OpenVPN on Ubuntu?
Stop any active OpenVPN connections with "sudo systemctl stop OpenVPN", then remove OpenVPN and its dependencies using "sudo apt purge OpenVPN".