Install Xrdp On Ubuntu 20
Xrdp is a service you can install on your Ubuntu and connect to it through remote desktop connections. The steps that we will pass in this article to install Xrdp on Ubuntu 20 are updating the server, installing the graphical interface, installing Xrdp, and setting some configurations.
Steps Of Installing Xrdp On Ubuntu 20
- Update Ubuntu Server
- Install Graphical Interface
- Install Xrdp
- Connect To Xrdp
1. Update Ubuntu 20
The first step to install Xrdp is to update the repositories to ensure we have the Xrdp package on our server. Xrdp is available by default on ubuntu repositories. Also, updating will update the versions of packages besides adding them to our server.
Use the following command to update Ubuntu 20 Server:
# apt-get update -y2. Install Xfce Graphical Interface
The second step is to install a graphical interface on your server. When you buy Linux VPS or Linux dedicated server, there is probably no graphical interface installed. But if you want to connect to Ubuntu 20 using RDP, you have to have a graphical interface.
There are many famous desktop interfaces for Linux like KDE, Gnome, Cinnamon, Xfce, etc. This is up to you to choose any of them but consider that RDP is optimized for Windows, not Linux. So it is better to choose the best option for this purpose.
In this article, we will install the Xfce desktop environment because it is light, fast, and user-friendly. By installing the Xfce desktop on your Linux server, you can be sure that you will not face slowness in your connection. Of course, keep in mind that the connection speed depends on many things.
You can use the following command to install Xfce on ubuntu 20:
# apt install xubuntu-desktop3. Install Xrdp On Ubuntu 20
Now that we have the desktop environment, we have to install Xrdp to connect to our desktop environment.
Use the following command to install Xrdp:
# apt install xrdpNote: Ubuntu has a display manager by the name Lightdm by default installed. In some versions, another display manager is installed, too, which is Gdm3. If both of them are installed on your Ubuntu server, you will be asked to choose one. If you faced this, choose lightdm.
Check Xrdp status
It is better to be sure that Xrdp is running or not after installing. To check this, run the following command.
# systemctl status XrdpIf you see the following message, it is all OK, and we can proceed to the next step.
xrdp.service - xrdp daemon
Loaded: loaded (/lib/systemd/system/xrdp.service; enabled; vendor preset: >
Active: active (running) since Mon 2021-08-02 07:25:49 EDT; 22h ago
Add Xrdp User To SSL-Cert Group
Xrdp uses “/etc/ssl/private/ssl-cert-snakeoil.key” file and only the users of the “ssl-cert” group can read it. So use the following command to add the Xrdp user to this group.
# adduser xrdp ssl-certRestart the Xrdp to handle the modifications using the following command:
# systemctl restart xrdpChange Xrdp Configuration (Optional)
The “/etc/xrdp” is the path which is included Xrdp configurations files. You don’t need to change anything in the Xrdp configuration unless if you face any issue or if you want to have modifications like changing the graphical environment.
Firewall Configuration
If you have an active firewall on your ubuntu server, which is good to have, you should allow Xrdp in it. The default port for Xrdp is 3389, which is the same port for Windows.
You can check the UFW firewall status using the following command.
# ufw statusIf it is not active, you can enable it using the following command:
# ufw enableIt is better to allow the connection to Xrdp from your own static IP or to allow it from a range of IPs because of security reasons. There are some examples.
Allow a specific IP:
# ufw allow from 149.255.38.47 to any port 3389Allow a range of IP:
# ufw allow from 149.255.38.0/24 to any port 3389Allow from anywhere:
# ufw allow 33894. Connect To Ubuntu Server Using Xrdp
To do this, you should use the remote desktop connection application, which is installed by default on all Windows systems. Search and find it in the Windows search bar, or you can open it using the following command in Run windows. To open it like this, press Windows Key + R simultaneously and type mstss, then press OK.
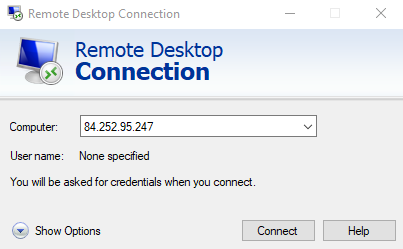
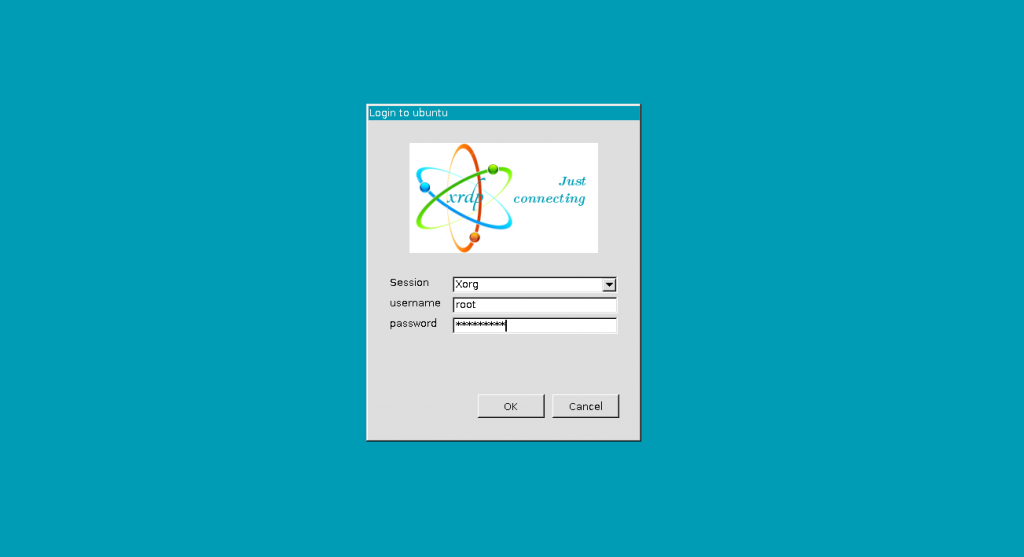
Once it is opened, enter the IP of your Linux server. Keep the session to be as Xorg and put the username and password of your server.
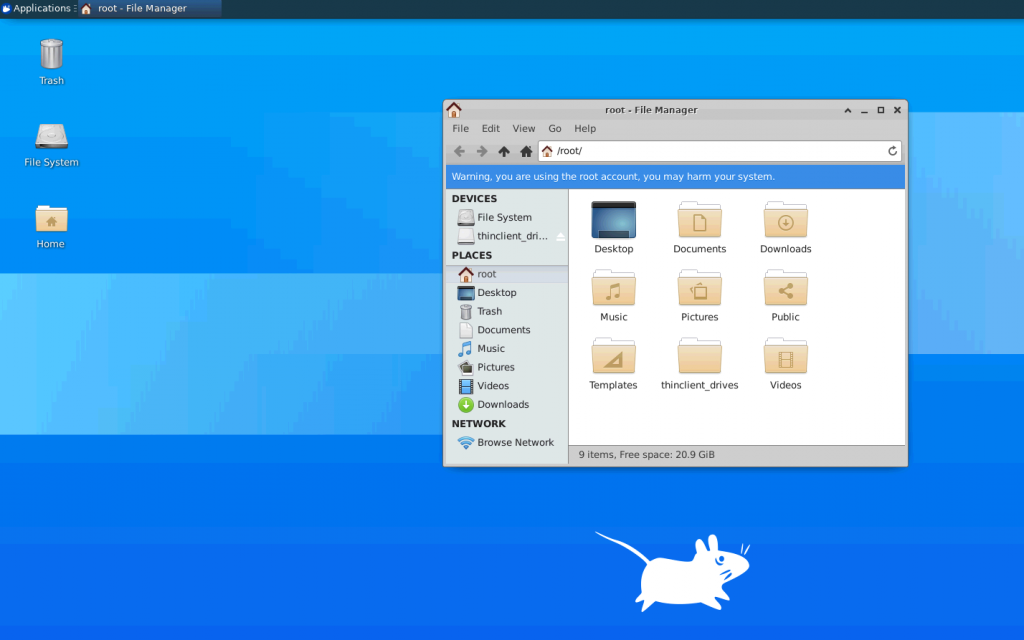
Finally, You will have the following interface.
Troubleshooting
You may face issues and errors when connecting to Xrdp. For example, at first, a time when I connected to Xrdp, after putting login details, I was disconnecting immediately. In the troubleshooting section, we will put any issue and solution that maybe anyone tells in the comments section.
Issue 1: I disconnect immediately after Connecting to Xrdp.
Solution: This is a common issue that many faces after installing Xrdp. To resolve it, stop the Xrdp service using the following command:
# service xrdp stopOpen the Xrdp start script file using the following command:
# nano /etc/xrdp/startwm.shComment the following line
test -x /etc/X11/Xsession && exec /etc/X11/Xsession
exec /bin/sh /etc/X11/Xsession
Note: You can ignore a line from being processed in Linux by putting the # label in the first of the line.
And add the following line to the same file and then save the file.
startxfce4Now you can start the Xrdp service using the following command:
# service xrdp startSummary
In this article, we checked how to install Xrdp on Ubuntu 20. To get the best performance, it is better to install a lightweight desktop like Xfce. Also, be sure to activate the firewall to be safe from being hacked.
I hope you enjoy this article and find it useful. Or, if you face any issue, let us know in the comments section. By doing this, we can complete the troubleshooting section to cover all of the issues.
Hi Dave, thanks for reporting the error that you face. It seems maybe you are entering the username/password incorrectly. Or if you are using Ubuntu 18, you should install new Xorg packages using this command:
apt-get install xorgxrdp-hwe-18.04That didn't fix it. I'm seeing the same error in Ubuntu 20.04. There must be some way to get Xrdp to use lightdm as the display manager but I haven't found it yet.
Dear Kris, first install the lightdm display manager using this command:
apt install lightdmthen use this command to find the default display manager in your Ubuntu 20 servers:cat /etc/X11/default-display-managerif the default display manager is lightdm, you should get this response:/usr/sbin/lightdmif it is anything else, you can change it to lighdm using this command:dpkg-reconfigure lightdm