Visual Tutorial to Mikrotik DNS Server Configuration
Except for IT professionals, the relationship between IP addresses and host names may be incomprehensible to many users, and even many users are not yet thoroughly familiar with the DNS service. It is entirely expected that not everyone is familiar with the function of DNS service, but after reading the article on the definition of a DNS server and how to use a DNS server and this educational article, we expect you to be familiar with the function of DNS.
Generally, in networks that do not have a separate DNS server and Mikrotik is also known as Gateway, the DNS service is the responsibility of Mikrotik. Since today many users use Mikrotik VPS because of its speed and extraordinary performance and providing different facilities for different purposes, configuring the DNS service in Mikrotik is one of the other goals to improve network performance for users; because you can change the nature of your server to DNS Server by configuring DNS in Mikrotik and benefit from Mikrotik VPS to translate IP addresses to domains or vice versa. This article will discuss configuring the DNS server in Mikrotik to get the best out of Mikrotik VPS.
What is a DNS service?
DNS service, which stands for Domain Name System, is a service in the network world that converts IP addresses to names and vice versa. In the networked world, computers need an IP address (a multi-digit number) to connect to each other on the Internet to be accessible and identifiable. The systems do not know the names; they have a mechanism to communicate with the IP addresses. DNS is an interface between humans and computers that helps users achieve their requests.
By receiving the domain name from the browser, DNS converts it into an IP address and presents it to the browser to direct users to achieve their needs, thereby eliminating the need for users to remember IP addresses with long and complex numbers. When DNS receives a domain name, it refers to a list of names with their numbers, just like a phone book, and finds the number corresponding to the name requested by the user in the browser and presents it to the browser; So it allows browsers to Access various websites and other internet resources by communicating with the web server.
Advantages of DNS server
- Facilitating access to websites
- Increased security in search operation infrastructure
- Ability to Search by domain name instead of using long IP addresses
- Increasing server security
- Quick update of IP addresses
- Ability to make online transactions
- Providing dynamic and secure updates
- Reliability and stability of DNS servers
- Correctly directing users to their requests
- Ability to identify database technical performance, data communication, data structure specifications, and data service performance
What is the reason for configuring DNS Server in Mikrotik?
The DNS server supported by the ISP becomes weaker and slower as the volume of requests increases. In addition, to respond to requests sent through the WAN connection, you will need to purchase bandwidth and Spend money. Configuring DNS in Mikrotik and converting the Mikrotik router to DNS Server will help you get better performance and save bandwidth costs.
Also, configuring the DNS server in Mikrotik, in addition to responding faster to clients’ requests, give you the ability to cache DNS server information.
How to configure DNS in Mikrotik using Terminal
Setting up and configuring DNS on a Mikrotik router is very easy. Just follow the steps that we will teach next.
Since the command line method is the easiest way to configure the DNS server in Mikrotik, at first, we preferred to teach you how to configure DNS on the Mikrotik router in the command line, but if you are interested in using the graphical interface, we will teach you how to configure the DNS server through Winbox in next step.
1. First, connect to your Mikrotik VPS.
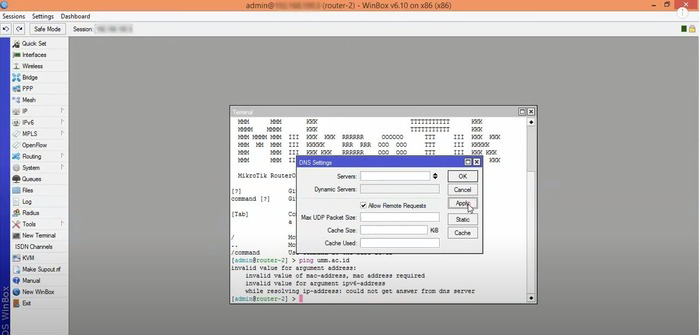
2. To configure the DNS server in Mikrotik, enter the following command in the Mikrotik server terminal:
ip dns set servers=8.8.8.8,8.8.4.4 allow-remote-requests=yes max-udp-packet-size=4096 query-server-timeout=2.000 query-total-timeout=10.000 cache-size=2048 cache-max-ttl=7dYou can easily configure the Mikrotik DNS server and MikroTik Caching DNS by executing the previous command. Also, The MikroTik server IP will be used instead of the DNS IP for your network clients.
How to configure DNS in Mikrotik through Winbox
Before you start configuring DNS in Mikrotik, install the useful Winbox tool on Mikrotik VPS. Since Winbox facilitates the management of MikroTik RouterOS with its features; many users are interested in configuring DNS through the graphical interface of the Winbox tool in Mikrotik; We have already talked about the Winbox tool and how to use it, for more information, you can read our articles.
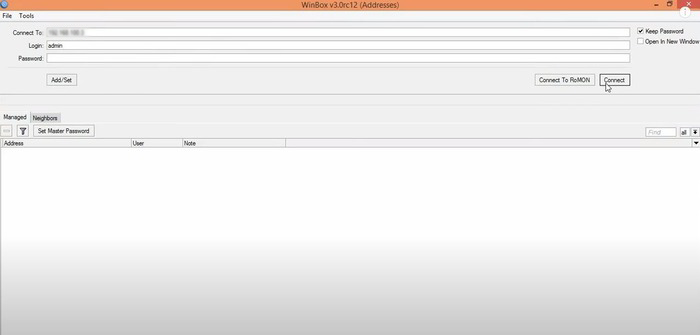
1. Enter Winbox software and connect to Mikrotik.
2. After entering the main dashboard of the Mikrotik router, select the IP > DNS sections to access the DNS settings window.
3. In this step, you need to complete the DNS settings fields. Follow our guide to set DNS correctly in Mikrotik:
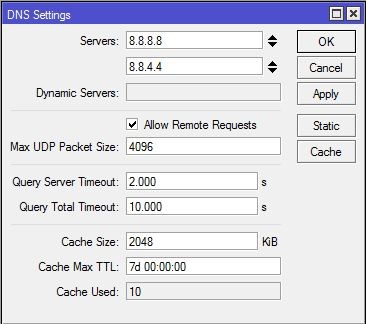
- Server: type the public DNS IP address that belongs to Google (8.8.8.8 and 8.8.4.4) or the IP address of your network’s DNS server.
- Dynamic Server: If you use a dynamic server for your DNS, fill in this section; otherwise, skip this section.
- Allow Remote Request: Make sure to check this option because you will allow the Mikrotik server to be used as a DNS server. Also, checking this section will activate the Cache feature for the Mikrotik server.
- Max UDP Packet Size: It is set to determine the maximum UDP packet size.
- Query Server Timeout: to set the waiting time in seconds for the DNS server to respond.
- Cache Size: You will fill this section to set the size of the Cache space and cache of DNS records.
- Cache max TTL: This section is used to set the time that should be allocated to caching the query before a new request.
- Cache Used: This section is in the settings to set the amount of cache used by the Mikrotik router.
4. Finally, after filling in the DNS settings fields, click Apply and then Ok to apply the changes. You have successfully configured the DNS server in Mikrotik through Winbox graphical interface.
Setting MikroTik Cache DNS to save Static DNS Entry
By receiving a new entry, the MikroTik cache DNS server dynamically stores the corresponding domain name and IP address, but what should we do if we want the domain name and IP address to be stored statically in the DNS cache? That is, how can we store local server entries in DNS Cache? Follow the steps below to configure MikroTik DNS Server to store static host entries.
1. In the main dashboard of the Mikrotik router in Winbox, select the IP>DNS sections.
2. Enter the DNS settings and select the Static DNS option.
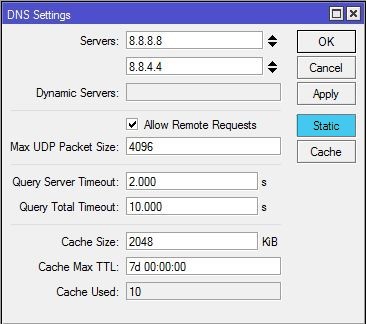
3. Click the PLUS SIGN (+) to access the new DNS Static Entry settings.
4. In the Name input field, enter your domain name or the desired domain; in the Address input field, enter the IP address of your host.
5. Enter static input.
6. Check that the TTL value is set to 1.
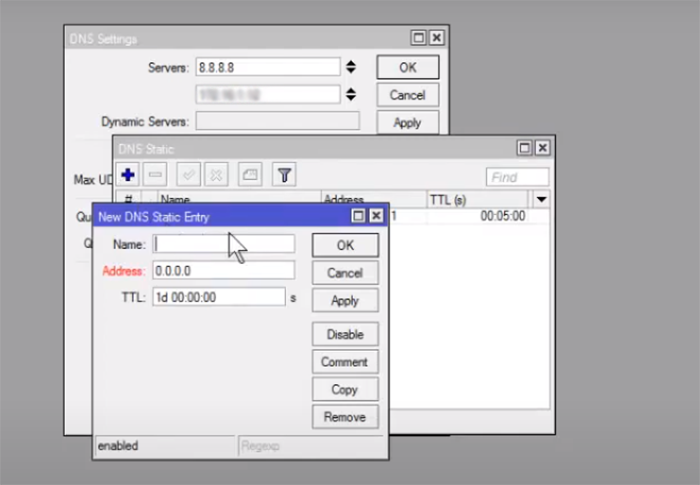
7. Finally, click the Apply and Ok buttons to save your entries in the static DNS list.
FAQ
How can we flush the DNS cache?
By referring to the IP>DNS>Cache section in the main dashboard of the Mikrotik router in the Winbox tool, check the DNS Cache and clear the DNS Cache by selecting the Flush Cache option.
How can we block DNS requests from the WAN interface?
- Select the IP option from the firewall menu and click on (+).
- Go to the general tab and select input from the Chain drop-down menu.
- From the protocol menu, select UDP, and in the "Dst. Port input" box, put the value 53.
- From the" In. Interface" sub-menu, select the desired WAN Interface.
- Go to the Action tab, and select the Drop option.
- Click on Apply and Ok options.
- By selecting (+) again, select the Input option from the Chain menu
- Select TCP from the Protocol tab menu and Set the "Dst. Port input "box to 53.
- Go to the" In. Interface "tab and click WAN Interface.
- Click on Apply and Ok.
Conclusion
Using the Mikrotik server as a DNS server is a smart move because by using its wonderful features, in addition to providing security and fast and optimal performance in responding to users’ requests, it bypasses any restrictions, and this is exactly what users need it. In this tutorial, we guided you on configuring the DNS server in Mikrotik using Terminal and Winbox and introduced you briefly to the DNS server and its features. If you have any questions about the DNS server configuration in Mikrotik, share them with us in the comments section so we can guide you as soon as possible.
Thank you for reading this article to the end.
In your instructions to block access from WAN, I believe you are missing the Drop action for TCP: * From the" In. Interface" sub-menu, select the desired WAN Interface. * Go to the Action tab, and select the Drop option. <-- Missing this line * Click on Apply and Ok options.