How to Enable SSH to Connect to a Remote Server in Linux
SSH is a safe and powerful tool that secures interactions between a server and a client.
To improve the security of a remote client-to-server connection, you must enable SSH to connect to a Remote Server.
The below steps help you achieve this purpose:
- Install OpenSSH Server
- Start and Enable SSH Service (Configure SSH)
- Check SSH Status
- Configure Firewalld
Prerequisites to Install and Enable SSH on Linux
To let this tutorial work correctly, provide the options below and move on.
- A Server running Linux VPS.
- A non-root user with
sudoprivileges. - Having the necessary privileges to communicate with the remote machine.
- Ensuring that the apt-get tool is loaded in your operating system (the Ubuntu operating system usually has this tool.)
- Access to the command line.
How to Install and Configure SSH on Ubuntu/Debian
Check if the SSH server is already started on your system using the SSH command:
ssh localhostBy receiving the “Connection Refused” message, you will be sure that the SSH server is not installed on your system.
Usually, you cannot use the default SSH protocol to connect to the Ubuntu or Debian server that you set up for the first time.
So, you must enable SSH on your server.
Step 1: Update your system and Install OpenSSH
Since you can find the OpenSSH-server package in the Ubuntu/Debian repository, it is better to:
Update the package repository cache and install the OpenSSH-server package by running the following commands:
sudo apt update

sudo apt install openssh-server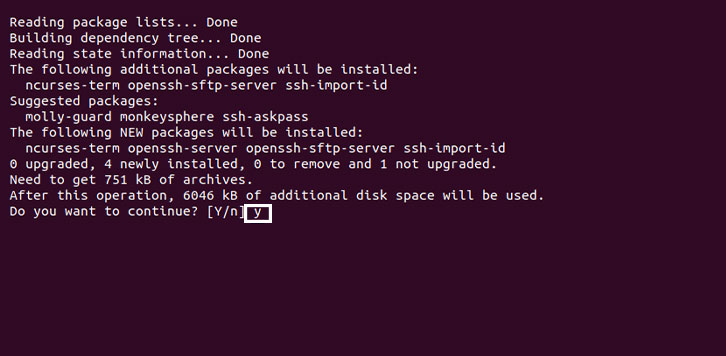
You may be asked to enter your password to authorize the installation process and press Y to confirm.
Step 2: Check SSH status
After you have successfully installed the SSH server, you can enter the following command to ensure that SSH is installed and running:
sudo systemctl status sshOutput
-
ssh.service - OpenBSD Secure Shell server

Loaded: loaded (/lib/systemd/system/ssh.service; enabled; vendor preset: enabled)

Active: active (running) since Sun 2022-06-01 10:40:00 CEST; 9h ago

...
Viewing Active: active (running) indicates that SSH is active and running on the remote system.
You can return to the command line by pressing the “q” button.
Connect to a Remote Server via SSH
After enabling SSH on Ubuntu/Debian, you can now connect to the remote system via SSH.
Execute the SSH command and the IP address and username as follows:
ssh username@ip_addressOr
ssh username@public_IP –p22
Note: Replace the IP address and username of your system on which we activated SSH instead of your IP address and username.
You can identify your IP address with the help of the following command:
ip aIn the output you will receive, you will see the public IP address of the device on which SSH is installed.
After you have identified the IP Address and the necessary information, you can connect to your remote server and manage it from your workstation securely.
When you connect to the remote server by executing the SSH command, you will receive a message that you must type yes to continue the process and enter the password if asked.
Connecting SSH server behind NAT
To connect to your home Ubuntu/Debian system via the Internet, you need to know your public IP address and apply the necessary settings on the router to receive data on port 22 and send it to your system running SSH.
To access the public IP address of the system you want to connect to via SSH, obtain the public IP address of the remote system from the system administrator or hosting provider.
If you are connecting to your system, you can find the public IP address by searching for “What is my IP” or by typing whatismyip.com or whatsmyip.org in your browser.
Since the method of setting up port forwarding is different in each router, you must refer to your router’s documentation to set up port forwarding.
In general, you should use the private IP address of the system that runs SSH, which you saw through the ip a command, and the port number where the requests are made, which is usually 22 by default for SSH.
After making the necessary configurations on the router and finding the IP address, run the following command to connect:
ssh username@public_ip_addressConfigure the router in such a way that when SSH traffic is received on a non-standard port, it will be forwarded to port 22 on the system where SSH is enabled.
Configuring SSH key-based authentication is another secure way to connect to your system.
Required SSH Configurations
After installing and running OpenSSH in Ubuntu/Debian, you can configure various things in SSH.
One of the useful changes to improve security can be changing the default port and disabling the Root user.
- Firewall configuration
If the firewall is active on the Ubuntu/Debian system, you need to open the SSH port.
There is a UFW firewall configuration tool, that we will use to open the SSH port:
sudo ufw allow sshChanging the default port number is one of the common security methods because everyone is aware of the default ports.
Follow the command format below to change the default port and configure the firewall to allow traffic on the specified port:
Taking port 2222 as an example, the firewall will be configured as follows.
sudo ufw allow from any to any port 2222 proto tcpIn some firewalls, it is necessary to do the configuration to allow the traffic to the public IP address of the system on which SSH is active.
Note: The above command is for situations where you want to change the default port and specify your own defined port.
If you use the default port 22, you do not need to specify a port number.
As a result, you will now be allowed to connect to your system from the remote system through the SSH protocol.
On Linux and macOS systems, SSH clients are installed by default. In Windows systems, use an SSH client such as PuTTY to connect.
- Change in SSH configuration file
You can make changes in the configuration file after enabling SSH in the Ubuntu/Debian system.
To edit the SSH configuration file, open the file by running the nano command:
sudo nano /etc/ssh/sshd_configIf you want to change the default port number of TPC for listening, find the line containing the default port number in the output of the above command and change it to the desired port number.
- Deactivation of Root
To improve security, it is useful to disable remote root access.
To do this, in the configuration file, make an edit in the line that includes the phrase” PermitRootLogin_yes” and replace the phrase “PermitRootLogin_no” instead of the phrase PermitRootLogin_yes.
After you have made the required change, restart the SSH service via the following command to make sure the changes take effect:
sudo systemctl restart sshd.serviceDisable SSH service in Ubuntu/Debian
To temporarily disable the SSH service in Ubuntu/Debian, simply stop the SSH service by running the following command:
sudo service ssh stopUse the following command to start the SSH service:
sudo service ssh startIf you don’t need SSH service at all, and you want to disable SSH service in Ubuntu/Debian completely, run the following command after reboot:
sudo systemctl disable sshTo activate the SSH service in Ubuntu/Debian, reboot the system and then enter the following command:
sudo systemctl enable sshHow to Install and Configure SSH on CentOS/RHEL
OpenSSH is available on CentOS and RHEL systems. Before getting started, you are recommended to refresh your package index using the following command:
sudo dnf check-updateNow, you can install OpenSSH server packages and OpenSSH clients on CentOS/RHEL. So, type:
sudo dnf install openssh-server openssh-clients -yRun the following command to start the sshd service and enable it to start automatically at system boot up after the OpenSSH installation is finished.
sudo systemctl enable --now sshdTo verify the sshd service status, run:
sudo systemctl status sshdOnce you view The sshd service is active (running) in your output, this part is all done.
Configure SSH Server in CentOS/RHEL
The primary configuration file for SSH is called sshd_config, and it may be found in the /etc/ssh directory by default.
This configuration is advised for security purposes to strengthen server security and reduce brute-force attacks on your server.
Now, use vi editor or your favorite editor to open the file sshd_config.
sudo vi /etc/ssh/sshd_configThe lines that begin with # blank lines are treated as comments before you begin altering the file.
Change the default SSH port 22 to the port of your choice at the top of the line. The non-standard port 2028 for SSH is used in this tutorial.
Port 2028Next, select PermitRootLogin no instead of PermitRootLogin yes. This will prevent the root user from logging in over SSH.
You have the option to start the PermitRootLogin line with #.
PermitRootLogin noWhen you are finished, save and close the file. Once the changes have been made, check the SSH configuration and restart the sshd service.
sshd -t
sudo systemctl restart sshd
Use the command below to connect to your SSH server:
ssh username@SERVER-IP -p PORTYou can set the port of your SSH server with the -p option.
Install and Configure Firewalld
You might need to activate the firewall if you are utilizing a CentOS/RHEL server that is connected to the public internet, like a cloud server.
This will make your server more secure by restricting access to only certain services, such as HTTP, HTTPS, and SSH.
Firewalld is the default firewall software that may be installed on a machine running a CentOS/RHEL-based distribution.
Run the command below to install firewalld:
sudo dnf install firewalld -yWhen you are done, start and enable the firewalld service. To verify the status of firewalld, type:
sudo systemctl enable --now firewalld
sudo systemctl status firewalld
The firewalld service is active (running) must appear on your output.
Run the following command to add the custom SSH port to your system:
sudo firewall-cmd --add-port=2028/tcp --permanentTo reload firewalld rules to apply a new configuration, type:
sudo firewall-cmd --reloadUse the command below to list all enabled rules:
sudo firewall-cmd --list-allFinally, remove the default SSH rule and reload again firewalld rules:
sudo firewall-cmd --permanent --remove-service=ssh
sudo firewall-cmd --reload
How to Install and Enable SSH in Fedora
You are recommended to update Fedora Packages first. To do this, run:
sudo dnf upgrade --refreshThen, check whether the OpenSSH server is already on your Fedora system:
rpm -qa | grep openssh-serverIf this command yields a result, the OpenSSH server installation is complete. It needs to be installed if there is no output.
To install the OpenSSH server, run:
sudo dnf install openssh-serverEnable and Start the SSHD Service
To ensure that the SSH daemon automatically starts with each system boot, you need to enable and start the SSHD Service. To do this, run:
sudo systemctl enable sshd
sudo systemctl start sshd
Then, you can use the following command to check the SSH server status and verify if it is running properly:
systemctl status sshdUsing Password Authentication to Connect to a Remote Server
Now, you can use SSH to connect to a remote server on your Fedora Linux. First, use the command below for a password-based authentication:
ssh username@remote_serverKeep in mind to substitute your real username for the username, and the IP address or hostname of the server for remote_server.
You will be required to enter your password for authentication after running this program.
Additionally, SSH allows public key authentication. Since this method makes use of cryptographic keys, it is more secure than password authentication.
Using Public Key Authentication to Connect to a Remote Server
By using the private key for authentication, this technique gets around the requirement to enter a password:
ssh -i /path/to/private_key username@remote_serverChange the username with your username, remote_server with the IP address or hostname of the server, and /path/to/private_key with the path to your private key file.
Specify a New Port
SSH connects by default on port 22. Nevertheless, use the -p option to specify the port if the remote server is listening on a different one:
ssh -p 2222 username@remote_serverUsing SCP
You can use SCP to transfer files securely between systems using SSH. To copy a file to a remote server from your local system, run:
scp /path/to/local/file username@remote_server:/path/to/remote/directoryAdapt /path/to/local/file to the local file’s path, username with your username, remote_server with the IP address or hostname of the server, and /path/to/remote/directory with the target directory on the remote server.
Configure SSH on Fedora
Let’s check out the examples you can use to configure SSH on Fedora Linux:
To enhance performance, you can disable GSSAPI authentication since it slows down SSH connection times.
Add the following lines to your /etc/ssh/sshd_config file:
GSSAPIAuthentication noAlso, you can add the below lines to your SSH configuration file and manage the SSH session timeouts:
ClientAliveInterval 300
ClientAliveCountMax 2
One of the most important security measures to prevent brute-force attacks is to disable root login.
Add this line to the configuration of your SSH server:
PermitRootLogin noAdding the below lines to your SSH configuration file enables you to restrict SSH access to specific users or groups:
AllowUsers user1 user2
AllowGroups group1 group2
Adjust Firewalld settings on Fedora
To not lose access to the server after applying firewall changes, you must allow your specific IP Address in Firewalld.
To do this, run:
sudo firewall-cmd --permanent --add-source=<your_ip_address>Substitute <your_ip_address> the IP address you are using at the moment.
Add the SSH service to Firewalld when your IP address is permitted safely.
By doing this, you can make sure that SSH connections via the firewall are allowed:
sudo firewall-cmd --add-service=ssh --permanentAfter completing the required adjustments, reload Firewalld to put them into effect:
sudo firewall-cmd --reloadRun the command below to verify SSH is correctly configured and allowed in Firewalld:
sudo firewall-cmd --list-services | grep sshThis command verifies that your remote SSH sessions are safe and available by looking through the list of services Firewalld permits and confirming SSH’s existence.
How to Install and Enable SSH in Red Hat
Similar to other Linux distributions, Red Hat establishes SSH service on port 22.
On Red Hat Linux, you might additionally need to provide firewall access for the SSH service.
The below commands allow you to check, install, start, and enable the SSH service on Red Hat Linux:
$ dnf install openssh-server$ yum install openssh-server$ systemctl start sshd$ systemctl status sshdConfigure SSH on Red Hat
$ systemctl enable sshd
$ systemctl disable sshd
firewall-cmd --zone=public --permanent --add-service=ssh
To start automatically at the boot time, run:
# chkconfig sshd onHow to Install and Enable SSH in Almalinux
Installing the openSSH-server package is required in AlmaLinux if you want your machine to accept SSH connections from outside.
Otherwise, you can install the openssh-clients package if all you want to do is use the ssh command to start outgoing connections. Installing both is also an option.
# dnf install openssh-server openssh-clientsTo start or stop the SSH server, run:
# systemctl start sshd
# systemctl stop sshd
Configure SSH on AlmaLinux
To enable or disable the SSH server, run the commands below:
# systemctl enable sshd
# systemctl disable sshd
Use the following command to check whether the SSH server is running:
# systemctl status sshdThen, run the following commands to allow the service through firewalld to accept incoming connections:
# firewall-cmd --zone=public --permanent --add-service=ssh
# firewall-cmd --reload
How to Install and Enable SSH in Arch Linux
Any application can be installed on Arch Linux by using the package manager (packman) command.
The Arch Linux system repository needs to be updated first. Then, use the packman commands to install the OpenSSH service on Arch Linux.
$ sudo pacman -Sy
$ sudo pacman -S openssh
$ sudo systemctl status sshd
With the systemctl terminal command, you may use Arch Linux to start or stop any SSH service, check its status, and disable it.
$ sudo systemctl start sshd
$ sudo systemctl status sshd
$ sudo systemctl stop sshd
$ sudo systemctl enable sshd
$ sudo systemctl disable sshd
$ sudo systemctl restart sshd
Configure the SSH Service Script on Arch Linux
To configure SSH on Arch Linux, open the configuration file from the /etc/ssh/ directory and run the commands below:
$ man sshd_config / config files
$ sudo nano /etc/ssh/sshd_config
How to Install and Enable SSH in Manjaro Linux
First, if you have not already installed SSH on Manjaro Linux, run the commands below to install OpenSSH and check its status:
$ sudo pacman -S opensshsudo systemctl status sshd.serviceOpenSSH service should be disabled by default.
Edit the SSH Daemon Config File
sudo nano /etc/ssh/sshd_configRun the commands below to enable and launch SSH Service:
sudo systemctl enable sshd.servicesudo systemctl start sshd.serviceHow to Install and Enable SSH in OracleLinux
The openssh and openssh-server packages are part of an Oracle Linux installation by default, but the sshd service isn’t enabled by default.
Run the command below to install the package:
sudo dnf install openssh openssh-serverTo start the sshd service and configure it run the following commands. It will start following a system reboot:
sudo systemctl start sshd
sudo systemctl enable sshd
Configure SSH on OracleLinux
For Oracle Linux 8 or later, the configuration files are saved in the /etc/ssh/sshd_config.
Restrict Access to SSH Connections
You can disable SSH if it isn’t required since SSH is an entry point into the system. To restrict its use, you can edit the /etc/ssh/sshd_config file.
For the modifications to take effect, you must restart the sshd service after making changes to the configuration file.
To restrict root access, run:
PermitRootLogin noTo restrict specific users, type:
DenyUsers carol dan
AllowUsers alice bob
In this way, you can limit remote access to specific people and groups.
Specify a Timeout Period
To let the SSH client time out automatically after a period of inactivity, you need to set up the ClientAliveInterval and ClientAliveCountMax.
# Disconnect client after 300 seconds of inactivity
ClientAliveCountMax 0
ClientAliveInterval 300
Disable Password Authentication
Passwords are used by OpenSSH by default for authentication. However, you can choose to disable that feature if you have set up key-based authentication, which is more secure:
PasswordAuthentication no
PubkeyAuthentication yes
How to Install and Enable SSH in Kali Linux
The SSH package is already installed on Kali Linux, however, it is not launched automatically.
Therefore, you must start this service to establish an SSH connection to Kali Linux.
If it is not installed on your Kali Linux, run the commands below:
sudo apt updatesudo apt install openssh-serverYou might be prompted to input “Y” or “yes” to confirm the installation procedure.
After installation is finished, execute the following command to see if the SSH service is running:
service ssh statusTo start the SSH service, type:
sudo systemctl start sshUse the following command to make sure the SSH service launches automatically each time your computer boots up:
sudo systemctl enable sshThen, run the command below to verify that the SSH service is running:
sudo systemctl status sshIf SSH is operating properly, you will see in your output that the ”service is active and running”
Configure SSH on Kali Linux
SSH uses port 22 for communications by default. To change it, you need to edit the SSH configuration file located at /etc/ssh/sshd_config.
sudo systemctl restart sshWhen you are finished, restart the SSH service.
FAQ
How to find out if SSH is already enabled on Ubuntu?
You must first enter the terminal and execute the SSH command:
ssh localhost
Then, if the system supports running SSH commands and you can use the ssh-keygen command for various purposes in the command line, then SSH is enabled on your Ubuntu system. But if you get Connection Refused message then you need to enable SSH on your Linux system.
What is the default SSH port?
By default, SSH runs on port number 22, but in exceptional cases, other ports can also be run.
Why Enable SSH to Connect to a Remote Server
Enabling the secure and reliable SSH protocol as an additional security shell on your system will reduce the risks of attacks.
Enabling SSH in Linux allows you to communicate with the remote system securely and perform daily sysadmin tasks in the desktop terminal environment of your system in a secure environment.