Install and Launch Git on Windows
Install and Launch Git on Windows by downloading the official installer, running it with administrative rights, and configuring essential settings. Verify installation via command line and launch Git Bash or PowerShell to begin using Git.
🤖AI Overview:
Installing and launching Git on Windows entails downloading the latest installer or using Winget, running it with default or customized settings, and configuring user identity for version control. Git can be accessed via Git Bash, Git GUI, or PowerShell, enabling efficient repository management on Windows systems.
Prerequisites for Installing Git on Windows
Before installing Git on Windows, you need to consider a few prerequisites. Fortunately, Git for Windows comes with its own standalone environment and dependencies bundled with the installer, so there’s no room to worry about installing additional software. Here, we will point out the primary prerequisites you should be aware of before the installation of Git:
- Windows system or a Windows VPS compatible with Git (e.g., Windows 11)
- Administrative privileges on the Windows system
- Access to a command-line interface (such as CMD or PowerShell)
- Use of a preferred text editor for coding
- Stable internet connection for downloading the Git installer for Windows and interacting with remote repositories.
- Git website username and password
- Installation of Git GUI Tools, which is a graphical interface for managing your repositories (optional)
How to Install Git on Windows
There are various methods for installing and configuring Git on Windows, and we will provide instructions for the most common and straightforward methods so you can make use of Git’s features. The installation process for Git on Windows and Windows Server is the same, so If you buy Windows VPS for software development, these steps will also work for installing Git on a Windows server.
Method 1: Installing Git on Windows from the Official Git Website (Traditional Method)
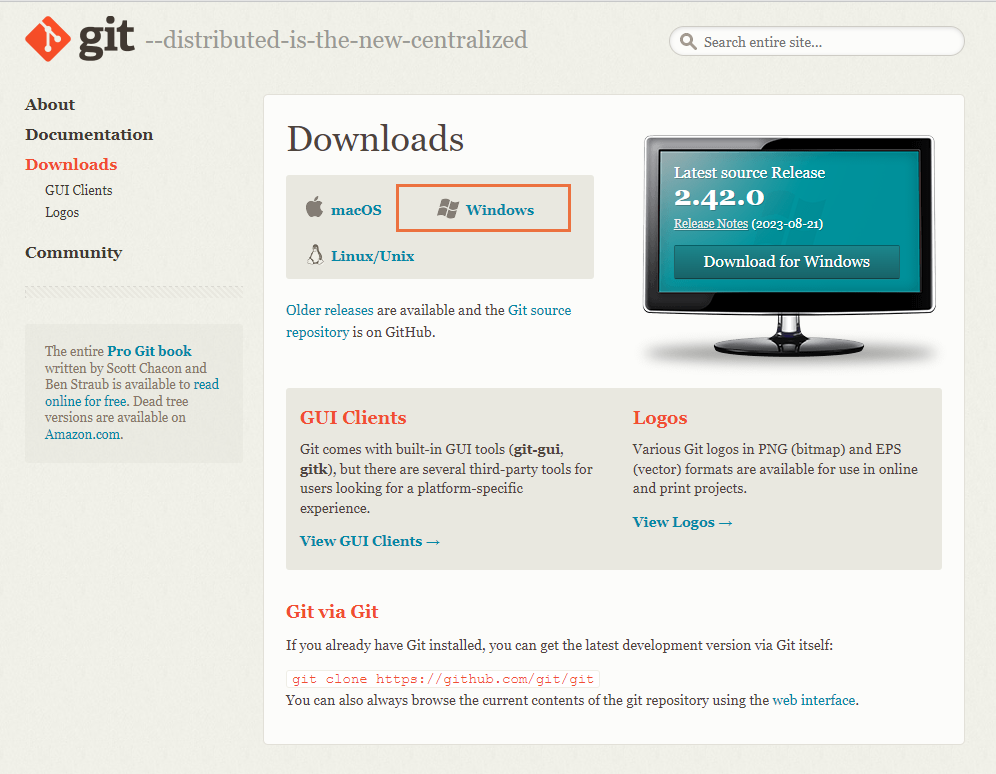
1. Download Git for Windows
Download the Git installer, typically available as an exe file, by clicking the “Download” button from the official Git website for Windows.
2. Run the Installer
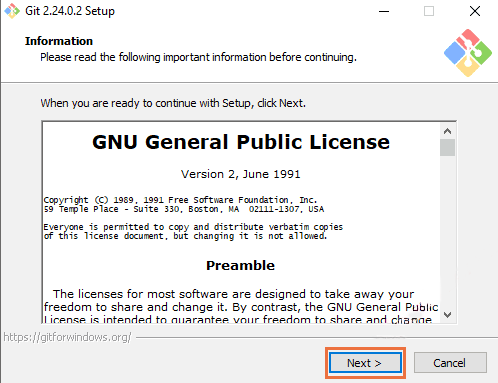
Navigate to the folder containing the downloaded files, or use the browser’s download shortcut and double-click on the downloaded .exe file to extract and launch the Git installer for Windows. Then, by clicking the “Yes” button, allow the program to make changes to your device, and after reading and accepting the GNU General Public License, click “Next.”
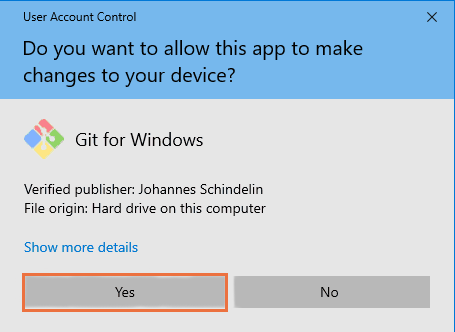
Note: At this step, you may need to grant administrative privileges in the Windows system.
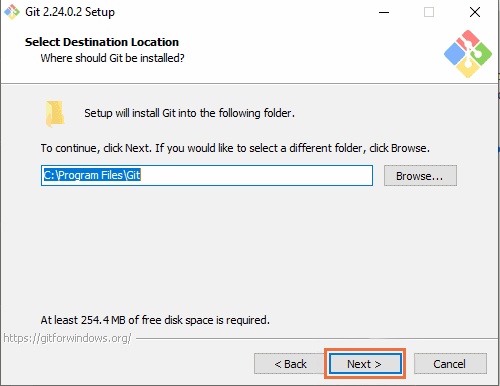
Next, you will be prompted to specify the installation location. It is recommended that you keep the installation location as the default location unless you have a specific reason to change it.
3. Configure Installation Options
From this point onward, it’s time to choose from various configuration options. The different configuration options are as follows:
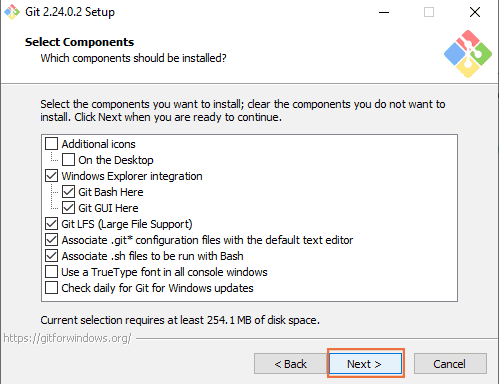
Select Components: After choosing the destination location for Git on Windows, the component selection page will appear. If you don’t have specific requirements, select the default components, leaving them as they are, which is safe. Then click the “Next” button to proceed with the installation.
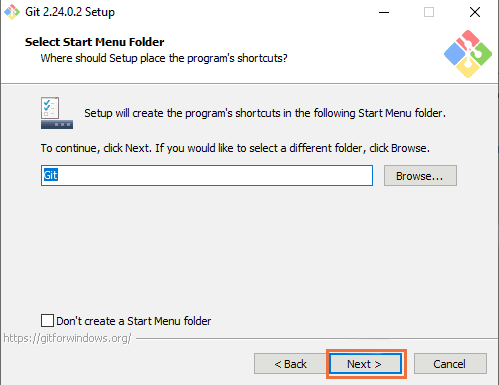
Select Start Menu Folder: The installer asks you to create a Start Menu folder. Click “Next” to complete the process.
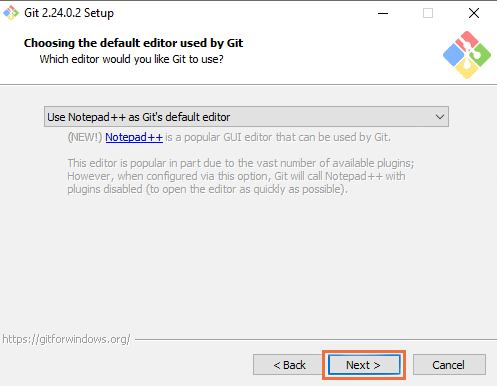
Choosing the Default Editor: At this step, the installer suggests that you select your default text editor for Git. By default, the Nano text editor is configured for Git, but you can choose other options like Notepad, Visual Studio Code, or any other text editor you prefer from the dropdown menu. Then, click the “Next” button.
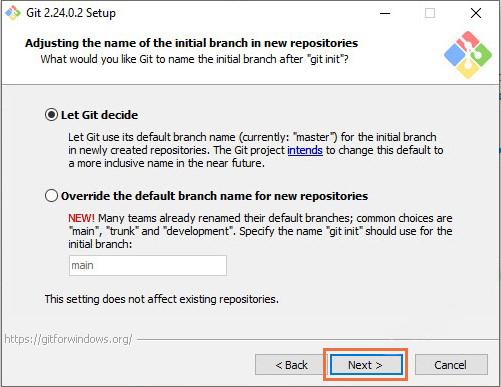
Choosing the Default Branch Name: On the next page, you have the option to set the default branch name. You can choose between two options, “master” or “main,” depending on your preference, and then click “Next”.
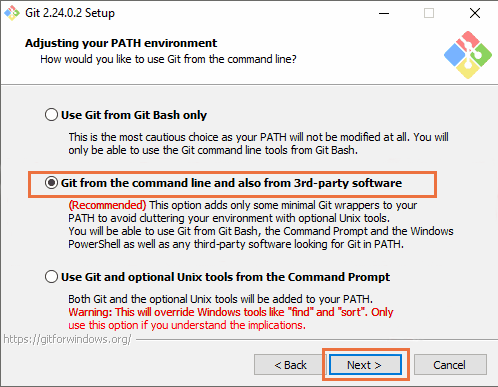
Choosing the PATH Environment: In this step, you are allowed to add Git to the system’s PATH environment variable by selecting the recommended option, “Use Git from the Windows Command line.” Adding Git to the PATH environment variable enables you to use Git from PowerShell or Command Prompt. We recommend selecting the default and suggested option and completing the installation of Git on Windows by clicking “Next”.
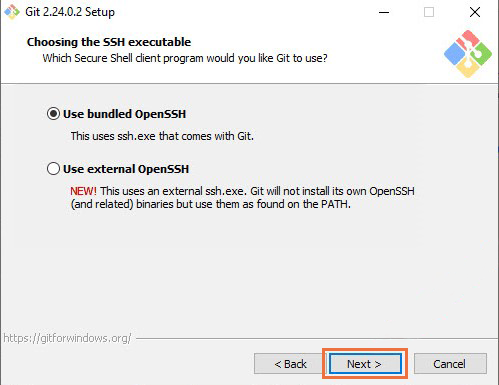
Choosing the SSH executable: While the installer provides you with the option to select Secure Shell (SSH) for Git, it’s unnecessary to make changes at this step, as the installer comes with OpenSSH. Therefore, there’s no need to modify this unless you intend to use a specific client. Click “Next” to proceed.
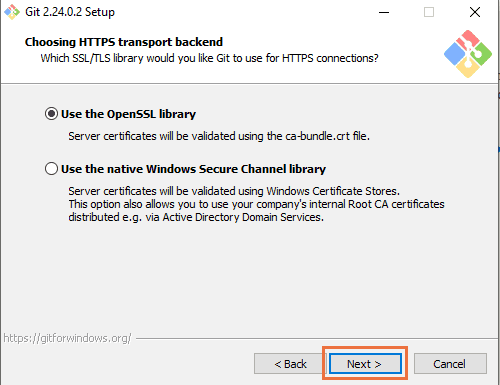
Choosing the HTTPS Transport Backend: It’s recommended to leave this step, which relates to server certificates, by sticking with the default option, which is selecting the default library “OpenSSL” for HTTPS transport. To continue, click the “Next” button. On the other hand, In an Active Directory environment, it might be necessary to convert your servers’ certificates to those from the Windows Store.
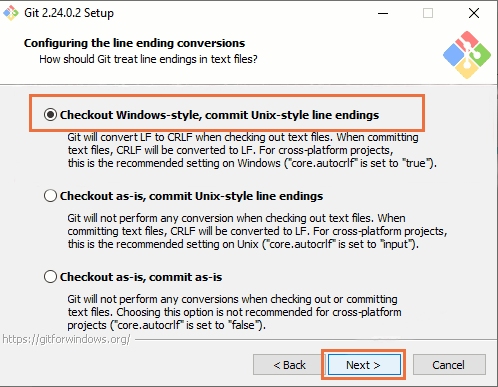
Configuring Line Endings: For most cases, selecting “Checkout Windows-style, commit Unix-style line endings” is suitable because this option enhances line ending conversion management when working with repositories created on different platforms. Line endings configuration depends on data formatting, and any improper changes can lead to issues. To complete the process, click “Next”.
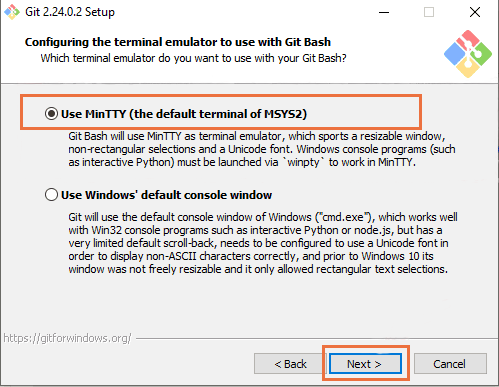
Choose the Terminal Emulator: In this step, you can select the terminal emulator, either the built-in Windows Terminal or MinTTY, for Git Bash. If you’re unsure about choosing between these two options, proceed with the default selection (usually MinTTY).
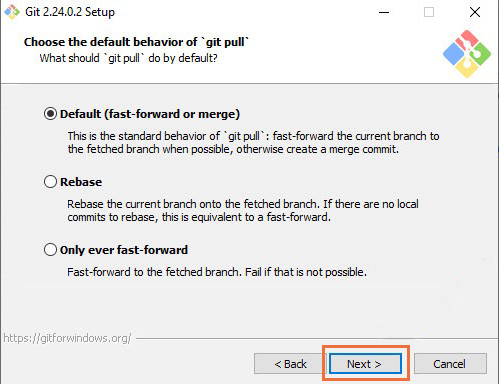
Choose the Default Behavior of git pull: The installer allows you to change the behavior of the “git pull” command, However, it is advisable to accept the “git pull” behavior by default and continue by selecting “Next”.
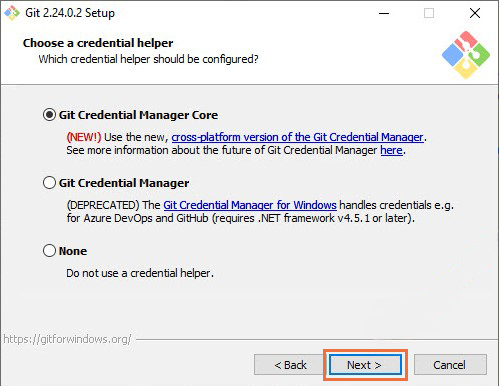
Choose a Credential Helper: use the default credential helper for storing or fetching credentials, and click “Next” to move on to the next step.
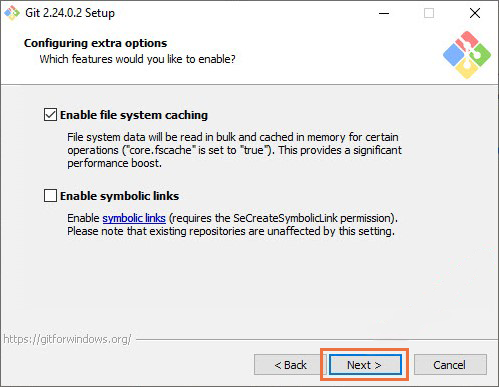
4. Configuring Extra Options
The Git installer provides additional customization options that you can enable based on your needs.
- You can choose to enable features like “enable File system caching” and “enable symbolic links,” depending on your requirements. Usually, users prefer the default option (enable file system caching), which significantly improves performance. However, if you need to use symbolic links (similar to shortcuts for the command line), you can enable this feature by checking the box next to it.
- Depending on the Git version you are installing, options may be provided to enable experimental features (support for pseudo consoles and a built-in file system monitor) currently in development. You can try them out, or you can enter the world of Git without installing and enabling them.
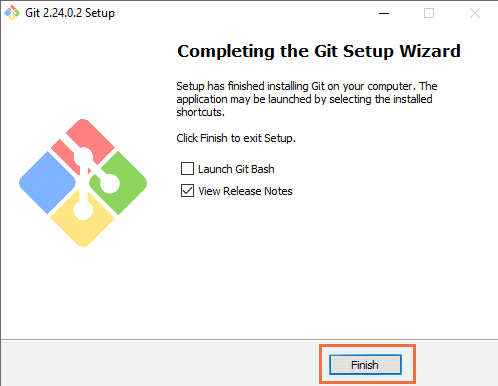
5. Completing the Git Installation on Windows Server/System
To finish the installation process, click the “Install” button, and after the installation is complete and you have selected options like “Launch Git Bash” or “View Release Notes,” click the “Finish” button.
6. Verify the Installation
After installing Git on Windows, to ensure that Git has been successfully installed, open a Command Prompt or PowerShell window and execute the following command:
git --versionBy receiving information and details about the Git version, you can confirm the successful installation of Git on Windows.
7. Configure Git Credentials
Before launching Git on a Windows system, configuring your username and email address for Git is an essential step. Open a Command Prompt, PowerShell, or Git Bash window and execute the following commands:
git config --global user.name "Your Name"
git config --global user.email [email protected]
Replacing “Your Name” and “[email protected]” with your Git account information.
If you want the configuration to be applied only to the current repository, you can use the --local option instead of --global. To check your configuration details, execute the following command:
git config --global --listMethod 2: Installing Git on Windows via Winget Tool (Modern Method)
In addition to the traditional method, you can install, configure, and even remove the Git program on a Windows server using the Winget tool. Winget is a package manager for Windows that enables the installation and management of various software packages in Windows. Windows 11 supports the use of the Winget tool to install Git. Follow the steps below to install Git on Windows:
1. Open Command Prompt or PowerShell: In the Start menu, search for PowerShell, right-click it, and select “Run as administrator.”
2. Search for Git: Search for available Git packages for installation by running the following command:
winget search Git3. Install Git: Once you have identified the available Git packages for installation, enter the following command to download and install Git using Winget, then press Enter:
winget install --id Git.Git -e --source winget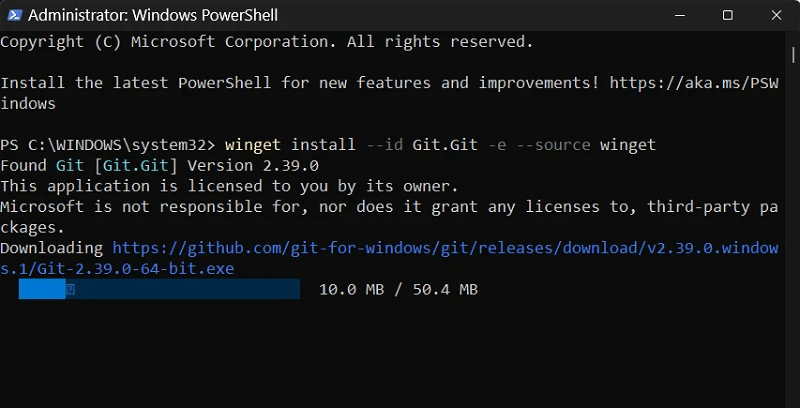
4. Follow the Installation Process: The installation will begin, and you will be prompted to confirm the installation. Follow the on-screen prompts to complete the installation. After a short wait, Git will be installed, and you will see the message “Successfully installed.”
5. Verify Git Installation: To verify a successful Git installation, type the following command in a Command Prompt or PowerShell window:
git --versionPlease note that the package name and its availability may change over time. Therefore, it’s a good practice to verify the package name by running the “winget search” command to ensure that you install the correct package.
How to Launch Git on Windows
In Windows, you can launch Git in different ways: 1. Using the Bash scripting shell, and 2. Using the graphical user interface (GUI).
Most users prefer using the Git Bash shell to start Git. To launch Git via Git Bash, click the “Start” button and search for “Git Bash,” then click on the program icon.
To use Git GUI, follow the same steps. Search for “gitgui” from the Windows Start menu and click on its icon.
You can also use PowerShell to launch Git, but you need to ensure that some settings are added to PowerShell for Git to work. To do this, first search for PowerShell in the Windows Start menu and right-click on it, then select “Run as administrator.” Next, type the following command in PowerShell:
Get-ExecutionPolicyIf you received the “RemoteSigned” message, you can ensure that the PowerShell ExecutionPolicy is set to “RemoteSigned.” If you didn’t see this message, you should execute the following command:
Set-ExecutionPolicy -Scope CurrentUser -ExecutionPolicy RemoteSigned -ForceThen, add Posh-git module by typing the following command:
Install-Module posh-git -Scope CurrentUser -ForceNow, it’s time to import the module into PowerShell. For this purpose, you should use the following command:
Import-Module posh-gitAs a result, PowerShell is now prepared and equipped for launch and using Git.
How to Use Git on Windows and Windows Server
Now that you’ve prepared your Windows system for Git, you can start using it without wasting any time. With Git, you can create repositories, clone existing repositories, make commits, and collaborate with others by pushing and pulling changes.
Creating a Test Directory and Initializing Git
To create a new Git repository, you must first create a new directory.
Open PowerShell or Git Bash, and create a new test directory or folder by running the following command:
mkdir testIf you have previously created a GitHub repository, replace “test” with its name in the previous command.
Then, change your location to the newly created directory by executing the following command:
cd testBy pressing the Enter key, you can initialize Git in the new directory.
git initOutput:
Initialized empty Git repository in C:/ test/.git/Then press the Enter button.
To add multiple project files, type the full name of the project file. For example:
notepad test.txtBy pressing the Enter key, the specified program launches, and by clicking “Yes,” you confirm the creation of a new file.
Then, add the relevant content to the file and save it by selecting the “File” tab and clicking on the “Save” option.
Afterward, you can check the file’s performance status by running the following command:
git statusOutput:
On branch master
No commits yet
Untracked files:
(use"git add <file> …" to include in what will be committed)
nothing added to commit but untracked files present ( use "git add" to track)
As you can see, the file is recognized by Git, but the “No commits yet” message indicates that Git has not detected any commits in the file yet.
Creating a new remote repository
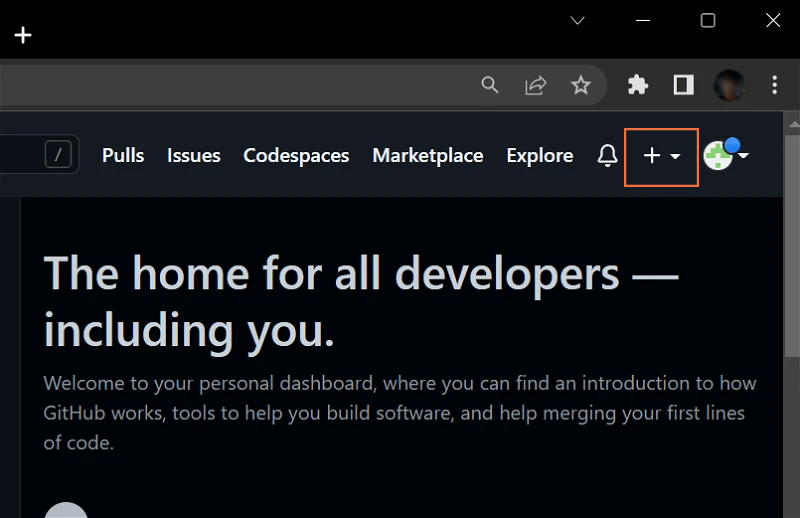
Creating a new remote repository is much simpler than you might think. To do this, first go to the official Github website, and sign in.
Then, in the upper right corner of the page, click on the “+” icon. From the options provided, select “New repository.”
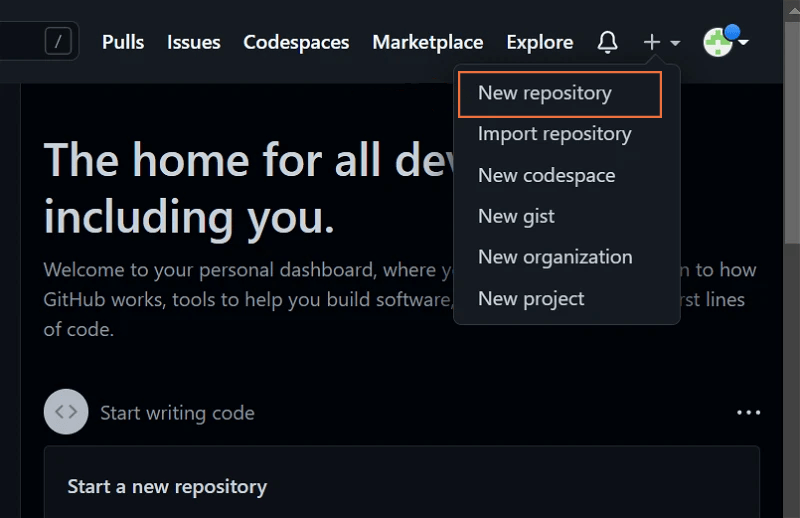
Name your repository and provide a description of it. Choose between the two options, “public” and “private.”
Finally, to create your new repository, click on the “Create repository” button.
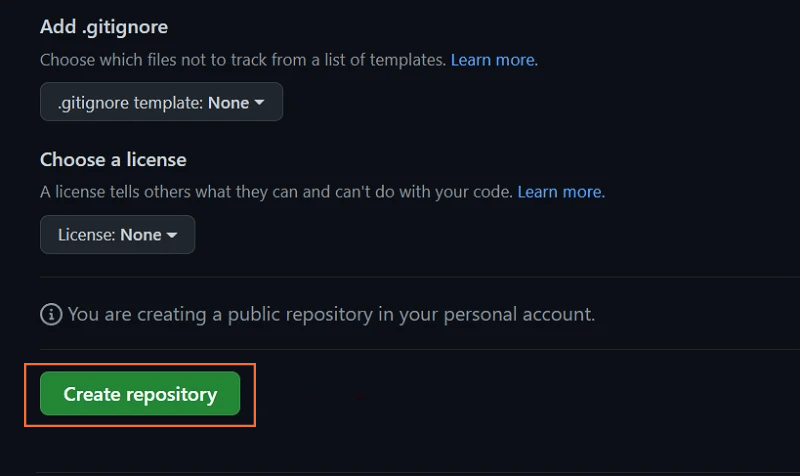
you’ve created a new repository, and you can use its URL for various purposes.
Clone a Git Repository
To clone an existing Git repository, execute the “git clone” command followed by the repository’s URL. To obtain the URL of a remote repository, you need to access the remote repository and copy its URL. Then, open a Git Bash or PowerShell window and type the following command:
git clone <repository_URL>Replace <repository_URL> with the actual URL of the remote repository you want to clone.
Basic Git Commands
Learning basic Git commands is essential for efficiently using Git. Here are a few commands to get you started:
- Stage a file for commit to prepare for sending files:
git add <file>- stage multiple files for commit:
git add <file1> <file2> <file3> ...Or
git add --all- Commit your changes with a descriptive message:
git commit -m "Your commit message"- Push your local commits to a remote repository:
git push- Pull changes from a remote repository:
git pull- Check the status of your working directory:
git status- View the commit history:
git logPush local files to remote repository
The local files on your system serve as a clone of the files in the remote repository, but to push local files to the remote repository, you need to set the origin of these files to the remote repository. To do this, follow these steps:
1. First, go to your GitHub account and navigate to the remote repository.
2. Copy the URL of the remote repository.
Then, open Git Bash and run the following command:
git branch -M mainPress Enter and run the following command:
git remote add origin repository_urlPress Enter again, and finally, use the following command:
git push -u origin mainFinally, your local files are now available in the remote repository.
For some users prefer working with a graphical user interface (GUI) over the command line, the good news is that Git supports GUI tools for ease of use and management. Several Git GUI clients like GitKraken, Sourcetree, and GitHub Desktop are available for Windows, which facilitate working with Git. As a result, you can use both the command-line tool and the GitHub Desktop client to manage repositories and perform actions like creating pull requests, forking repositories, and more.
Conclusion
Installing and launching Git on Windows is a foundational step for business owners involved in software development or managing IT projects. Through a well-structured installation and initial configuration process, you can establish a secure and efficient version control system. This guide provides comprehensive instructions that preserve essential details and best practices, enabling business owners worldwide to harness the power of Git.
By prioritizing the correct installation and launch of Git on your Windows devices, your business positions itself to manage software projects confidently and competently, a vital competitive advantage in today’s digital landscape.
FAQ
2. How can business owners install Git on Windows using the official website?
Download the installer, run it with administrative rights, follow the installation prompts, and verify with "git --version".
3. Is there a modern method to install Git on Windows?
Yes, use Winget in PowerShell to search and install Git automatically with administrative privileges.
4. How do I launch Git after installation on Windows?
Launch Git Bash from the Start menu, run "Git GUI" with gitgui, or use PowerShell with the "Posh-Git module".
5. What initial configurations are needed after installing Git?
Set your username and email globally with git config commands to establish identity for version control.
6. How do I create and manage repositories on Windows?
Use commands like "git init"," git add", "git commit", "git clone", and "git push" to manage repositories.
7. Are there GUI options for working with Git on Windows?
Yes, tools like GitHub Desktop, Sourcetree, and GitKraken offer graphical interfaces for Git operations.
8. How can I verify Git installation?
Open Command Prompt or PowerShell and run "git --version"; performing git status in a repository confirms functionality.
9. What configuration options should I consider during installation?
Choose your default editor, include Git in PATH, select the default branch name 'main', and terminal preferences.
10. How does Git benefit business owners?
It enables efficient version control, team collaboration, project management, and streamlined software development workflows.