Install NFS Server & Create NFS Share in Windows Server
Have you ever used two machines with different operating systems, such as Windows and Linux, and faced problems seamlessly sharing files and resources between these two machines? Or do you use two Windows and Linux servers in your organization, and do you find sharing files between different platforms challenging? You have probably experienced this problem that you came to this article; congratulations on your choice because you have chosen the right way; the solution to your problem is in this article.
Setting up an NFS (Network File System) server is an efficient solution to seamlessly files share on heterogeneous platforms or mixed environments with Windows and Linux systems. Installing an NFS server on a Windows server is not a standard feature and is usually associated with Linux environments. But you can install an NFS server using third-party software like “Services for NFS” or “NFS Server” from QNAP on a Windows server. In this article, we will teach step by step how to install an NFS server and create NFS Share in Windows Server.
Reasons for installing NFS server in Windows Server
You might say to yourself that a Remote Desktop is the ideal solution that you can easily transfer files using Remote Desktop on a Windows server, But you are wrong because a Remote Desktop is a good solution for file transfer between the local PC and remote Windows server, and it is not responsive for file sharing between two heterogeneous and different platforms.
Installing an NFS server in a Windows server is the most common way to facilitate cross-platform file sharing, collaboration, and compatibility between Windows and Linux. It also performs better for specific workloads or applications than the SMB/CIFS protocol.
In addition to facilitating the sharing of files on different platforms, installing the NFS server on the Windows server also provides an advantage for software developers, such as testing the compatibility of the software in the Windows environment with the Linux system. Installing the NFS server also enables the compatibility of programs and services that depend on NFS access from Windows to Linux and is preferred for specialized uses such as high-performance computing (HPC) clusters or scientific computing environments where NFS is a commonly used protocol for data sharing. In data integration scenarios where you have the task of centralizing data storage from several sources, setting up an NFS server in Windows Server will help you optimize and facilitate your tasks in data integration.
Prerequisite for installing NFS server in Windows Server
Before installing the NFS server in a Windows Server, you must meet the specific requirements and have the necessary permissions. Here, we will mention the requirements for installing an NFS server on a Windows server:
- Windows VPS with Windows Server version compatible with NFS server (usually Windows Server editions like Windows Server 2012, 2016, and 2019 support NFS server.)
- Administrator Privileges
- Stable network connection and correct network configuration
- Installing the Service for NFS feature on the Windows server
- Configuring NFS client settings (including settings such as server IP address and share paths) in NFS client systems that need access to the NFS server for sharing.
- Allocate sufficient server hardware resources (CPU, RAM, and storage) to handle the NFS workload
- Data backup
How to install NFS Server in Windows Server
After considering the necessary prerequisites for installing the NFS server, follow the steps below.
1. Access Server Manager
After logging in to the Windows server on which you intend to install the NFS server, open the “Server Manager” by pressing the “Win + X” buttons from the keyboard and selecting “Server Manager” from the context menu. There is also another way to launch “Server Manager”, you can click on the start button (Windows icon) in the bottom bar of the screen, search for Server Manager, and click on it.
2. Add Roles and Features
On the server manager page, click the “Manage” option in the upper right corner and select “Add Roles and Features.”
3. Select installation type
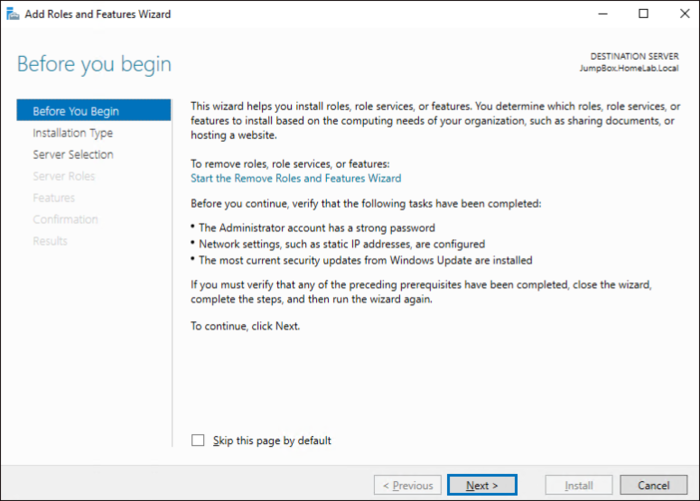
On the “Before you begin” page, select “Next” to proceed.
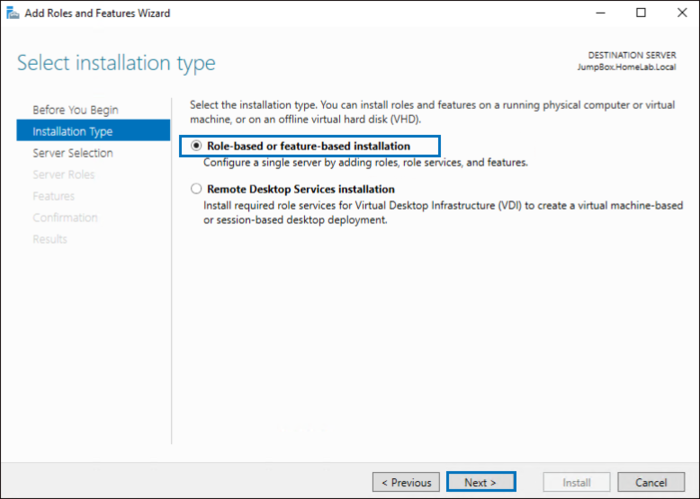
In the “Installation Type” section, select the “Role-based or feature-based” installation option and continue the installation process by clicking the “Next” button.
4. Select a server
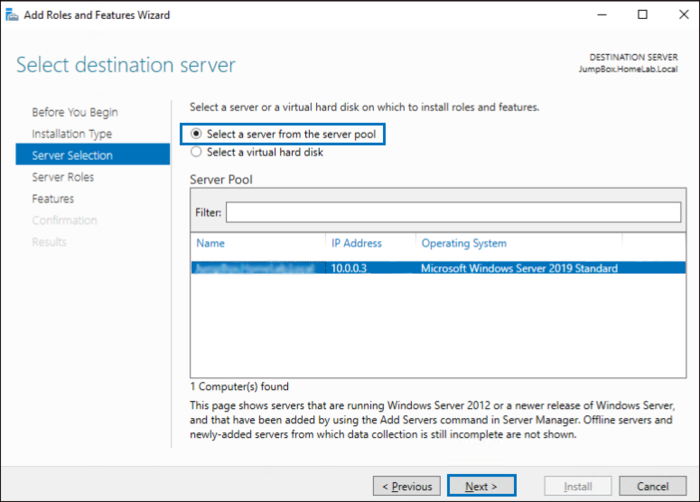
From the “Server selection” section, click the “Select a server from the server pool” option to choose the target server where you want to install NFS. Then click on “Next”.
5. Select server roles
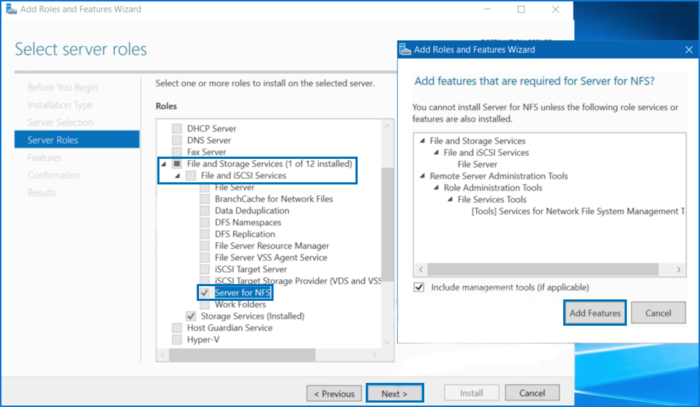
On the “Select server roles” page, scroll down; if you have already installed Services for NFS, you will find this option. If you do not find this option, find “File and Storage Services” and expand it, and among the options, open “File and iSCSI Services” and select the “Server for NFS” option by checking the box next to it.
By selecting the “Server for NFS” option, a pop-up window will appear asking you to add and confirm the required features for the server for NFS; for this purpose, click “Add features” > “Next.”
6. Confirm the required features added
On the “Select features” page, since you have already added the features you need, click the “Next” button after checking the added features.
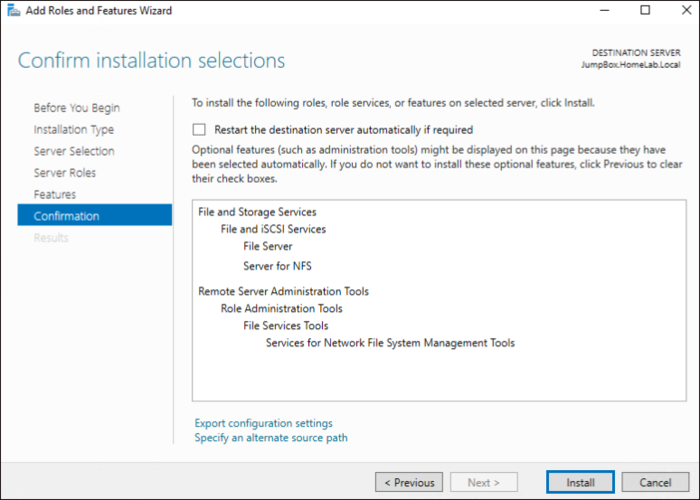
7. Confirm installation
On the “Confirm installation selections” page, check and confirm the installation selections and click the “Install” button to install the NFS server.
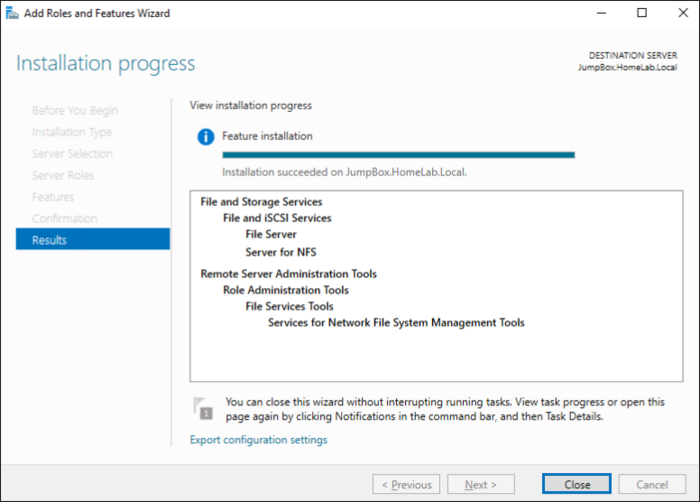
8. Complete installation progress
Wait for the installation to complete, and hit “Close” when it’s complete.
Configuring and Creating NFS Share in Windows Server
Congratulations, you successfully installed the NFS server in your Windows server, but what was the main purpose of installing and running the NFS server? Yes, the main purpose is to share files between Windows and Linux environments, so to achieve this goal, you must create an NFS share. Follow the steps below to set up the NFS share and make it accessible to NFS clients.
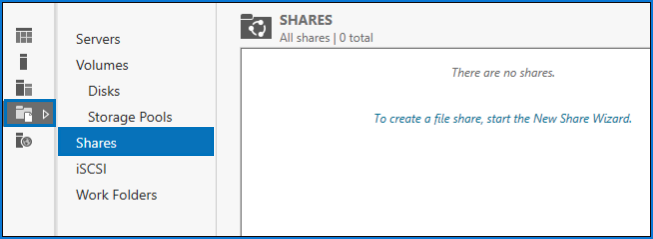
1. Open a new share wizard
Open “Server Manager” and expand “File and Storage Services” on the left side of the Server Manager screen so that you can select the “Shares” option in the menu that appears.
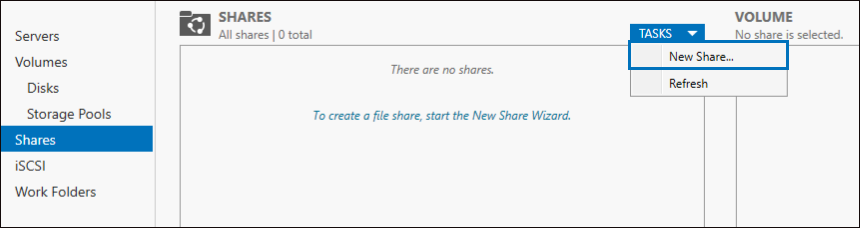
Click on “Tasks” in the upper right corner of the share window and select “New Share” from the drop-down menu.
2. Select Profile
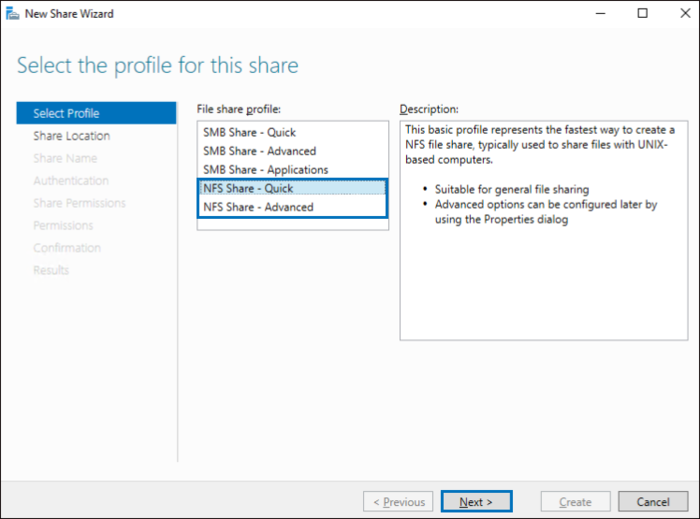
In the “New Share” Wizard, the user can choose a profile for this share from the “Select profile” section; you can choose between “NFS Share-Quick” and “NFS Share-Advanced” options based on your needs. If you want to create an NFS share with basic settings, select the “NFS Share-Quick” option, but if you want to apply advanced settings such as folder owners, data classification, access policies, and quotas and you have also set the File Server Resource Manager role on your server, choose “NFS Share-Advanced“. In this tutorial, we prefer to select the NFS Share-Quick option, so select the option you want and click “Next”.
3. Specify share location
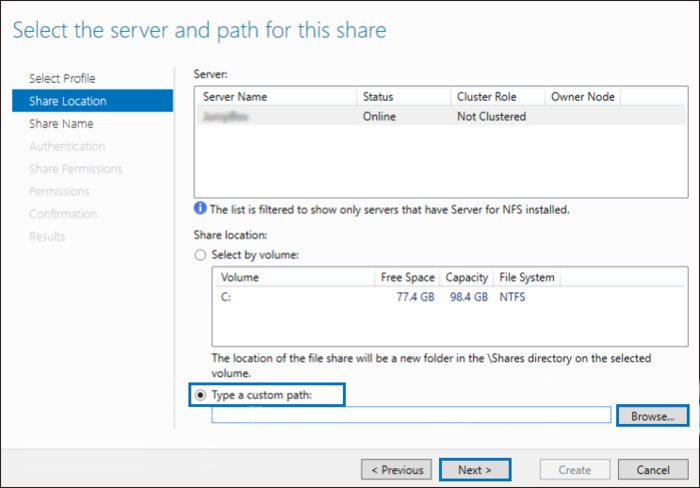
Select the server and custom path from the “Share location” section for this share. For this purpose, select the “Type a custom path” option for your share location and choose the desired directory and folder for the NFS share you want to create through the “Browse” button. You can also type the folder’s full path and click “Next”.
4. Specify the name for your NFS share
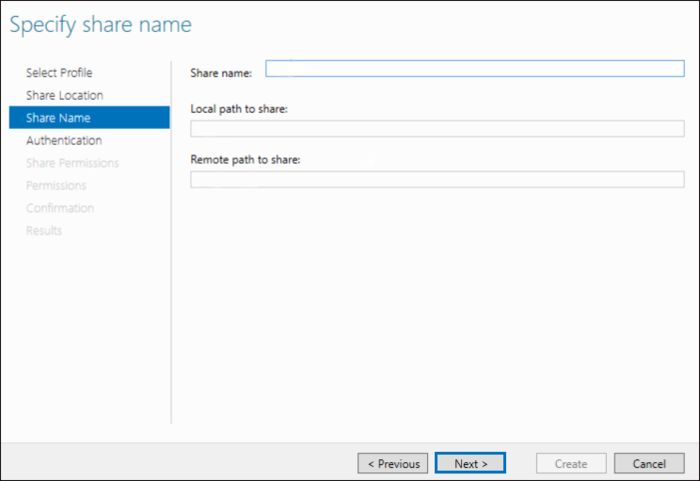
On the “Share Name” page, specify a specific name for your NFS share and complete the steps of creating the NFS share by selecting the “Next” button.
5. Specify authentication methods
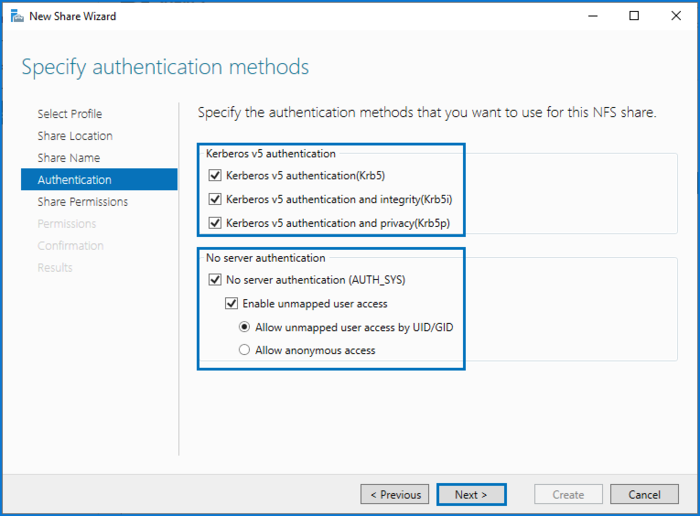
In the “Authentication” section, you will determine the authentication method for the NFS share. Choose the method that suits your goals and needs. By selecting all the Kerberos options, assign the Kerberos authentication that the server supports for clients.
In the “No server authentication” section, mark the following items to allow clients who do not have Kerberos to access the NFS share:
- No server authentication (AUTH_SYS)
- Enable unmapped user access
- Allow unmapped user access by UID/GID
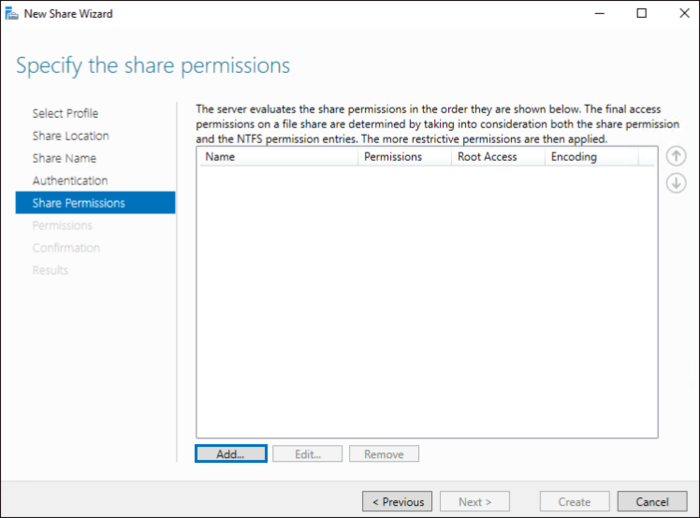
6. Grant permissions to a host to access the NFS share
On the “specify the share permissions” page, you can specify the Host, Netgroup, Client group, or servers allowed to access the NFS share. Do this by clicking “Add” and adding the NFS clients that you want to access the NFS share.
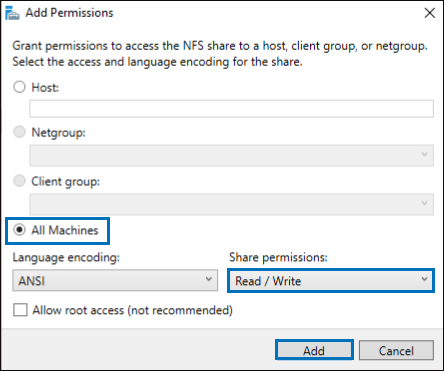
Regarding granting permissions, select the “All Machines” option to allow NFS clients, Netgroup, or the specified client groups to access the NFS share. In addition, to allow read and write access, expand the share permission menu and select the “Read/Write” option. Then click on the “Add” button.
Then, navigate back to the “Specify the share permissions” page and hit “Next”.
7. Specify permission to control access
Review the permissions you set on the “Specify permissions to control access” page, and after confirming the assigned permissions, click the “Next” button.
8. Confirm selections and create the NFS share
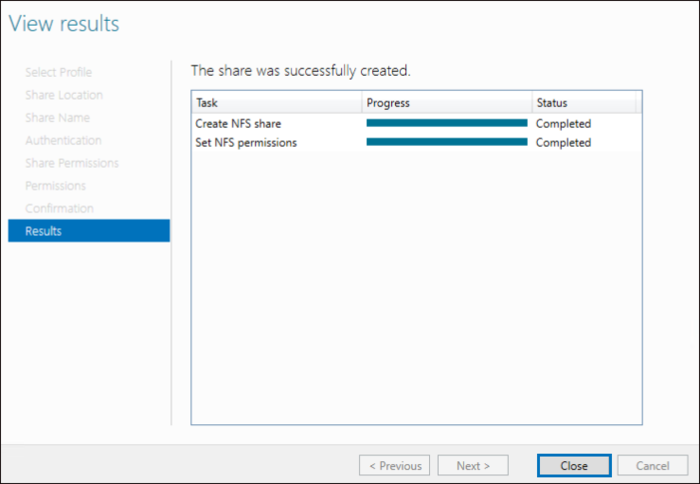
On the “Confirm selections” page, confirm the correctness of the NFS share settings and then click the “Create” button.
After completing the share creation process, select the “Close” button.
9. Verify your share is created
Open Server Manager, navigate to File and Storage Services > shares and ensure the NFS share is created.
After installing the NFS server and configuring the NFS share, mount the NFS share to a location on your Windows server by installing Client for NFS on Windows. Also, to connect to the NFS share from the Linux system, you need to install NFS on Linux and configure the NFS client settings so they can access the NFS share.
Conclusion
Congratulations, you installed the NFS server in the Windows server and configured an NFS share. In summary, installing an NFS server in Windows Server is a useful solution if you need cross-platform file sharing, compatibility with a Linux system, or the performance benefits provided by NFS. Before installing an NFS server on Windows, evaluate your needs and consider security and maintenance requirements because NFS can pose security risks.
Therefore, ensure authorized users and systems have access to NFS shares, and do not forget to implement appropriate access controls and authentication to increase security. In addition to paying attention to security measures, remember that NFS, like other Windows server software, requires regular updating, monitoring, and maintenance. It should be noted that if you use a firewall in Windows Server, allow specified clients to access the server and grant them access to NFS.
If you have any questions about installing the NFS server in Windows Server, feel free to ask them in the comments section so we can respond as soon as possible.