How to Install Notepad++ on Linux VPS?
Notepad++, a free open-source code editor loved for its speed and features, can surprisingly be used on Linux!
This lets you code with the familiar Notepad++ interface and features like syntax highlighting for different languages, making your development process smoother.
There are two main ways to install Notepad++ on Linux VPS: Snap and Wine.
Snap is ideal for a quick, easy one-click installation. It offers a single-click installation that bundles Notepad++ with Wine, a program that lets Windows applications run on Linux. This is the simpler option.
- To install Notepad++ using Snap, run
sudo snap install notepad-plus-pluscommand to install both Notepad++ and the necessary Wine components, making it very user-friendly.
Wine offers more control, but requires additional setup and configuration. While Notepad++ is a Windows program, Linux users can also leverage Wine compatibility software to run it.
- To Install Notepad++ using Wine, you can install Wine separately and then use it to run the downloaded Notepad++ installer, giving you more control over the process.
Prerequisites to Install Notepad++ on Linux VPS
Notepad++ itself doesn’t have specific prerequisites for Linux, since it’s a Windows application. However, before you jump in, ensure your system meets the following:
- A Server running Linux VPS.
- A non-root user with
sudoprivileges. - Available Snap utility. (For Ubuntu 16.04 LTS and later, you likely already have Snap)
- Have installed Wine application.
Quick Guide to Install Notepad++ on Linux VPS Using Snap
Snap offers a breeze of installation, especially when compared to the standalone Wine method. Plus, it works on most Linux distros, even if the program you want isn’t officially available.
- Pop open your terminal and type:
snapIf you see the Snap description, you’re good to go! But if your first step didn’t reveal Snap, you’ll need to install it for this method to work.
Instructions can vary slightly depending on your distro, but you can usually find them on the distro’s website.
- Once Snap is ready to roll, use the command below to install Notepad++ using the Snap method:
sudo snap install notepad-plus-plusThat’s it! Snap will handle both the Notepad++ installation and the necessary Wine components, making your life easier.
- To update Notepad++ on Linux after installing it using the snap package installation method, run:
sudo snap refresh notepad-plus-plus
- If you do not need Notepad++ anymore due to your reasons, use the following command to uninstall it from your system:
sudo snap remove notepad-plus-plusHow to Launch Notepad++ on Linux [Snap Method]
After successful installation, launch it to start using this app.
- The following command launches the Notepad++ app:
$ notepad-plus-plusBut if that doesn’t work, it might be a path issue.
Here’s how to tackle it:
- Open your terminal and run
which notepad-plus-plus. Copy the path it displays. - In a new line within your terminal, paste the copied path followed by “notepad-plus-plus.”
For instance, if the path is “/snap/bin/”, you’d use:
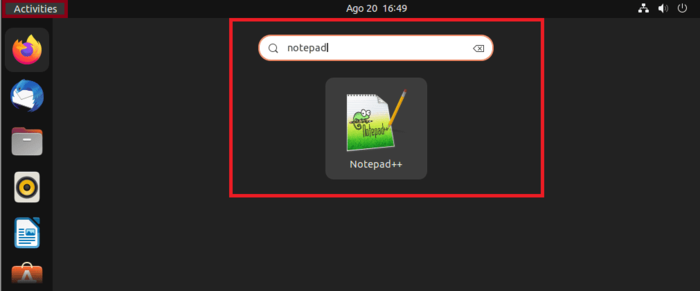
/snap/bin/notepad-plus-plusAlternatively, you can hit the Activities button (usually top left corner) to access all your applications.
- Type “notepad++” in the search bar that appears.
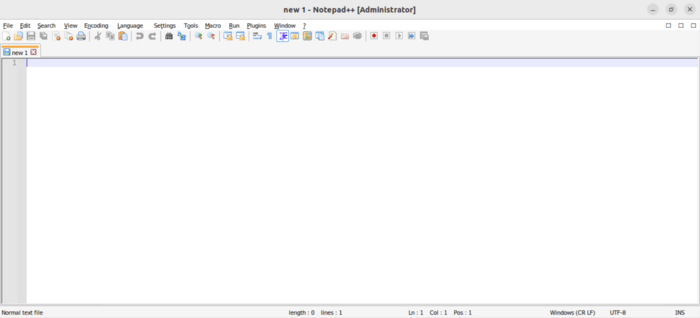
- Once you see the Notepad++ icon, just click on it to launch your favorite code editor and get started!

- Clicking the Notepad++ icon launches the editor, ready for your coding adventures!

Steps to Install Notepad++ on Linux VPS Using Wine app
Wine is an emulator for installing Windows applications that is one of the preferred methods to install Notepad++, especially on Debian.
If you are using other Linux distributions, the previous method, snap, might be a better way.
Here’s a step-by-step guide to installing your favorite code editor using the Wine method:
- Open your terminal and type:
wget -qo- https://dl.winehq.org/wine-builds/Release.key | sudo apt-key add -If it throws an error, try these two commands instead:
wget -qo- https://dl.winehq.org/wine-builds/Release.key
sudo apt-key add Release.key- Stock your system with Wine’s official repository using this command:
sudo apt-add-repository 'deb https://dl.winehq.org/wine-builds/ubuntu/ bionic main'- Ensure your system has the latest package info with:
sudo apt-get update- Install Wine with this command (press ‘y/yes’ when prompted):
sudo apt-get install --install-recommends winehq-stableNow, tell Wine if you have a 32-bit or 64-bit system by running these commands in your terminal:
export WINEARCH=win32
export WINEPREFIX=~/.wine32
To download Wine:
- Head to the official website of Notepad++ and grab the latest installer.
- Navigate to the downloaded installer file and right-click it. Choose “Open With Other Application” > “Wine Windows Program Loader” to run it with Wine.
- Select your preferred language in the “Installer Language” prompt and hit “OK.”
On the Installation Wizard, follow:
- Click “Next” on the initial setup screen.
- Accept the license agreement.
- Choose an installation folder and click “Next.”
- Select “Minimalist” for basic components or “Custom” to pick specific features (like plugins).
- Check “Create Shortcut on Desktop” for easy access (optional).
- Finally, click “Install” to begin the installation.
Remember, Wine compatibility can vary, so if you encounter issues, there are online resources to troubleshoot. Also, you can ask the OperaVPS technique support team.
How to Launch Notepad++ on Linux [Wine Method]
After a successful Notepad++ installation using the Wine method, follow the below steps to launch it and have a shortcut on your desktop.
If you didn’t create a shortcut during the installation, find Notepad++ nestled within your Applications menu, just waiting to be clicked.
You can also launch Notepad++ directly from the terminal using the wine start command:
wine start 'installation\path\for\Notepad++'Replace “installation\path\for\Notepad++” with the actual path where you installed Notepad++.
For example, if it’s in “Program Files (x86),” your command would look like this:
wine start 'C:\Program Files (x86)\Notepad++\notepad++.exe'Conclusion
We’ve explored two installation methods to quench your coding thirst, which is helpful for Ubuntu, Debian, and CentOS users. Snap offers a one-click breeze, perfect for beginners.
Simply ensure Snap is installed and run sudo snap install notepad-plus-plus in your terminal.
Wine provides more control but requires additional setup. Follow our step-by-step guide to install Wine, configure it for your system, and download the Notepad++ installer.
Once installed, you can launch Notepad++ using the desktop shortcut (if created), the Applications menu, or the terminal with the wine start command and the correct installation path.