How to Set NTP Server on Windows Server?
Accurate time synchronization is essential for event logging, network security, and system operations. Network Time Protocol (NTP) can be configured on different versions of Windows such as:
- Windows Server 2022
- Windows Server 2019
- Windows Server 2016
- Windows Server 2012 R2
- Windows Server 2012
- Windows 11
- Windows 10
You can easily use NTP on your Windows Time service to synchronize time across a network in two different methods.
Steps to Set NTP Server on Windows Server
Network Time Protocol (NTP) is an internet protocol used to synchronize with computer clock time sources in a network.
After buying Windows VPS, you can choose one of the explained methods in this guide to enable NTP on your Windows Server. Let’s get started:
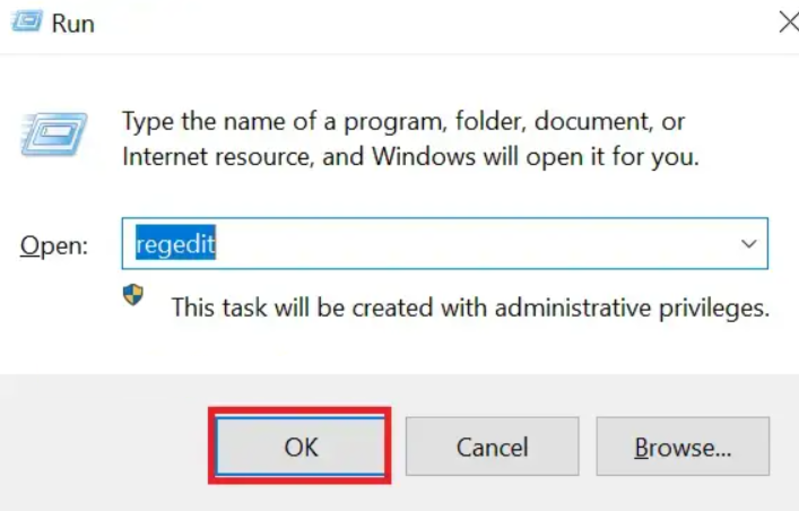
Step 1. Open Registry Editor
Search for the ”Run” application in the start menu. There, type in ”regedit” and press Enter.
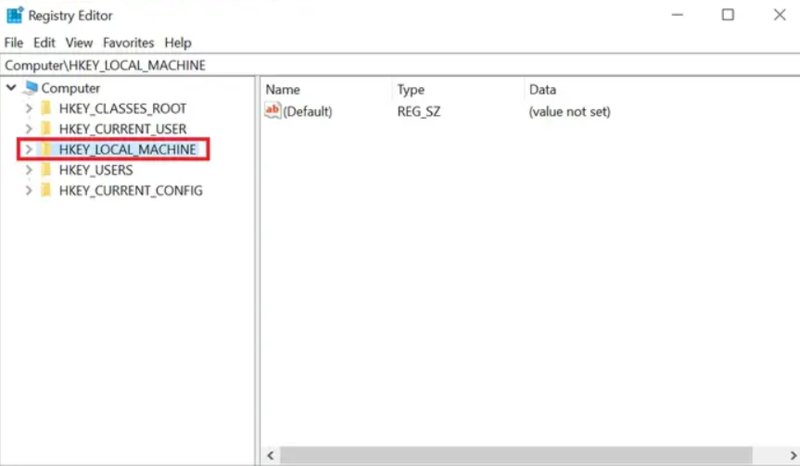
There will appear a window similar to the one below.
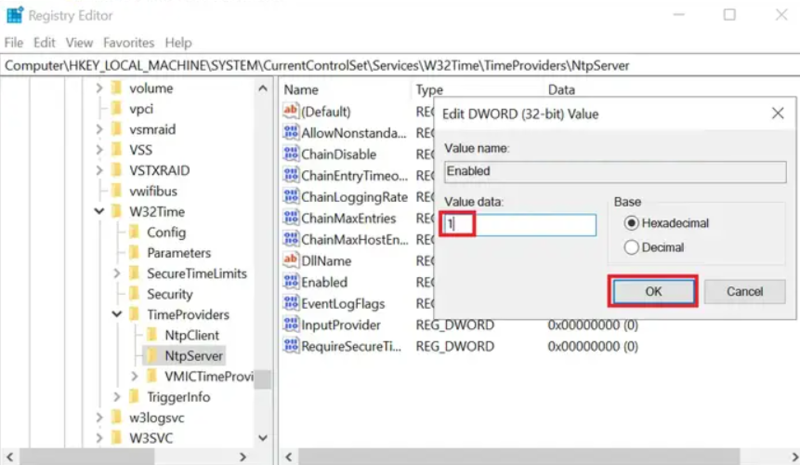
Step 2. Find NTP Server Files
Follow the below path to go to the NTP Server Configuration:
Computer>HKEY_LOCAL_MACHINE>SYSTEM>CurrentControlSet>Services>W32Time>TimeProviders>NtpServer.
You can see the tree’s end in the picture below. As you can see, the files we are looking for are on the right pane.

Step 3. Enable NTP Server
To open a tiny window, double-click the “Enabled” file. A section on the window titled “Value data” is there. As shown below, change the value from 0 to 1.
After changing, click “OK”.
Step 4. Create the AnnounceFlags 5
This computer’s status as a trustworthy timeserver Windows is controlled by entry.
If a computer is not also designated as a timeserver, it cannot be certified as dependable. The default value for domain members is 10.
The default value for stand-alone clients and servers is 10.
Follow the path below:
Computer>HKEY_LOCAL_MACHINE>SYSTEM>CurrentControlSet>Services>W32Time>
To go to the ”Config”:
Computer>HKEY_LOCAL_MACHINE>SYSTEM>CurrentControlSet>Services>W32Time>Config.
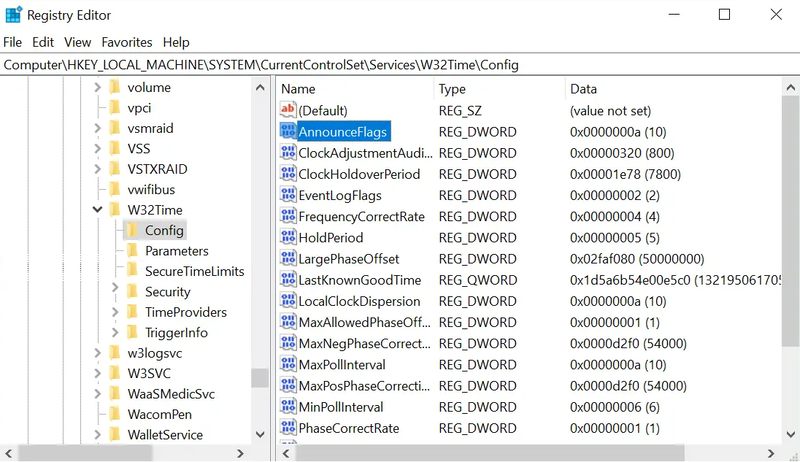
On the right pane, as seen above, you will find a file with the name “AnnounceFlags” while there.
Double-click it. That will cause a tiny window akin to the one in Step 3 to open.
Change the value from a to 5 under “Value data“.
Step 5. Restart NTP Server
By pressing the Windows key and typing “Services,” the “Services” window will appear.
Look for “Windows Time” once it has opened. Click “Restart” from the context menu when you right-click on it.

Step 6. Open UDP port 123 in the Firewall
Your Windows Server must have UDP port 123 open for NTP to connect to the clocks. Please check your firewall configuration if you can’t reach the servers.
To complete this step, follow the How to open a Port on Windows VPS Firewall guide. Remember that this port is UDP and not TCP.
Configure NTP Using PowerShell
From Windows XP and Windows Server 2008 up to the most recent versions of each OS, PowerShell offers a command-line tool with the name w32tm.exe.
You may set up your Windows PC to sync with online timeservers using the w32tm.exe program.
This is typically the tool of choice when configuring and keeping track of the time on your Windows Server NTP installation.
If you prefer to use PowerShell, the second method of this guide would be your preferred one to Set NTP Server on Windows.
Open your PowerShell as administrator and use the following commands to do all the steps of the previous method.
Enable NTP Server
Set-ItemProperty -Path "HKLM:\SYSTEM\CurrentControlSet\Services\w32time\TimeProviders\NtpServer" -Name "Enabled" -Value 1Create the AnnounceFlags 5
Set-ItemProperty -Path "HKLM:\SYSTEM\CurrentControlSet\services\W32Time\Config" -Name "AnnounceFlags" -Value 5Restart NTP Server
Restart-Service w32TimeRun the command below to allow NTP port: (If Firewall is running)
New-NetFirewallRule `
-Name "NTP Server Port" `
-DisplayName "NTP Server Port" `
-Description 'Allow NTP Server Port' `
-Profile Any `
-Direction Inbound `
-Action Allow `
-Protocol UDP `
-Program Any `
-LocalAddress Any `
-LocalPort 123
Most Used Commands to Configure NTP Server
Now, you know how you can w32tm set NTP server. Let’s review some useful commands while setting up NTP Server on Windows.
To check NTP configuration, run:
w32tm /query /configurationTo check NTP server list, type:
w32tm /query /peersTo force NTP server synchronization, run:
w32tm /resync /nowaitUse the command below to show the source of the NTP time:
w32tm /query /sourceTo show the status of NTP service, type:
w32tm /query /statusAt this point, you know everything you need to Set NTP Server on Windows Server. The above commands are also used for configuring Windows server 2022 NTP Server.
How to Disable NTP Server on Windows Server?
To disable Windows Internet Time Update, follow the below steps:
1. Load Control Panel.
2. Click Date and Time.
3. Click the Internet Time tab.
4. Click Change settings.
5. Click to clear the checkbox to synchronize with an Internet timeserver.
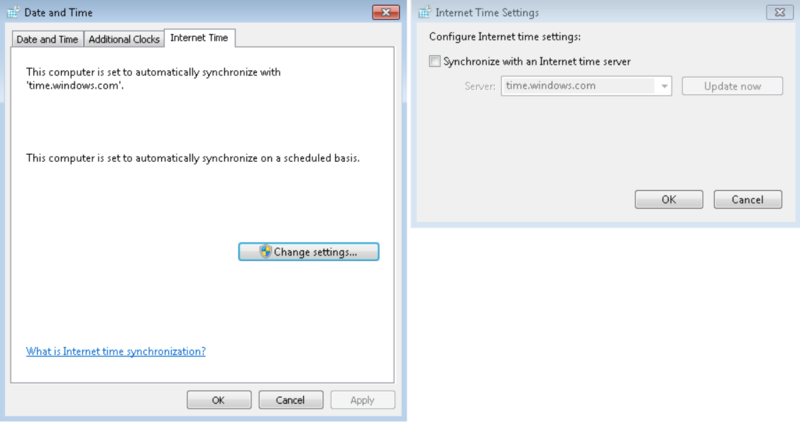
6. Click OK to save.
7. Close the Date and Time dialog box.
8. Close the Control Panel.
Using the above steps also helps you know how to configure NTP server in Windows Server 2019.
How to Set NTP Server in Windows Command line?
If you prefer to use the command line to configure NTP Server on Windows, run the command below.
Keep in mind that Your NTP server’s hostname or IP address should be substituted for [server].
w32tm /config /syncfromflags:manual /manualpeerlist:"[server]" /reliable:YES /updateWhen you are finished, use the following commands to restart the Windows Time service:
net stop w32time

net start w32time
How do I configure NTP Server in Windows Server 2016?
Follow the below steps to configure Windows Server 2016 as an NTP server:
Sync Server Time by running:
w32tm /config /manualpeerlist:pool.ntp.org /syncfromflags:MANUALpool.ntp.org is an example of an external NTP server
Restart the time service to apply the recent changes:
Stop-Service w32timeStart-Service w32timeTo enable NTP server feature, set the Enabled flag to 1 open and regedit, and navigate to:
HKEY_LOCAL_MACHINE\SYSTEM\CurrentControlSet\Services\W32Time\TimeProviders\NtpServerPrevent syncing with the hostname by disabling Time Sync for VMs (If Windows runs as a VM)
Sync Windows client machines time to sync their time by running:
w32tm /resyncThe time synchronization across your network must be accurate now.
How do I find my NTP Server on Windows?
To find out the latest/current NTP configuration of your system, run:
w32tm /query /configurationThe configuration settings that you have set up will be displayed using this command.
Also, if you need to check the stratum, last sync, NTP server, and the NTP server/servers that the system is getting time from, type:
w32tm /query /statusAnd finally, consider that the following command shows the current system time:
time /THow do I know if NTP is running on Windows server?
To do this, you can check whether the NTP Server is reporting the correct time and date. So, run:
: w32tm /stripchart /computer:IPADDRESSORDNSNAME /dataonly /samples:5Where the IP Address or DNS name of the NTP time-server you want to check is equal to IPADDRESSORDNSNAME.
The below commands enable you to check if NTP is running on your Windows server:
w32tm /query /source
w32tm /query /peers
How to set NTP Server in Active Directory?
To maintain precise time synchronization between domain computers and domain controllers, you can set up an NTP server Windows using the below path:
- Modify the Server value to NTP
- Set the AnnounceFlags value to 5
- Enable NTPServer
- Configure Time Correction Settings on all the domain controllers
- Confirm Correct Time Settings for PDCs
How to set NTP in Windows 10?
Following the below path, you can set NTP Server Windows 10:
Control Panel > Clock, Language, and Region > Date and Time > Internet Time tab > Change settings… > Enable NTP > Specify a unique timeserver (Optional).
In this way, you can change NTP Server Windows. Finally, restart Windows 10 so that any modifications you make are applied and NTP is set up on your computer.
How do I sync time in CMD?
You can force Windows to show the correct time. To do this, search for ”Command Prompt”, right-click on it, and select ”Run as administrator ”. Then, type:
w32tm /resyncIn this way, the Windows NTP server will be forced to synchronize its time with a trustworthy Windows timeserver, guaranteeing that the accurate time is shown.
How do I manually sync time with NTP server?
To sync your system time with an NTP manually, follow the below steps:
- Open an elevated Command Prompt.
- Run the command below while you replace ntp_server with the address of your preferred NTP server:
w32tm /config /manualpeerlist:"ntp_server" /syncfromflags:manual /reliable:yes /update- When you are finished, run the below commands to restart the time service:
net stop w32time

net start w32time- To resync the time with the NTP server, type:
w32tm /resync- Check the status of synchronization:
w32tm /query /statusHow to start NTP Service in Windows Server 2012?
Follow the below steps to set up NTP Service in Windows 2012:
- Search for Command Prompt, run it as an administrator, and type:
net start w32time- By pressing Enter, the time service will be initiated. In this way, your Windows 2012 server will synchronize time with external NTP servers or other time sources.
Does Windows use NTP?
Yes. Accurate event logging, security, and other system operations all depend on this synchronization.
The time synchronization is achieved by Windows operating systems via the Network Time Protocol (NTP). System clock accuracy and network synchronization are guaranteed via NTP.
Windows systems automatically synchronize their time with external domain controllers or NTP servers by default.
How do I Check my NTP Server Connection?
Follow the below path or use commands to learn how to check NTP server in Windows and check your NTP configuration:
Control Panel > Date and Time > Set the time and date > Internet Time > Change settings…
If you prefer to work on CML, run the commands below:
- Check your current NTP configuration:
w32tm /query /configuration- Check NTP Status:
w32tm /query /statusCheck your current System Time:
time /TMake sure you have elevated privileges when executing these commands.
How do I restart NTP service in Windows?
Follow the below steps to restart the NTP service:
Open a Command Prompt and run it as administrator. To Stop the time service, use the command below and press Enter:
net stop w32timeTo start the time service, run the following command and press Enter:
net start w32timeIn this way, the NTP service will be restarted on your Windows computer while accurate time synchronization is guaranteed.
What is the default NTP Server for Windows?
The time.windows.com NTP server is used by Windows for time synchronization. It can be different according to Domain-Joined Computers and Standalone Computers.
However, you can change the NTP server by following the below path:
Control Panel > Date and Time > Internet Time > Change Settings > Select an STP server > Update Now.
FAQ
Is it possible to set my server to automatically sync time?
Yes. Go to the "Internet Time" tab and select "Change Settings." If you want the clock to sync automatically, click the "Synchronize with an internet time server" box; otherwise, uncheck it to set the clock manually.
Which NTP server is better to be used?
It is always advised to select an NTP server that is located close to the device you wish to time-synchronize. It is also advised to use a server that is hosted by a reputable business or organization.
Conclusion
After setting up the NTP service on your server, Windows clients connected to the domain will synchronize with the domain controllers and other domain controllers in your environment.
Keep in mind that if NTP is set up on a virtual machine, make sure it is configured to exclusively sync with the time service rather than the host system.
Thank you for sharing your precious knowledge. Just the right information I needed.
This is an excellent writeup which I found very useful. Thank you for posting!
So glad it was helpful! We enjoy sharing our knowledge with readers like you.
How to synchronize system time on Windows 2019 with an NTP server?
On Windows 2012 and Windows 2019, you need to use the W32Time service for time synchronization. Also, you must have administrator privileges and the knowledge of working with the Windows registry.