How to Setup TeamSpeak 3 Server on VPS
To communicate and chat with friends in a group or team, especially when you are playing an online game, you need a stable and light tool! TeamSpeak is a free VoIP(Voice over Internet Protocol) software that you can set it up on a VPS and create your dedicated TeamSpeak server. here we will show you how to install a Teamspeak server on VPS(virtual private server) and use it. the installation depends on your VPS’s OS(operating system), but don’t worry, the Teamspeak installation can be done in a few simple steps.
By the end, you’ll learn how to create Teamspeak server on Windows and Linux VPS. also, how you able to connect to the TeamSpeak server and make a profile.
How to setup TeamSpeak Server on Windows VPS
let’s start with the easy one, Setting up the TeamSpeak server on a VPS with Windows OS that you can easily connect with RDP and install TeamSpeak as like as your own Windows PC.
Step 1 – Download the TeamSpeak
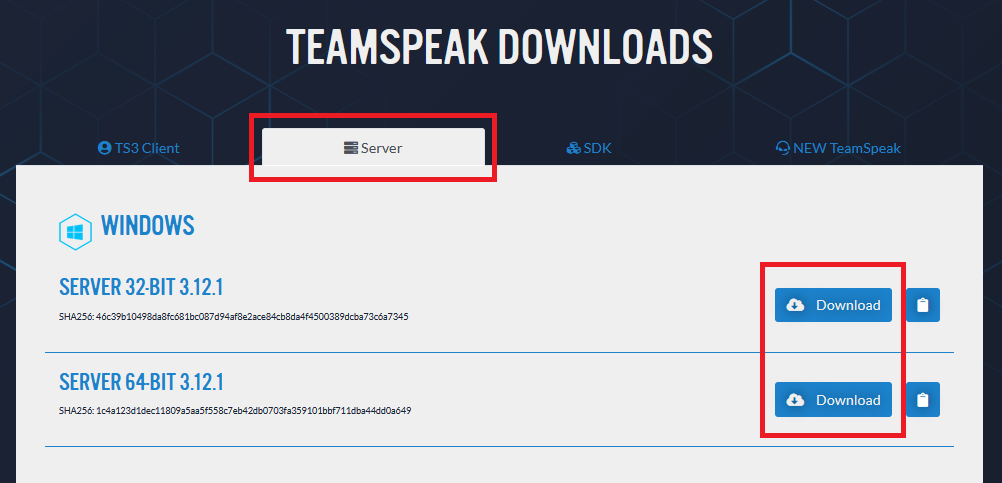
Log in to Windows VPS and use the browser to download the TeamSpeak 3 server version.
https://www.teamspeak.com/en/downloads/#server
Step 2 – Extract the files and run the installation
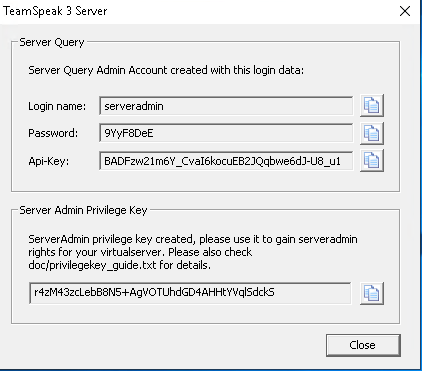
Extract the files to a directory and run the installer file(ts3server.exe), it will ask you to accept the license agreement, once you accept, you will be provided with Login Name, Password, API-Key, and Privilege Key. Copy all information and save it for the next step.
Step 3 – Allow TeamSpeak port on Windows firewall
By default, Windows does not allow incoming ports for new services unless you allow it during installation, or add a rule manually and allow the required ports on Windows firewall. TeamSpeak is using various ports/protocols to communicate between client and server, here we will need only Voice, Filetransfer, and ServerQuery (raw) ports.
| Service | Protocol |
Local Port (Server) |
Required? |
| Voice | UDP | 9987 | Yes |
| Filetransfer | TCP | 30033 | Yes |
| ServerQuery (raw) | TCP | 10011 | Optional |
| ServerQuery (SSH) | TCP | 10022 | Optional |
| WebQuery (http) | TCP | 10080 | Optional |
| WebQuery (https) | TCP | 10443 | Optional |
| TSDNS | TCP | 41144 | Optional |
Step 4 – Connect to TeamSpeak Server as Admin
The TeamSpeak installation is done, now you need to connect to this server through TeamSpeak Client(download here) as admin to able to manage the server.
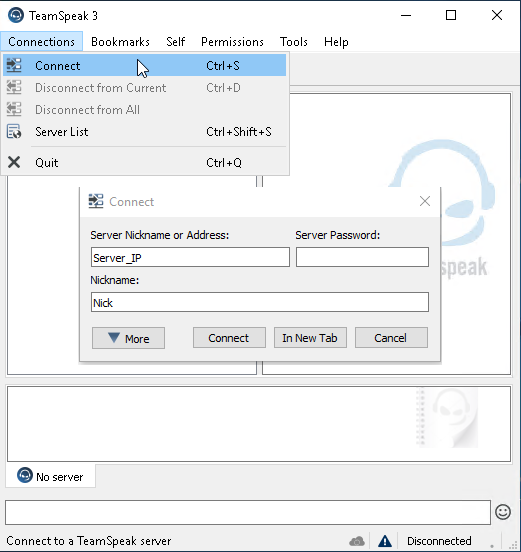
use the Connections Tab and Connect option, put the VPS IP(ex, 192.168.1.10) in Server Nickname or Address field, and press Connect.
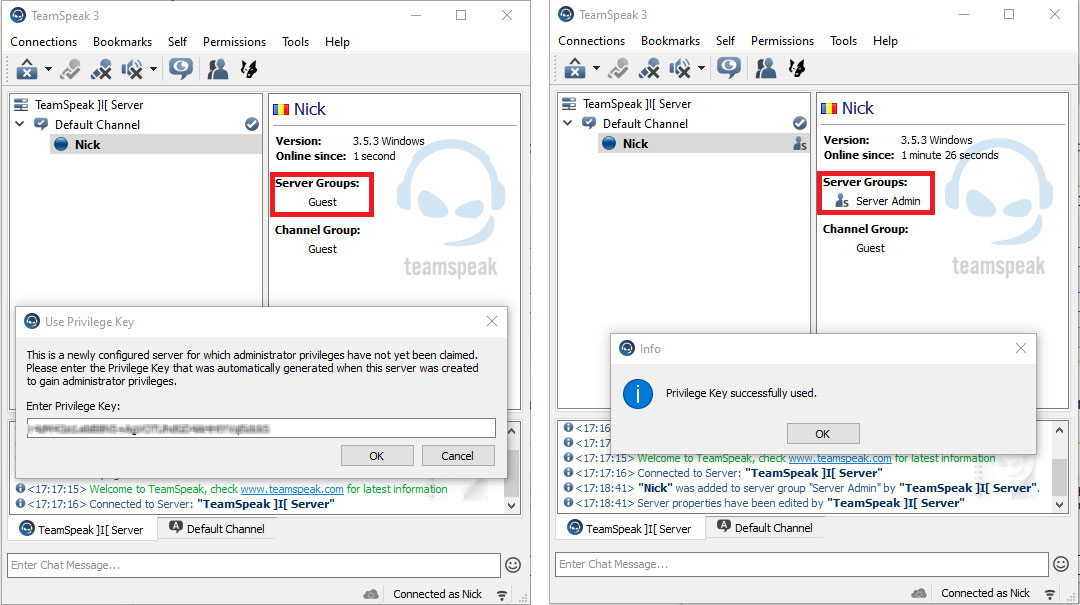
When you connect successfully to the TeamSpeak server, it will ask you for the Privilege Key to change your user rank to admin.
How to setup TeamSpeak Server on Linux VPS
TeamSpeak setup on Linux depends on the distribution that is running on VPS, it can be Ubuntu, Centos, Debian, Fedora, etc. here we will only cover the TeamSpeak server setup on Ubuntu 18.04 distro. I’m sure this guide can be used also for other Ubuntu versions and Debian.
When you buy a Ubuntu VPS, you will be provided with SSH root access. connect to your VPS through SSH and make sure all packages are updated to the latest version before TeamSpeak installation:
apt-get update && apt-get upgradeStep 1 – Download and Extract the TeamSpeak
To download the latest version of TeamSpeak, Copy the download link and put a wget command in front of the URL.
wget https://files.teamspeak-services.com/releases/server/3.12.1/teamspeak3-server_linux_amd64-3.12.1.tar.bz2Note: If it gives you the following error:
cannot verify files.teamspeak-services.com's certificate, issued by ‘/C=US/O=Let's Encrypt/CN=R3’: Issued certificate has expired.You just need to put a parameter (--no-check-certificate)to the end of wget command:
wget https://files.teamspeak-services.com/releases/server/3.12.1/teamspeak3-server_linux_amd64-3.12.1.tar.bz2 --no-check-certificate
Extract the downloaded file(since you will download a newer version of Teamspeak, it won’t be exactly the below file name, so, after download, check the downloaded file name and replace it in the below command):
tar xvf filenameExample:
tar xvf teamspeak3-server_linux_amd64-3.12.1.tar.bz2teamspeak3-server_linux_amd64it will make a new folder in the root directory called:
teamspeak3-server_linux_amd64Step 2 – Configure the TeamSpeak
First of all, Accept the license agreement for TS3.
touch /teamspeak3-server_linux_amd64/.ts3server_license_acceptedNow, To add the TeamSpeak service to the Ubuntu startup services list, we need to create a file(teamspeak.service) in “/lib/systemd/system/” directory.
nano /lib/systemd/system/teamspeak.serviceNext, Copy and paste the following settings to this file and save it.
[Unit] Description=TeamSpeak 3 Server
After=network.target
[Service]
WorkingDirectory=/root/teamspeak3-server_linux_amd64/ User=root
Group=root
Type=forking
ExecStart=/root/teamspeak3-server_linux_amd64/ts3server_startscript.sh start inifile=ts3server.ini ExecStop=/root/teamspeak3-server_linux_amd64/ts3server_startscript.sh stop PIDFile=/root/teamspeak3-server_linux_amd64/ts3server.pid RestartSec=15
 Restart=always
[Install]
WantedBy=multi-user.target
Once you are done, close the nano editor and reload the daemon list to recognize the new service that we just added.
systemctl --system daemon-reloadStep 3 – Start and enable TeamSpeak
Now we should activate/enable/start the script to run automatically even when the server is rebooted.
systemctl enable teamspeak.service systemctl start teamspeak.serviceTo check the TeamSpeak service’s status, you can use the below command:
systemctl status teamspeak.serviceIf all is set correctly, you should see an output like this:
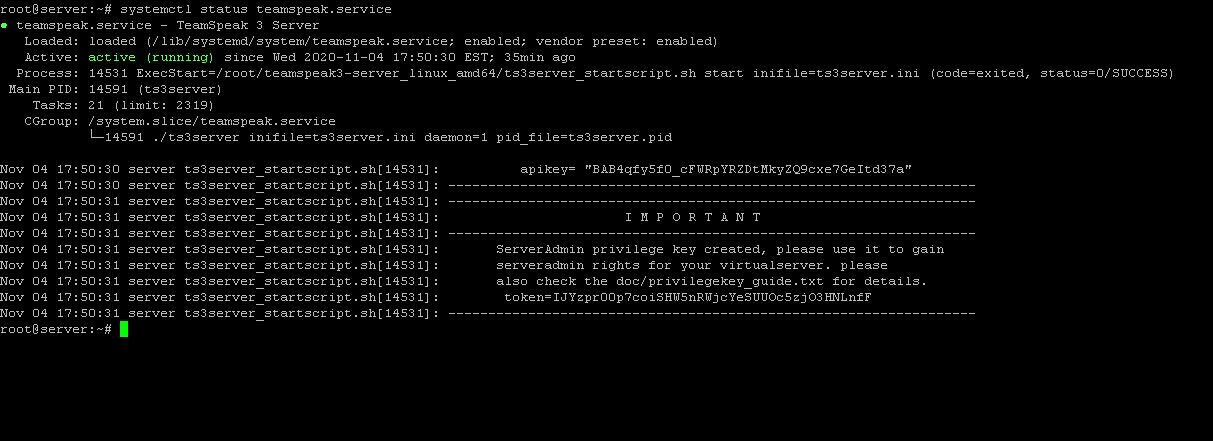
Step 4 – Connect to TeamSpeak server
You will be asked to provide a privileged key to gain the server’s admin rights at your first connection. To get this privileged key or token, you can check the logs in TeamSpeak directory.
cat /root/teamspeak3-server_linux_amd64/logs/ts3server_*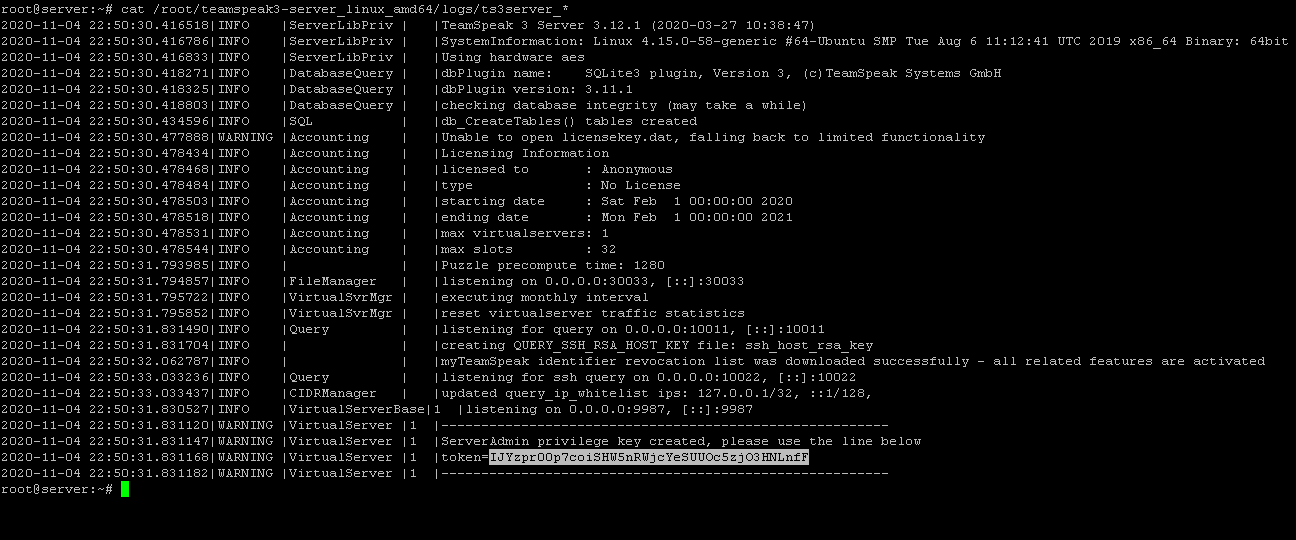
Run the TeamSpeak Client on your own PC, then use the Connections Tab and Connect option, put the VPS IP(ex, 192.168.1.10) in Server Nickname or Address field, and press Connect.

When you connect successfully to the TeamSpeak server, it will ask you for the Privilege Key to change your user rank to admin.

That’s it, if you have any ideas or facing a problem during installation, do not hesitate to share with us in the comments below!