How to Install Manjaro Linux?
If you have reached this article, you are probably familiar with Manjaro Linux and are interested in using its up-to-date and valuable features. As you know, Manjaro Linux is a beginner and attractive Linux distribution that was released on May 31, 2021, and was developed based on Arch Linux.
Since we have introduced you well to Arch Linux, you can guess what Manjaro features; yes, you guessed right, Manjaro Linux is a rolling distribution with updated packages.
You will get significant improvements and updates in this excellent Linux distribution which we have recently witnessed its usage expands. Manjaro Linux benefits from Linux kernel 5.10, and With improvements in support for flatpak and Snap package, ZFS file system, Calamares Installer has increased its appeal. In addition to these features, with a user-friendly graphical interface along with the new Breeze theme, it has worked well to satisfy its fans.
With its repository, Manjaro Linux releases updates after the packages are thoroughly tested and determined to be stable. Manjaro Linux, With an emphasis on stability, gives you the benefit of having a rolling distribution.
Now we come to the point, how to install and use Manjaro Linux? This tutorial will explain how to install Manjaro Linux step by step. If you want to benefit from Manjaro Linux on your Linux system, follow us to the end of the article.
Installing Manjaro Linux step by step
Manjaro can be installed and run on XFCE, KDE Plasma, and GNOME desktop environments. The steps to install Manjaro Linux are easier compared to Arch Linux thanks to having a GUI installer, and there is no need to worry; it is enough to follow the steps that we teach below.
Manjaro installation prerequisites
To start the process of installing Manjaro Linux, it is better to follow the following points and equip your system with the minimum requirements:
- At least 2 GB of RAM
- At least 2 GHz CPU
- At least 30 gigabytes of hard disk space
- Having an HD graphics card
- A reliable internet connection
Note: To free up disk space, you can start from scratch and remove previously installed operating systems. Also, if you are dual booting, you will need to shrink some partitions to create a partition for the previous OS. We recommend that you consider 50 GB of free disk space. It should be noted that it is better to back up your data before deleting or shrinking some partitions.
Step 1: Download Manjaro ISO
Manjaro disk images are available for desktop environments (DE) that range from GNOME, Budgie, Deepin, Tiling WM like i3, and more. Xfce and KDE are the most popular DE desktop versions.
We start the installation process by downloading the required ISO version from the official Manjaro website.
Download Manjaro KDE Plasma ISO
In this tutorial, we have chosen the KDE desktop environment. However, all DEs follow the same installation procedure.
Step 2: Burning the Manjaro ISO
After receiving the ISO, it’s time to burn the ISO file on a USB flash drive. To avoid possible problems, choosing a USB with a storage memory of at least 4 GB is better. To create a bootable USB of Linux manjaro, you can use different methods such as UNetbootin, Etcher, or Rufus.
After making sure the USB is bootable using the downloaded Manjaro ISO file, proceed to the next step
Step 3: Booting into a Live Environment
After the ISO is successfully burned to the USB drive, connect it to your system and reboot the system.
After rebooting the system, you can enter the Manjaro Live installation environment.
Booting from the installation environment requires changing the BIOS settings’ boot order. The next step is to save the changes and continue the system boot process.
To use a USB drive to boot your computer, follow the instructions provided by your PC manufacturer. As soon as you select the Manjaro disk, this menu will appear.
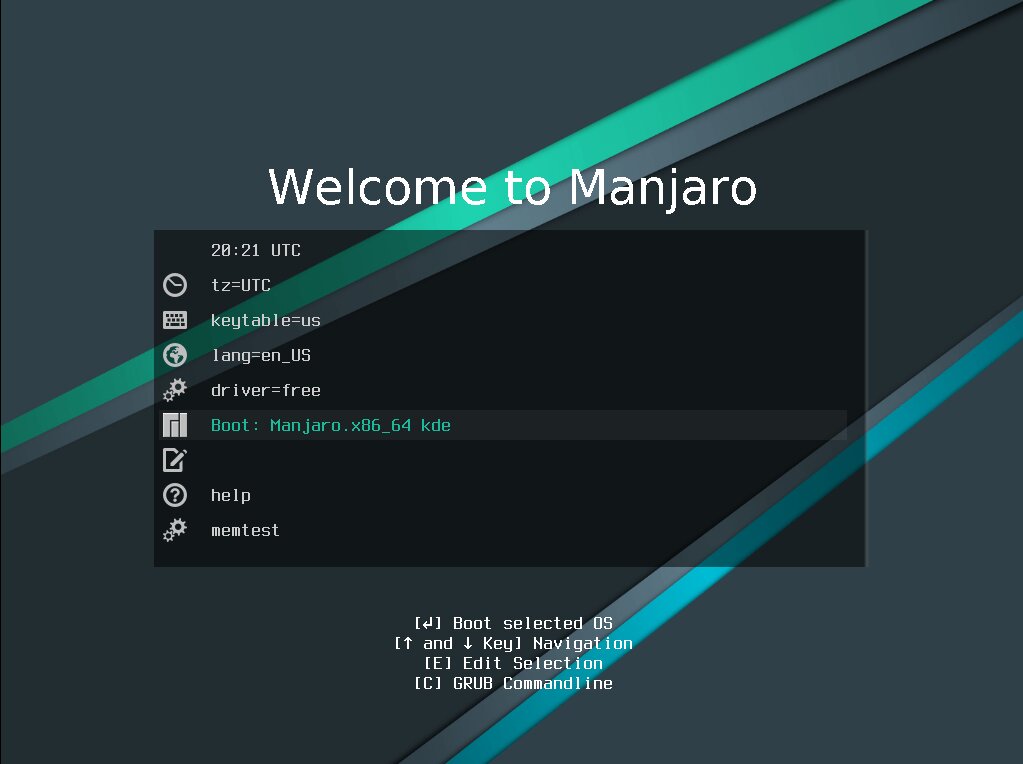
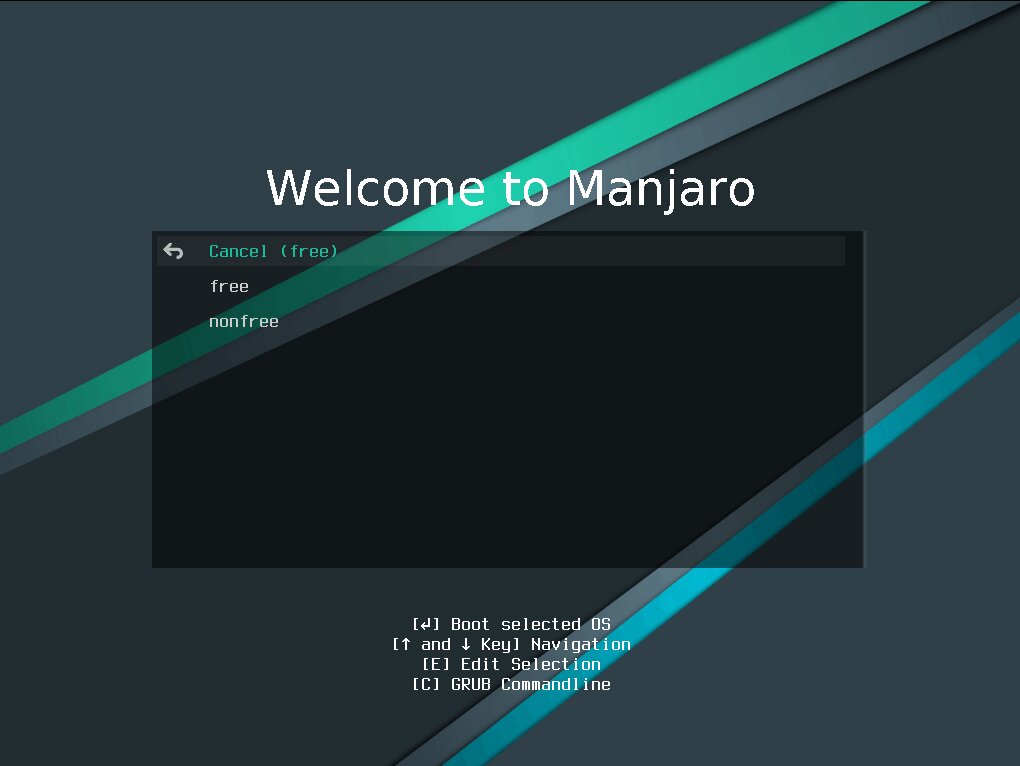
If your computer has a dedicated graphics card, you should use non-free (proprietary) drives. To select non-free drives, you can access the drives menu with the help of the arrow keys on the keyboard.
To start Manjaro, select the Boot option and press Enter. After waiting a few minutes, you will come across the Manjaro welcome screen.
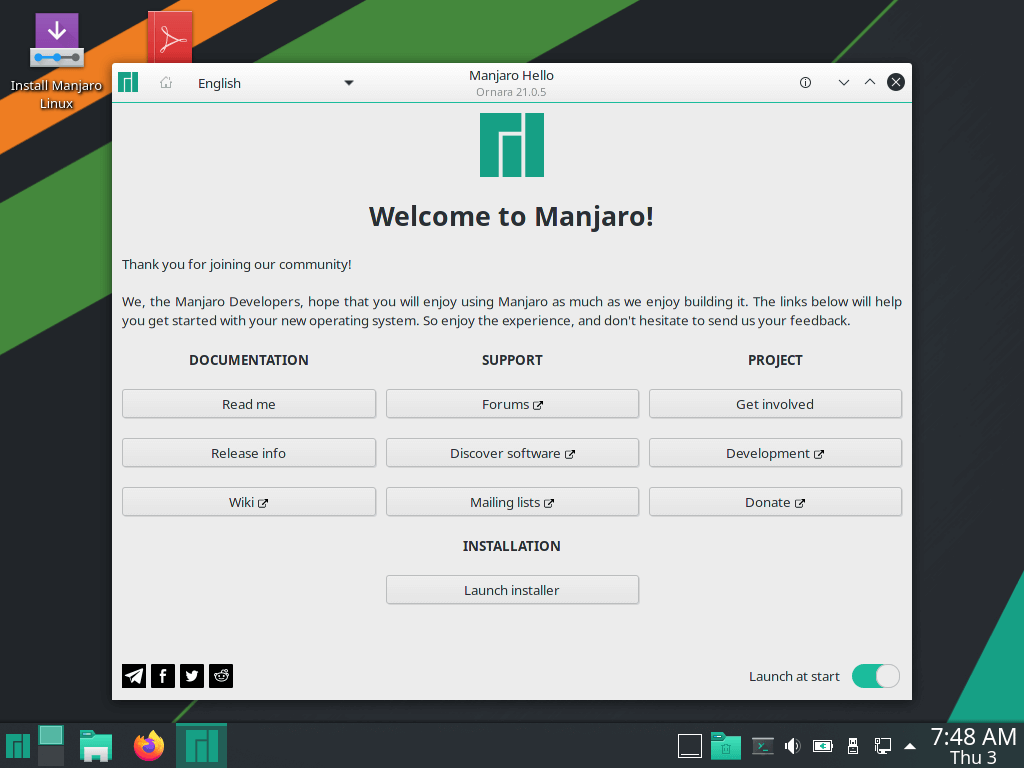
You will receive sufficient documentation and support resources to learn more about the Manjaro operating system. However, since we only care about getting Manjaro 21 up and running, we’ll proceed by selecting the “Launch Installer” option.
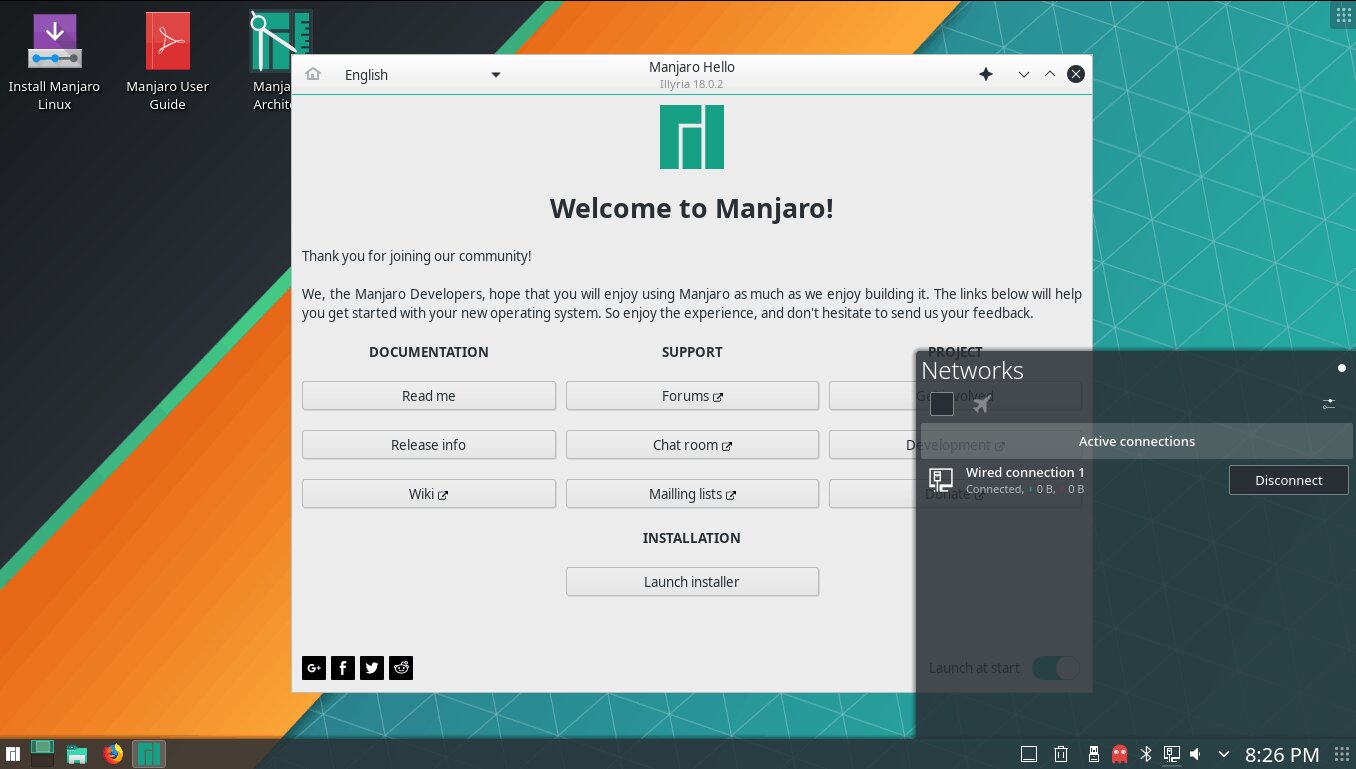
Note: Before we go to the next step, we should mention that when you connect to the Internet using the network selection menu in the lower right corner, Manjaro will automatically detect your location and set the appropriate time zone for you.
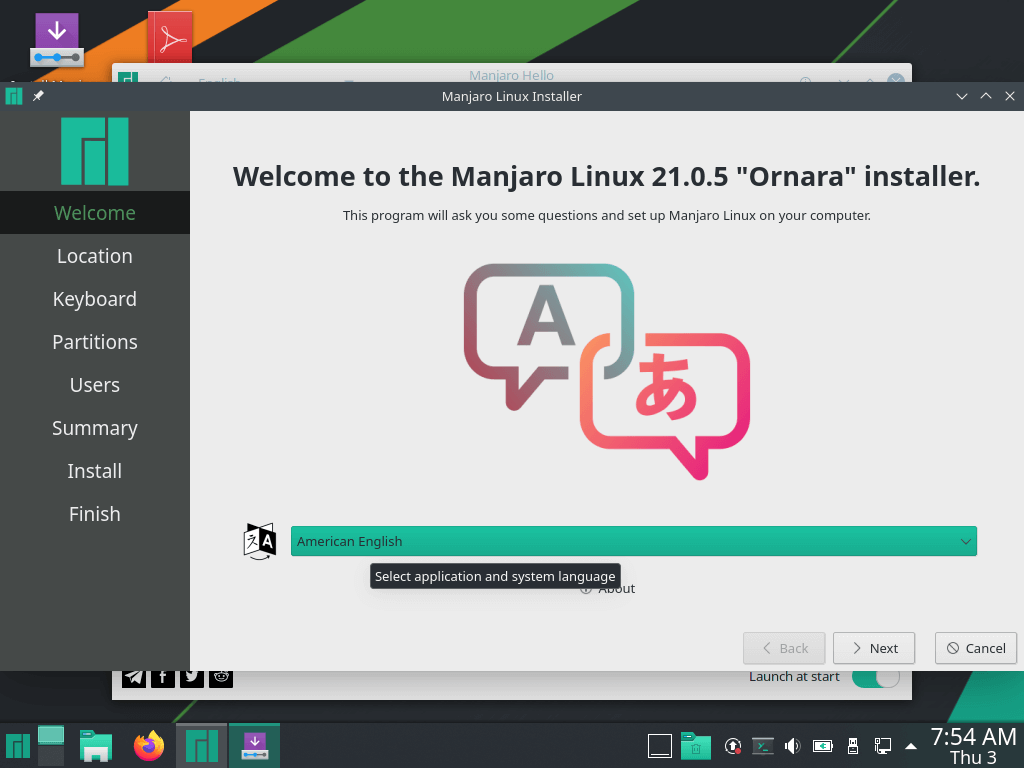
Step 4: Selecting the system language
After connecting to the network and clicking on the “Launch Installer” option, the main steps of the Manjaro installation will begin. You will be asked to select the system’s language on the new page. Usually, the American English language is preferred by default, but you can set the language you are more comfortable with and then click on the “Next” option.
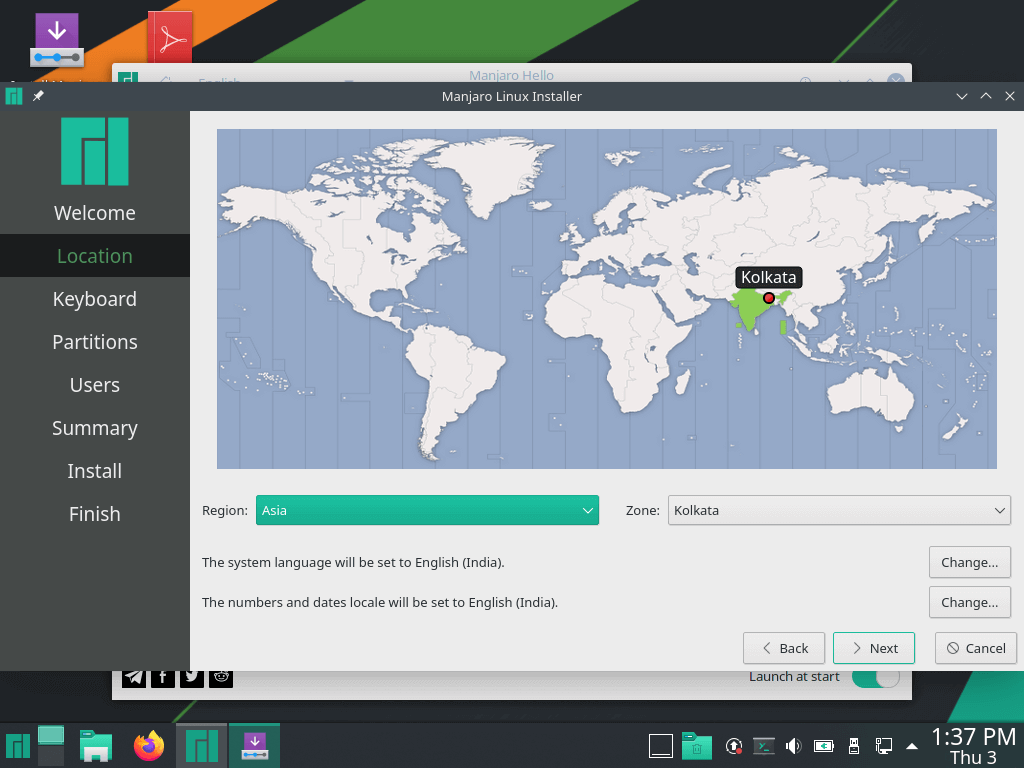
Step 5: Selecting Timezone
If you are connected to the Internet, the installer will automatically determine your location and time zone based on your Internet connection on the world map. As a result, after making sure that the location and time zone are correct, press Enter. You can also customize your time zone and location settings.
Step 6: Selecting Layout
In this step, in the menu you see, you specify the keyboard layout. Then click on the “Next” option.

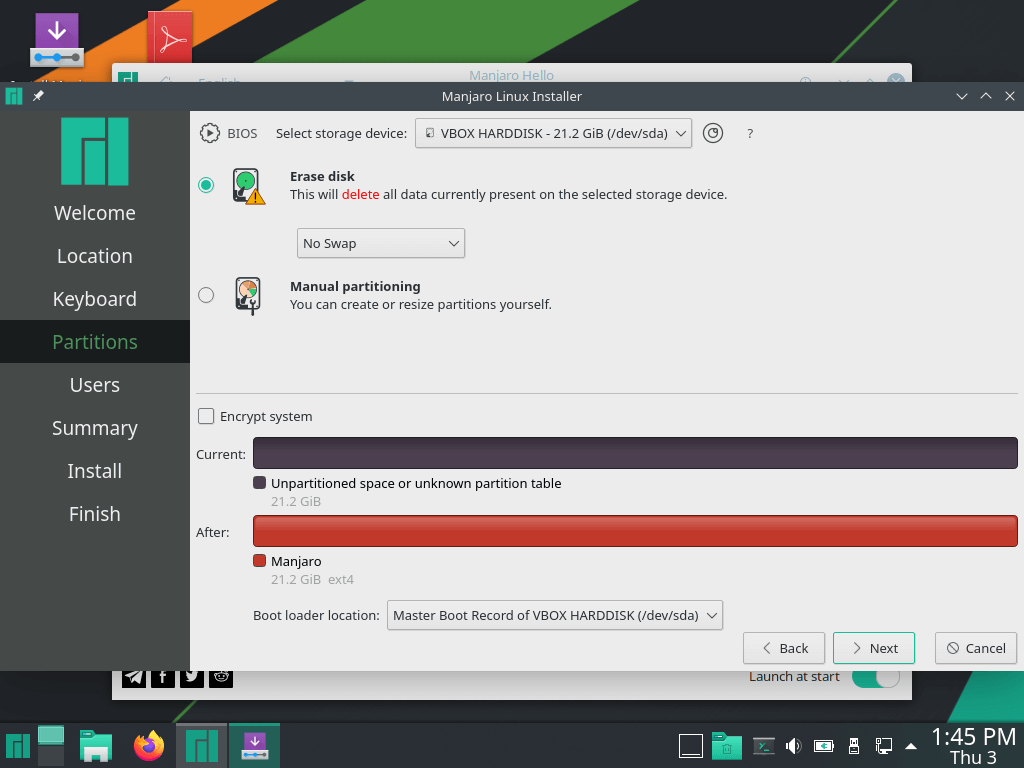
Step 7: Hard disk partitioning
This step is critical because the installation process cannot begin until the hard drive is partitioned. Two options, “Erase Disk” and “Manual Partitioning,” are available.
If you prefer the system to partition the hard disk automatically, the first choice, “Erase Disk,” is the most suitable method. The “Erase Disk” option is for users who have not partitioned a hard disk before or do not have enough experience and knowledge to do it manually.
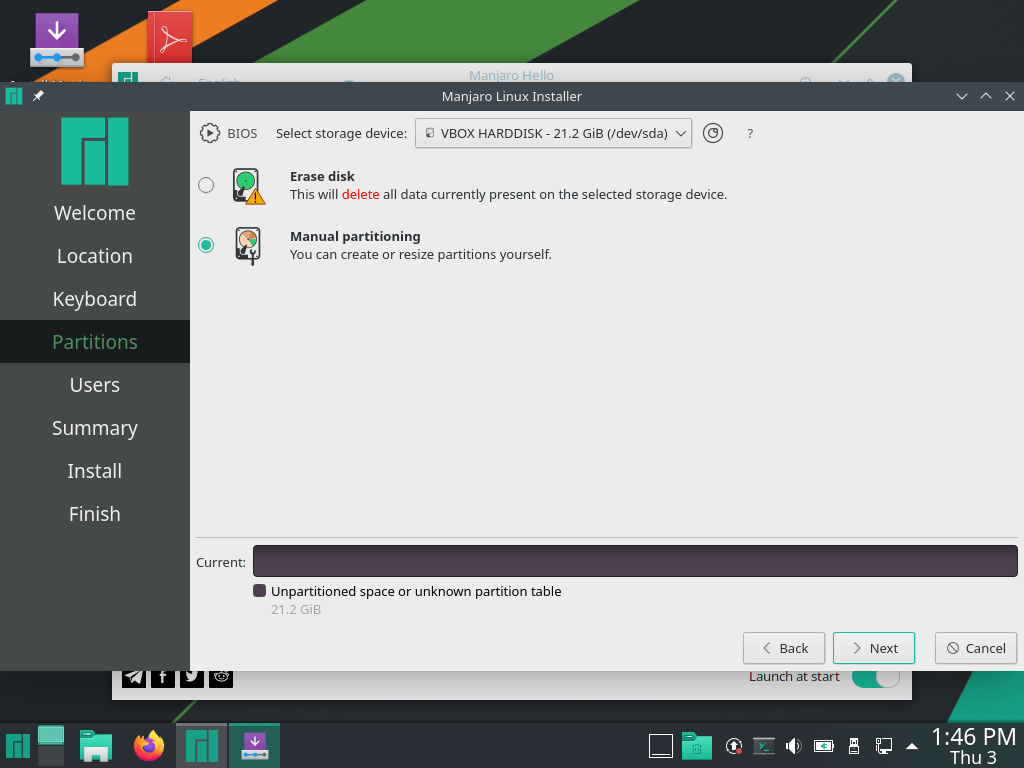
Option two, “Manual Partitioning,” allows you to set up the disk partitions however you like.
Since automatic partitioning is easy, we want to perform manual partitioning and create disk partitions in this tutorial.
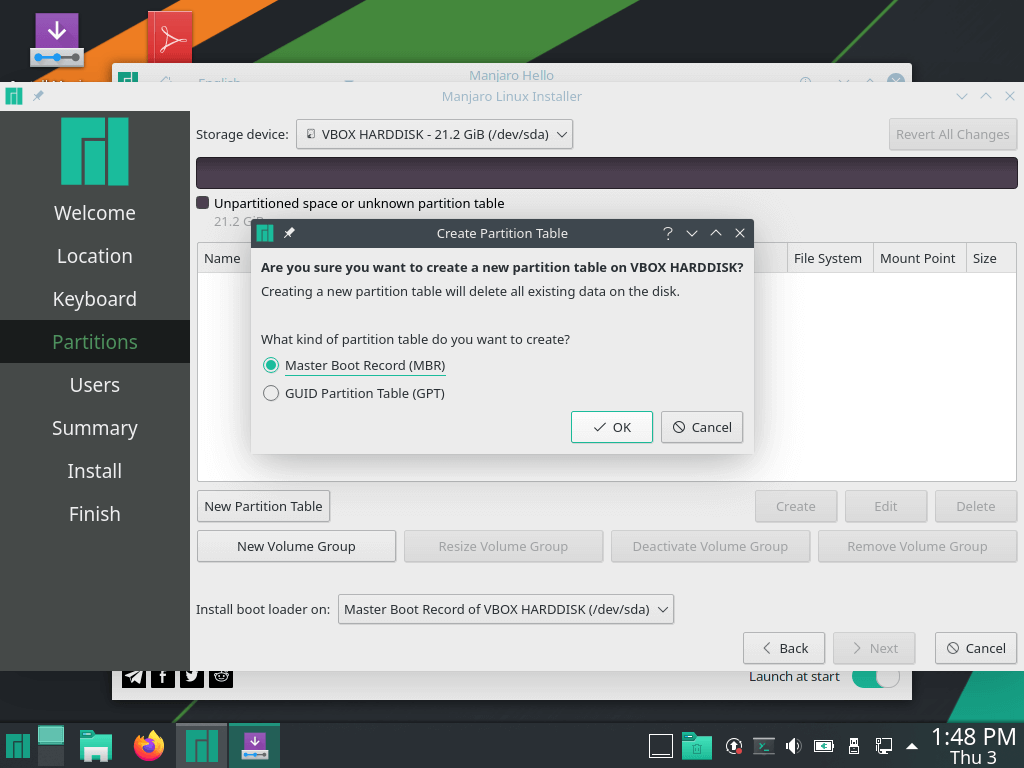
This step chooses the partition table type between MBR and GPT formats.
- GPT option: suitable for systems whose motherboard supports UEFI (Unified Extensible Format).
- MBR option: suitable for systems with Legacy BIOS.
After choosing the appropriate option, click on the “Next” button.
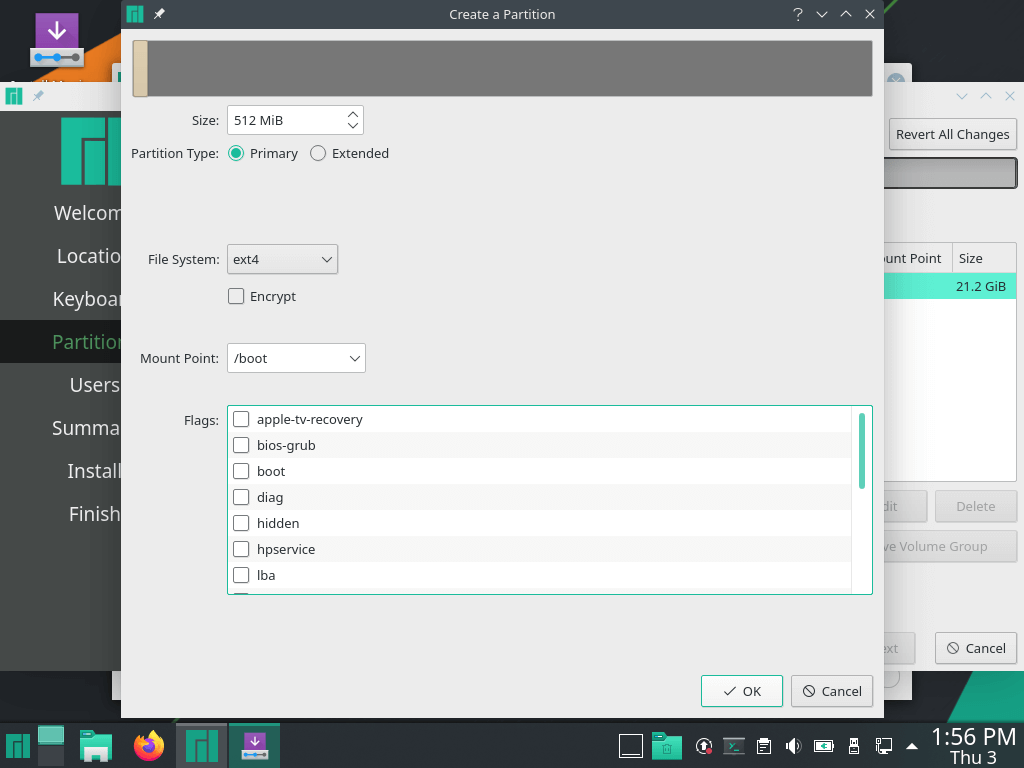
Depending on the available storage space, three standard partitions can be set up, each with its specific RAM allocation, as shown:
512 MB should be allocated to the /boot partition, 2048 MB to the swap partition, and the remaining space to the /root partition.
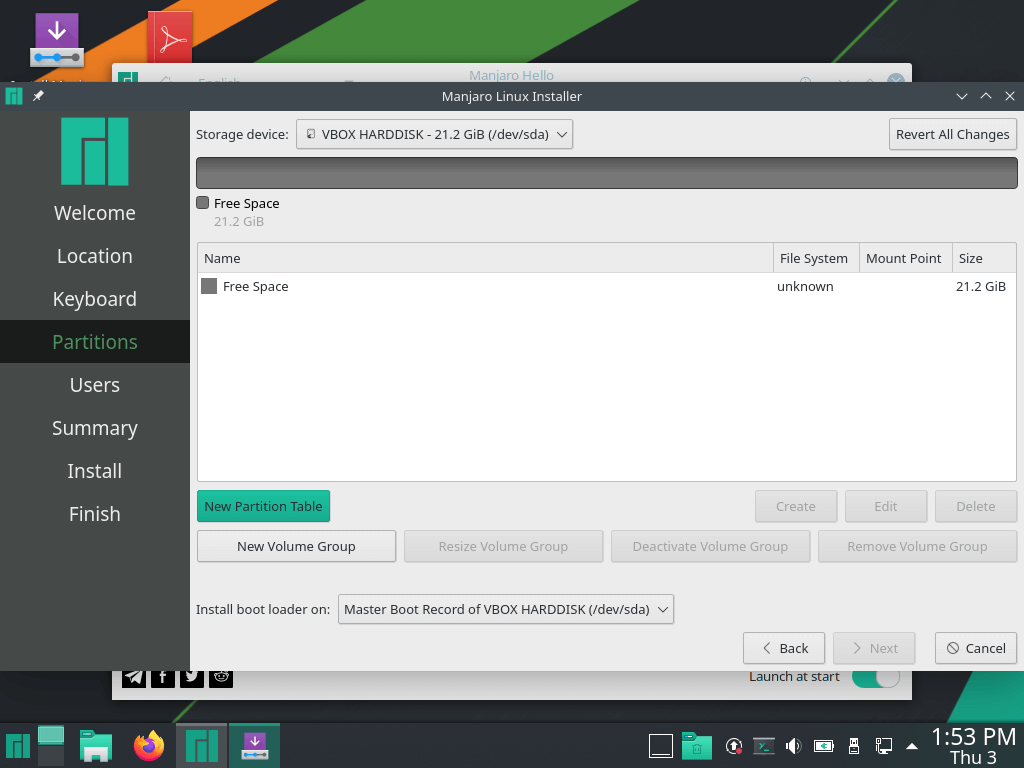
Step 8: Creating a boot partition
Clicking the” New Partition Table” button will open a window that allows you to create a boot partition. You just need to follow the steps shown in the pictures. Select the type of file system to use, the mount point, and the amount of partition memory, and then click “Ok” to go to the next step.
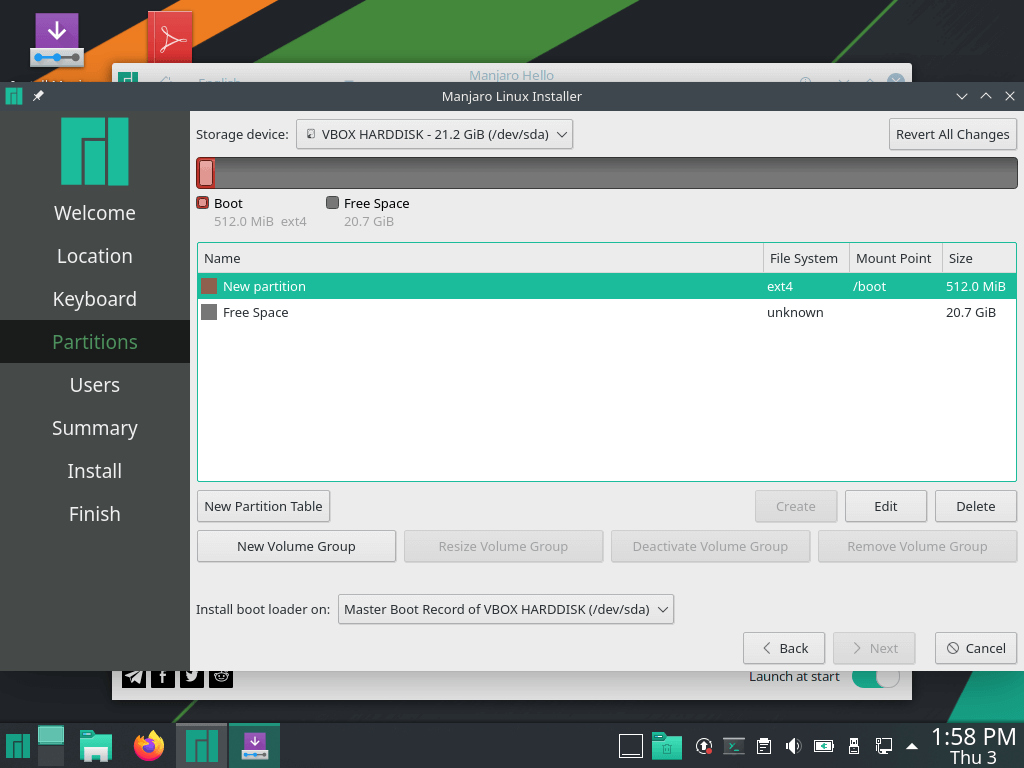
The updated partition table is displayed on the next page. A closer inspection shows that the boot partition has been successfully formed, and some free space is still available.
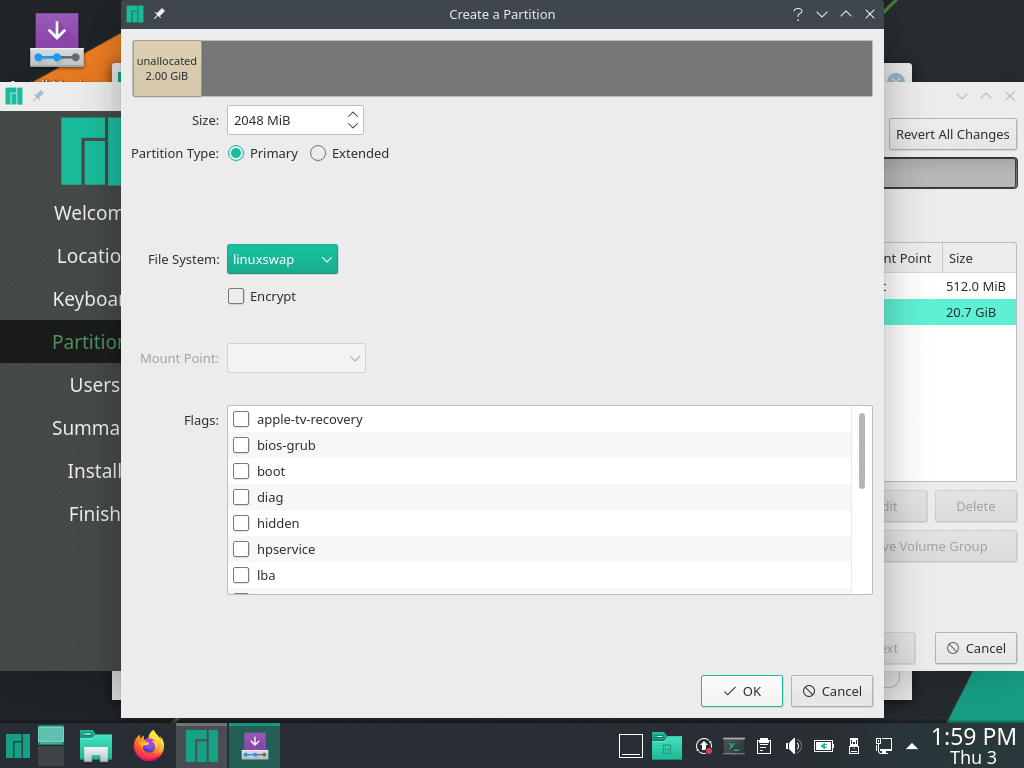
Step 9: Creating a Swap partition
Again, go to the “New Partition Table” option and follow the instructions to set up your swap space. If you try to create a mount point for the LinuxSwap file system, you will see that this option is grayed out, and you cannot make it.
This is because Swap is not a connection point for storing data but instead acts as a virtual memory space that is used when the main memory is full.
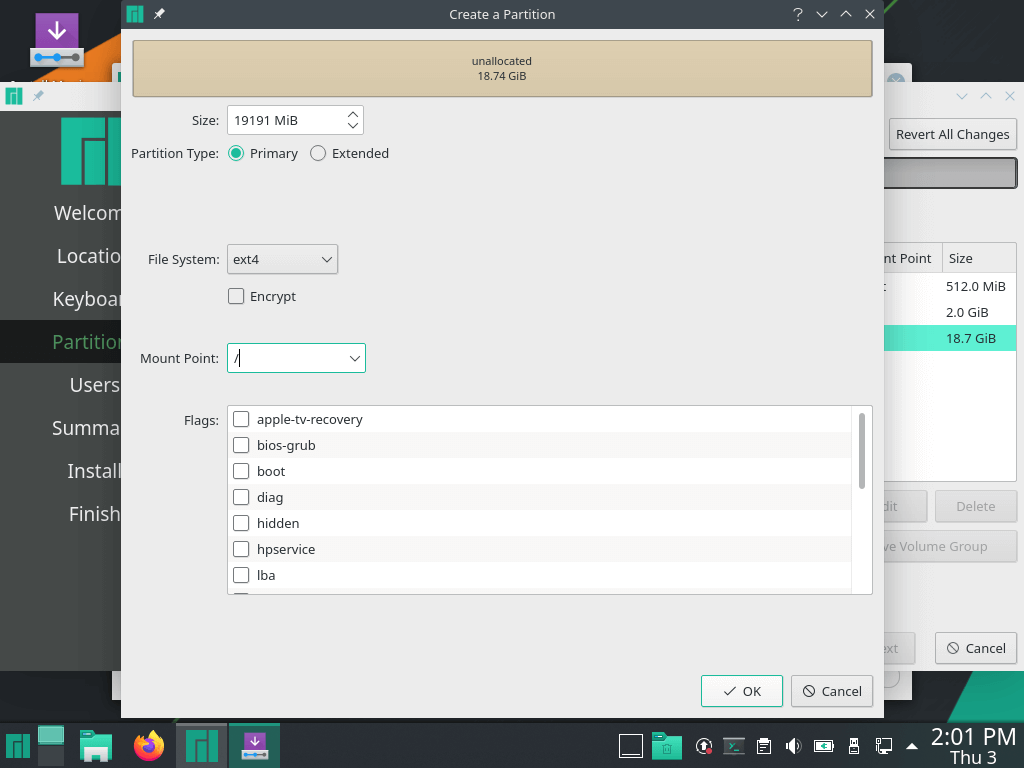
Step 10: Creating the Root partition
Now we will use the remaining free space to create the Root partition.
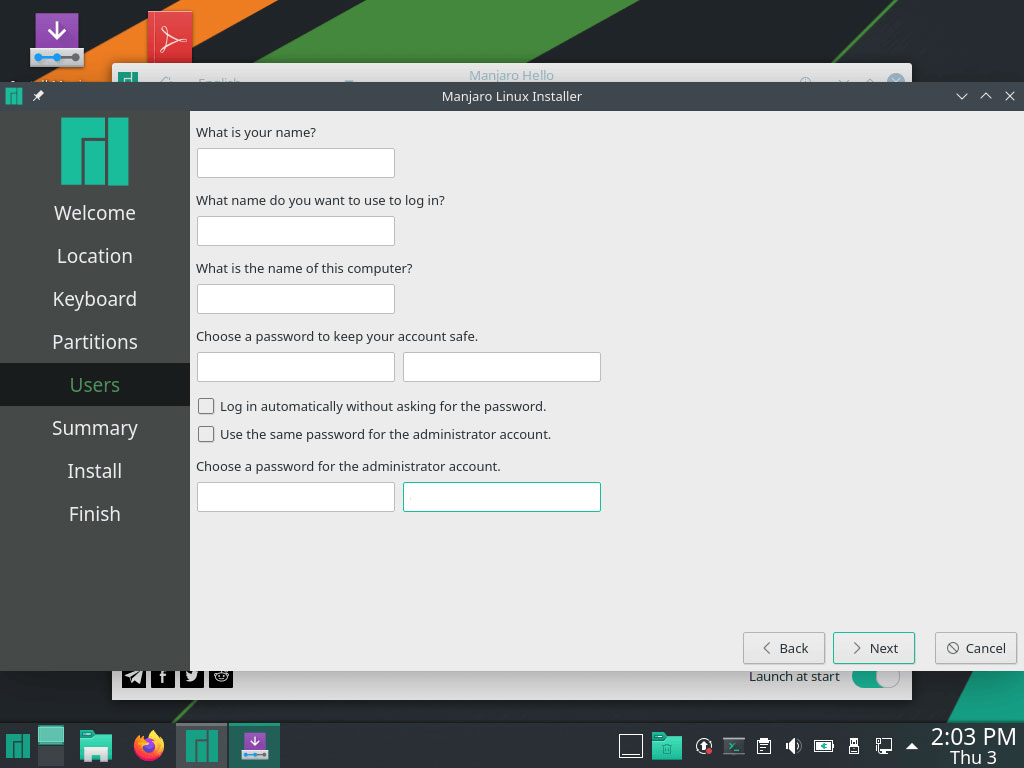
Step 11: Creating a User Account
Step 11 involves creating a standard user account with a username, password, and root password. Enter your information and go to the next step by clicking Next.
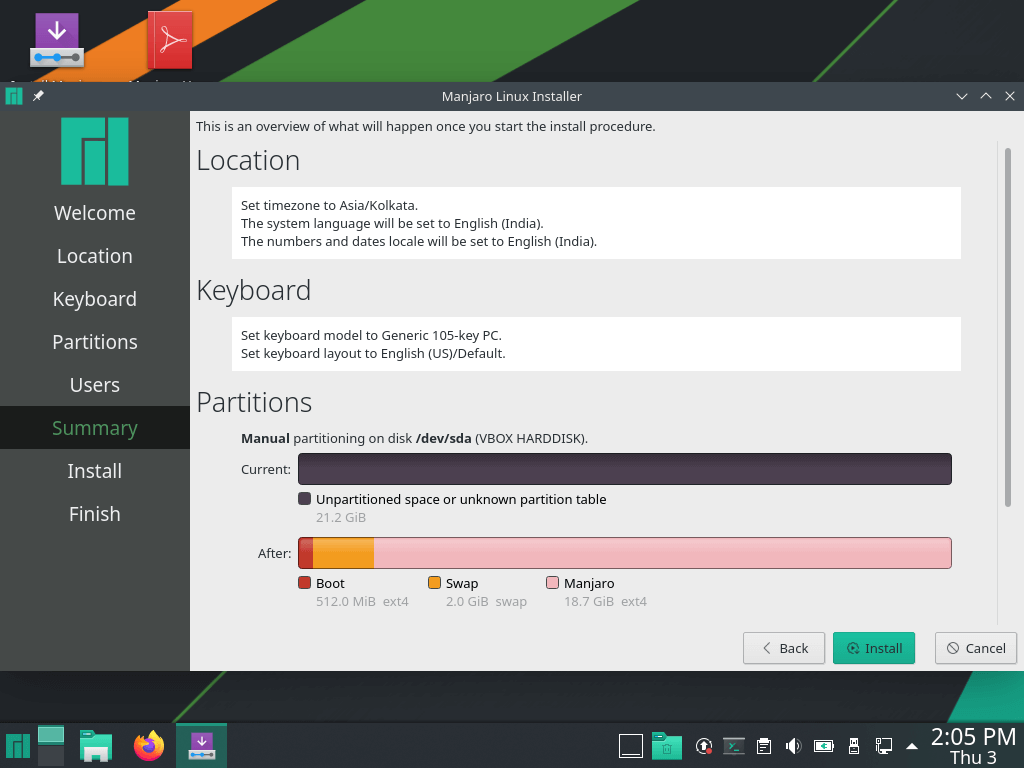
Step 12: Manjaro Installation Summary
This step is done to ensure the correctness of the process that you have gone through. This way, you can access the settings you have made since the beginning of the installation process and check your information and settings. If you need to make changes, click on the” Back” option; otherwise, select the “Install” button after ensuring that all the steps to install Manjaro are going well.
Step 13: Starting installing Manjaro
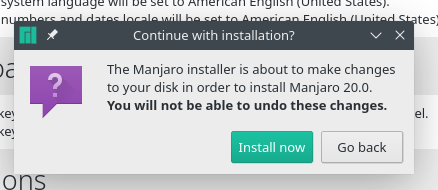
Click the Install button to start installing Manjaro. A window will then appear asking if you want to continue with the installation. If you are sure that all your settings are done correctly, select the “Install now” option. Note that there is no way back after choosing the installation option, so be careful in checking the settings.
Note: If you are unsure about the continuation of the process or feel that you have to go back to the previous steps and make changes, select the “Go back” option.
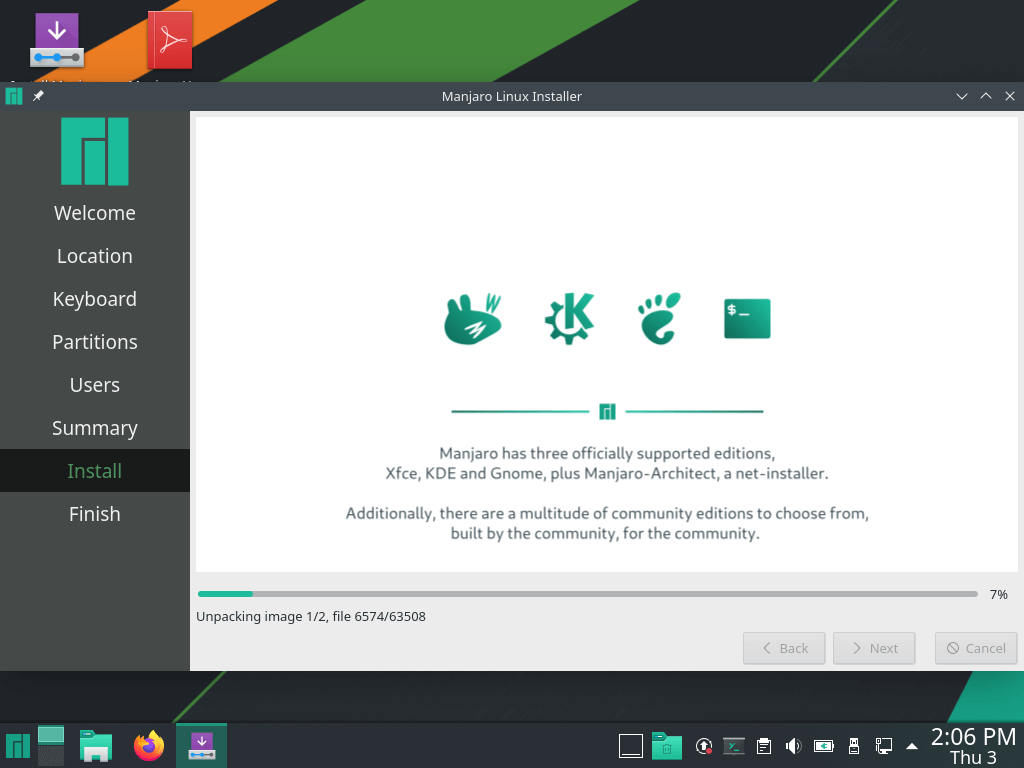
After passing the previous step, the installation starts, and the installer starts creating system partitions and installing software packages and a grub bootloader. This process may take 10-15 minutes.
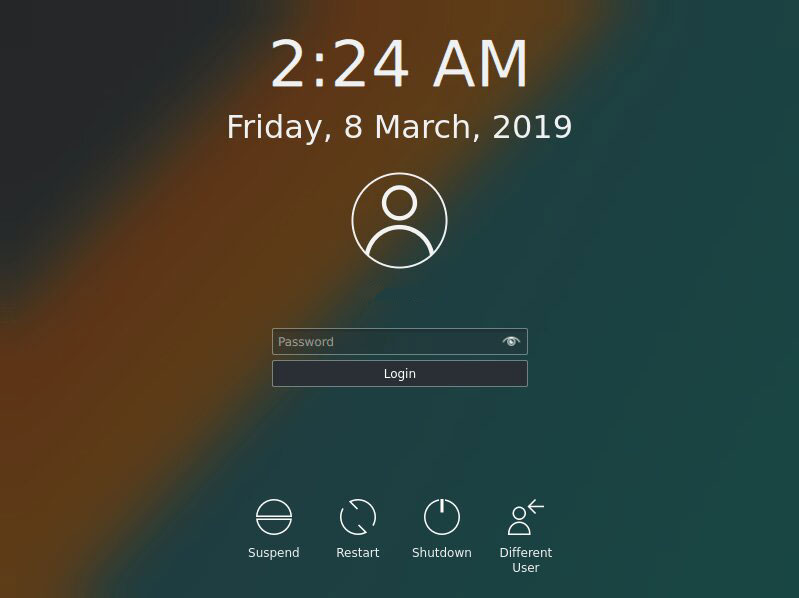
After the installation is complete, you will be prompted to reboot the system, as shown.

After restarting the system, the lock screen will appear. To enter the operating system, you must enter the input information, which is your password and username, and then click on the Login option.
After logging in, you will familiarize yourself with the most up-to-date themes and appearance features of the wonderful world of Manjaro, and you can enjoy Manjaro’s capabilities.
FAQ
What is the purpose of Manjaro?
Manjaro is a user-friendly and accessible Linux distribution that is free and open-source and based on the Arch Linux operating system. It uses Pacman as its package manager and a rolling release updating methodology.
What is Manjaro's most recent version?
Version 21.3, codenamed "Ruah," of Manjaro's eponymous Arch Linux-based distribution has been released. There are many improvements in the new version.
Conclusion
As you can see, the steps to install Manjaro are not complicated. By following the steps we have explained in this tutorial, you can easily install Manjaro on a Linux system, enter the world of Linux wonders, and take steps towards your success.
Manjaro can also run on a Linux VPS like other Linux distributions. If you are interested in using Manjaro Linux on a server, you can use this excellent operating system by purchasing a Linux VPS and then installing Manjaro in the same way we explained.
If you encounter a problem in one of these stages of installing Manjaro Linux or if you have any questions, contact us through the comments section so that we can guide you. We hope Manjaro creates a good experience for you.
We appreciate your support.
I struggle follow basic instruction (text) and this helped me out so much, I was hung up on the partitioning part. Thank you SO much!
What should I do installing Manjaro before and after?
Before installing Manjaro, you should: Back up your important data. Download the latest Manjaro ISO. Create a bootable USB drive using a tool like Etcher or Rufus. After installing Manjaro: Update your system. Install additional software and packages. Configure your desktop environment and appearance settings. Set up user accounts and permissions as needed.