How to Install and Setup UFW Firewall on Debian 11
Linux users commonly use firewalls to improve the security of their Linux system, as you know, firewalls control network connections and incoming and outgoing network traffic. To prevent unsafe and unwanted traffic to the network, users can set rules in the firewall to limit or allow specific traffic.
UFW, which stands for “Uncomplicated Firewall”, is a firewall software that runs on Linux to manage and monitor iptables and set rules in “iptables”. UFW is the best alternative to configure iptables, which have a relatively complicated syntax.
By using UFW, in addition to restricting network connections, it is also possible to block the network. It means that users can define certain connections as allowed in their firewall and allow only those connections to access the network or apply restrictions on incoming and outgoing connections. As a result, UFW plays a management role by monitoring network connections.
Among the best Linux firewalls, UFW is preferred by most Linux users due to its great role in improving Linux server and system security. Therefore, many users seek to install and configure UFW firewall on many Linux distributions.
The Debian operating system is one of the most popular and famous Linux distributions, and you are well aware of features of Debian; Due to the widespread use of Debian and the interest in using the UFW firewall on the Debian operating system, we decided to teach how to install and set up the UFW firewall on Debian 11 in this article. So stay with us until the end of the article.
prerequisites
To configure and run the debian firewall, you need a Linux VPS running the Debian operating system; in addition, you must have sudo non-root user privileges to execute the instructions.
Installation steps of UFW firewall in Debian 11
Step 1. updating the Debian repository
We start the steps of setting up the UFW firewall by updating the Debian repository:
sudo apt update
Step 2. Installing the UFW firewall
Debian does not include the UFW firewall by default, so you need to install ufw debian 11 using the apt command:
sudo apt install ufwAfter installing UFW, it is time to enable it, but before enabling UFW, you need to make some settings.
Step 3. Enable IPv4 and IPv6 ports
IPv4 and IPv6 are the main ports that must be enabled. Therefore, we must ensure that they are activated in UFW and check whether UFW supports IPv6 and IPv4 firewall rules or not.
Therefore, for configuration, you must open the UFW configuration file (/etc/default/ufw) using any editor or nano by running the following command:
sudo nano /etc/default/ufwThen search for IPv4 and IPv6 ports in the output and if you find that these two main ports are inactive, activate these two ports by changing their value to yes.
IPV6=yes

IPV4=yes
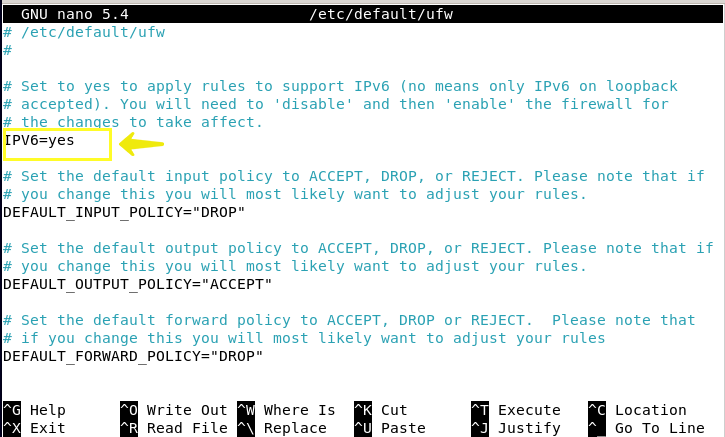
Then press the CTRL + S buttons together to save the configuration and press the CTRL + X, then y and Enter buttons to exit the nano editor environment and reload UFW again to make a new configuration.
This step is optional, but by executing this step, UFW will be configured according to IPv4 and IPv6 port rules after activation. Before you enable the UFW firewall, it is better to have settings for connecting via SSH and default policies.
Step 4. Configuring default UFW policies
As you know, the firewall allows users to define certain rules, so you will be allowed to change the default policies of the firewall. The default policy of UFW is set in such a way that the incoming traffic is not allowed and the outgoing traffic is allowed, that is, it denies access to your server by others, but your server programs are allowed to connect to the outside world. To change the default UFW rules, the basic syntax is as follows:
sudo ufw default [policy] [chain]To change the default rules, you need to go to /etc/default/ufw to access the UFW policies. As a result, if you want to prevent users from accessing your Debian server, enter the following command to deny incoming connections:
sudo ufw default deny incomingOutput
Default incoming policy changed to 'deny'

(be sure to update your rules accordingly)
Also, to allow external connections, enter the following command:
sudo ufw default allow outgoingOutput
Default outgoing policy changed to 'allow'

(be sure to update your rules accordingly)
Defining these rules for firewalls running on the computer system may be sufficient, but in the server, access by external users cannot be defined as unauthorized. Therefore, we need to apply settings for a secure connection to the server in the UFW firewall, which we will explain in the next step.
Step 5. Allowing connection to the server via SSH in UFW
To enable the UFW firewall and respond to server requests from external users, we must allow SSH connection. Therefore, you must define rules to allow specific and legitimate incoming connections (such as SSH or HTTP) to the server.
You can allow incoming SSH connections to your server using the following command:
sudo ufw allow sshIn this configuration, UFW defaults to SSH connection on port 22. But to configure the SSH daemon to use a different port, you need to open it in the UFW firewall.
For example, if you want to allow SSH connections on port 4444, you would run the following command:
sudo ufw allow 4444/tcpAs a result, you allowed SSH connections to your server in the firewall.
You can also use the following command to limit the SSH connection:
sudo ufw deny ssh/tcpIf you use a specific port instead of the default port, you must run the following command:
sudo ufw deny [port-number]/tcpStep 6. Checking UFW Firewall Status in Debian 11
Before you try to enable UFW, it is better to check its status by entering the following command to make sure it is disabled.
sudo ufw status verboseOutput
Status:inactiveStep 7. Enabling UFW
UFW is disabled by default. Run the following command to enable UFW:
sudo ufw enableNote: Because you made settings to allow SSH connections in the previous step, you may encounter a warning after running the UFW firewall activation command. This warning is because UFW activation may cause SSH connections to be disrupted. To resolve this warning, you must answer the request with the Y button and then press the Enter button.
Now your firewall is activated, you can run the command sudo ufw status verbose again to ensure that the UFW firewall is active and running.
In the following, we will teach how to use UFW.
Providing List of rules in UFW
-
How to access program profiles in UFW
To access a list of programs installed on Debian, you must first know that these programs are stored in the /etc/ufw/applications.d path, and then, by executing the following command, obtain a list of profiles and files of programs installed on the system:
sudo ufw app listIf you want to get more information about a specific program, run the following command:
sudo ufw app info ‘The name of the desired program’-
Allowing other connections
As you set rules in the firewall to allow SSH connections based on the service name or port in the previous steps, you can allow other required connections based on your purpose. So you can configure the firewall for allowing HTTP connections by openning port 80. Run the following command to allow HTTP connections:
sudo ufw allow httpOr
sudo ufw allow 80If you want to allow HTTP connections on port 443, type the following command:
sudo ufw allow httpsOr
sudo ufw allow 443-
Allowing Port Ranges in UFW
Firewall rules allow you to consider a range of ports for programs or any other service instead of a specific port and specify the port range in the UFW firewall.
For example, to set the range of 5000-5500 for X connection, use the following command:
sudo ufw allow 5000:5500/tcp

sudo ufw allow 5000:5500/udp
Note that to set the rules on tcp or udp protocols, it is better to specify them because if they are not specified, both protocols are allowed by default.
-
Allowing specific IP addresses
In UFW, you can specify a specific IP address. For example, if you want to allow connections for a specific IP address such as work or home, use the following command:
sudo ufw allow from IP address-
Allowing a specific IP address to a specific port
You can also allow a specific port for a specific IP address. For this purpose, use the following command:
sudo ufw allow from [required IP address] to any port [port number]-
Allow specific network interface
To set a firewall rule for specific network interface connections on a specific port, use the allow in on command along with the network interface name:
sudo ufw allow in on [The name of the network interface] to any port [port number]For example, if we want to allow the specific port 80 for the connections of the eth1 network interface, the following command should be executed:
sudo ufw allow in on eth1 to any port 80-
Denying Connections
The default UFW policy is configured to prevent access to your server and block all incoming connections. But if you want to create a new deny rule in firewall policies to increase security and block connections for a specific range, a specific port, or a specific IP address, you should run the following command as a template. For example, enter the following command to define deny rules for HTTP connections:
sudo ufw deny httpOr to deny connections in a specific range, for example, 203.0.113.4/23, run the following command:
For example:
sudo ufw deny from 203.0.113.4/23In the creating of denying rules to block the addresses used in the specific port, use the following command as a template:
sudo ufw deny from 203.0.113.4/23 to any port 22-
Removing Rule in UFW
In the UFW firewall, it is possible to remove ufw rules using the actual rule number and actual rule. To do this, first create a sub-list of UFW firewall rules by executing the command below to know the numbering of the rules:
sudo ufw status numbered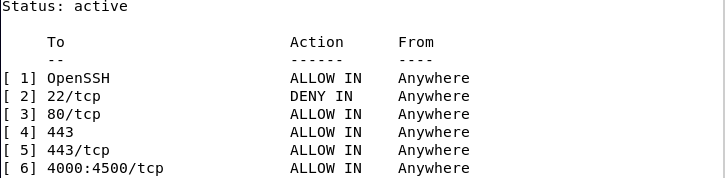
And then you can delete the desired rule with the help of the following command and through the rule number that is provided. For example, if you want to remove OpenSSH using the rule number, you should type the following command:
sudo ufw delete 1
If you want to remove the allowed HTTP rule through the rule itself, execute the following command:
sudo ufw delete allow httpYou can also remove rule 443 through the actual rule:
sudo ufw delete allow 443-
Dry-run of ufw
You can use the UFW firewall without changes, for this purpose you must run the following command:
sudo ufw --dry-run enableOutput
>running ufw-init

Firewall is active and enabled on system startup-
Resetting UFW
You can reset UFW by running the following command to configure new settings and rules in the firewall:
sudo ufw resetBy executing the above command, all the rules you created except for the default rules and policies of the firewall will be deleted, and UFW will also be disabled, and then the UFW firewall will be ready to configure new rules.
-
Disabling UFW
You may not need UFW and want to disable it by running a command, so enter the following command:
sudo ufw disableBy disabling the UFW firewall, all the rules you set will also be disabled.
To reactivate the UFW firewall, just run the following command:
sudo ufw enable-
UFW Logging Level
UFW firewall offers users the possibility to set the access level. The user should choose the logging level according to his needs when logging in to the system based on the options provided by the firewall. The /var/log/ufw.log file contains UFW firewall entries in the default mode and low level, but if you need to enter with a higher level, you should select the High option. I will provide a guide to the options offered by the firewall in the UFW logging below:
| Options | Description |
|---|---|
| Off | This option disables the firewall logging feature. |
| Low | It Logs related and unrelated packages with your specified rules. |
| Medium | It logs invalid and unauthorized packets, new connections to the server, and low-level packets that don't follow the rules you've created. |
| High | It logs medium reports without attempts/rate-limiting. |
| Full | logs all firewall packets without exception. |
Now that you are familiar with the firewall logging options, you need to run the following command to adjust the logging level according to your needs:
sudo ufw logging LEVELFor instance:
sudo ufw logging highIf you want to add a new rule in the firewall, such as SSH connections, use the following command to enable logging in to the UFW firewall:
sudo ufw allow log 22/tcpThe following command is also executed to disable the UFW Logging feature:
sudo ufw logging offInstallation and configuration of the GUI of UFW
UFW also supports the graphical environment, and users who are interested in working in the graphical environment of the UFW firewall can benefit from the UFW firewall debian 11 graphical interfaces. To install the UFW graphical user interface, run the following command:
sudo apt install gufwThen search for firewall in the search bar.
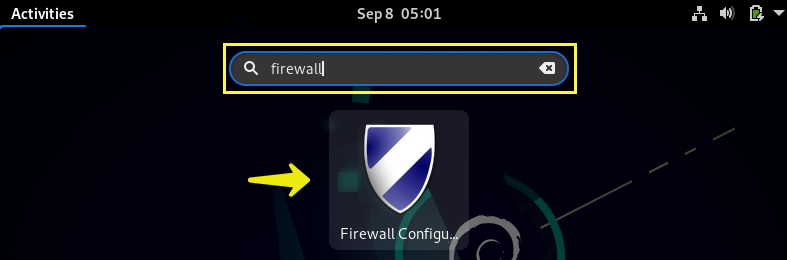
By selecting the firewall icon, you will be asked to enter the root password.
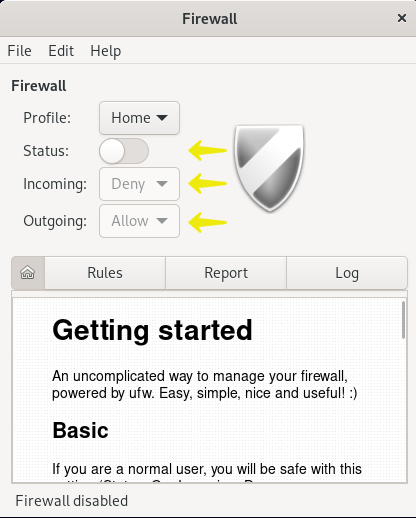
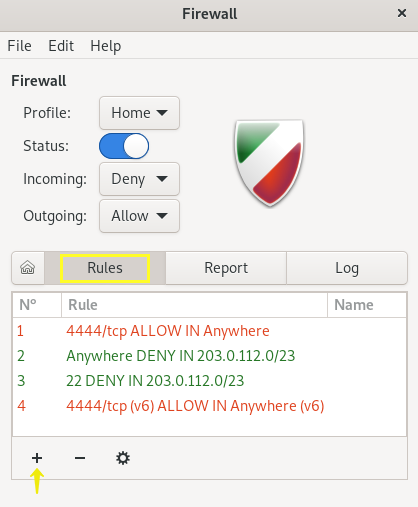
As you can see, the graphical interface of UFW easily provides the possibility of checking the status of the service, managing the incoming and outgoing traffic, as well as creating new rules(by selecting the + option).
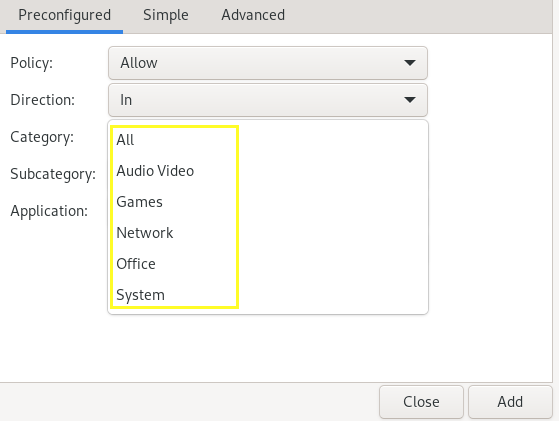
After applying the settings in the firewall rules, you will come across a new window for setting policies.
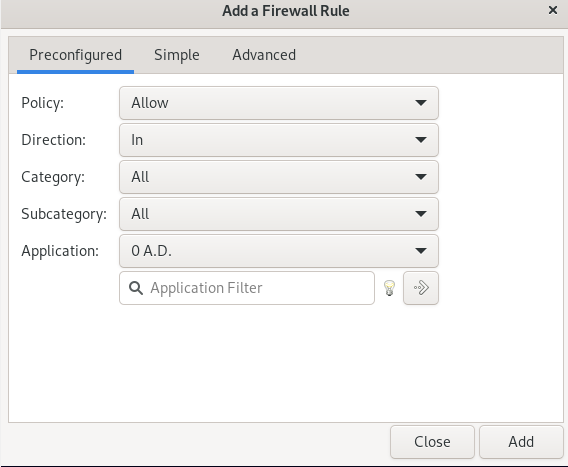
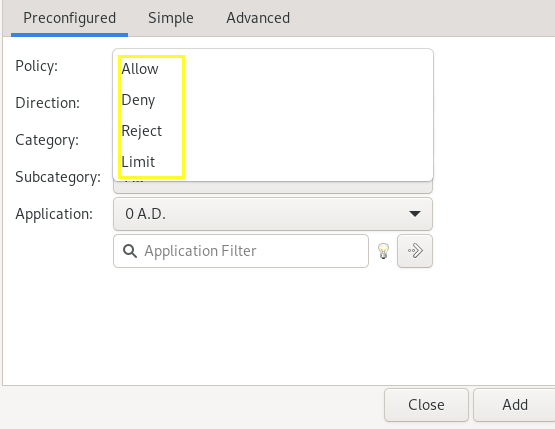
In the window that you see, in the preconfigured tab, by selecting the policy option, you can specify policies to limit, allow, and deny according to your wishes for incoming and outgoing traffic.
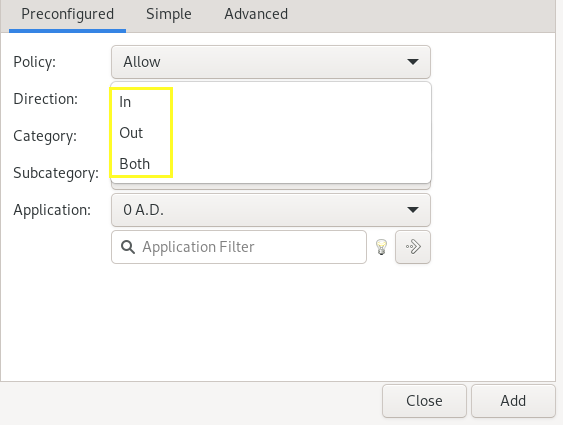
The Direction option allows you to specify whether the set rules are created for incoming traffic (by selecting the in option) or for outgoing traffic (by selecting the Out option), or for both incoming and outgoing traffic. (by selecting the both option).
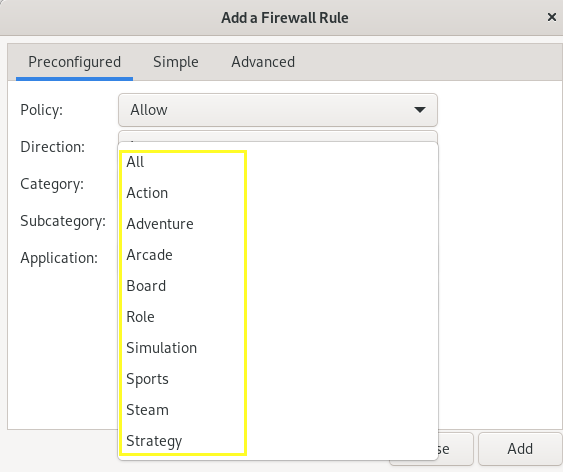
Category and subcategory options provide the desired factors so that you can easily apply your desired settings.
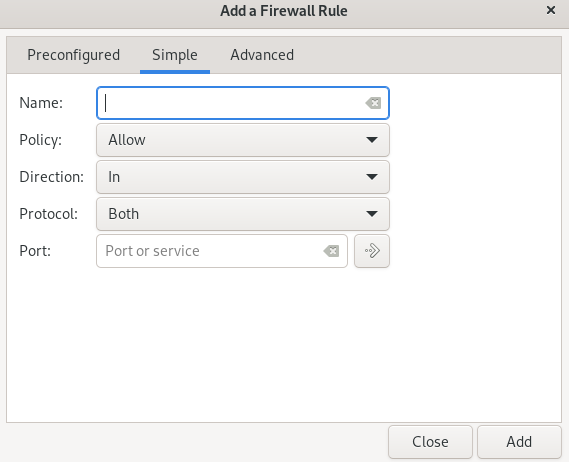
In the Add a Firewall Rule window, using the Simple tab, you can also set the type of policy, port number, and protocol, and after applying the settings, select the Add option to register the changes.
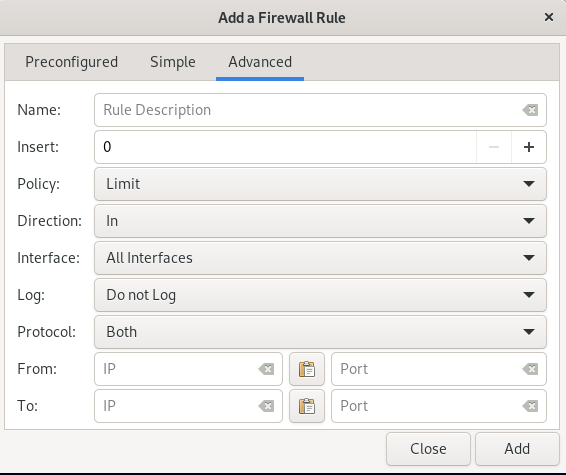
The Advanced tab is also for setting a new rule for a specific range.
FAQ
Activating UFW causes what restrictions?
When the UFW firewall is enabled, all external access to the network and ports of your server are blocked by default, unless you have set rules for certain incoming connections in UFW.
How to find out if UFW is activated?
You can check the status of the UFW service by running the following command:
sudo ufw status verboseIf you see the status: active in the output, it means that UFW is activated, but if you see inactive, you must activate it by running the following command:
sudo ufw enableWhy do we get the ufw command not found error?
This error is received when your Linux operating system does not support the UFW firewall by default. In most Linux distributions, UFW is preinstalled by default, but Debian does not support UFW by default. Therefore, to solve this problem, you need to install the UFW firewall on Debian 11 by running the command:
sudo apt install UFW
Conclusion
Ensuring the security of the system network is the most important task of the Linux server and system administrators so that they can protect important data and the local network against hacking and cyber-attacks. Using the UFW firewall is one of the most common and efficient ways to improve Linux server security. By using UFW debian 11 firewall capabilities, you can set limits for incoming and outgoing network traffic and prevent unauthorized and unwanted incoming connections, thereby improving the performance and security of your Linux server.
In this article, we taught how to install and configure UFW in Debian 11, as well as how to use UFW. We hope that by using our tutorial, you can use UFW usefully and strengthen the security of your Linux system.
If you encounter a problem in any part of this article, let us know in the comments section so that we can respond as soon as possible.
Related Article : What is Debian OS
Amazing article! Very informative and helpful. Thank you so much!