How to Configure and Run Docker on Windows Server
Configure and Run Docker on Windows Server by installing Docker, enabling container features, and managing containers efficiently with essential commands. This setup supports application deployment in isolated environments.
🤖AI Overview:
Configuring and running Docker on Windows Server involves installing Docker on versions 2016, 2019, or 2022, using PowerShell or GUI methods. Docker enables isolated container environments for seamless application deployment and management on Windows Server platforms.
Familiarity with Docker
Dockers are standard components for integrating operating system libraries with application source code and application dependencies for code execution. In other words, Docker is a popular open-source platform for running, creating, managing, deploying, and updating applications in independent and portable container environments.
Using Docker, services, and applications are packaged in containers and can be used in a portable way. Docker allows transporting containers and programs between systems so that you can run programs with their dependencies in any environment.
Docker separates containers from the host environment and turns them into an independent environment to prevent programs from interfering with each other or with the operating system, thanks to the isolation it creates. The most common use of containers is in organizations with hybrid multi-cloud environments with the purpose of development because the development and delivery of distributed applications are facilitated and optimized with the help of the features of containers.
Steps to install Docker on Windows Server
If you want to use Docker on Windows Server, you must purchase a Windows VPS running Windows Server 2016 or later because Windows does not support Docker in versions older than 2016. You must also have administrative privileges to install and configure the server.
Ensure Intel VT-x or AMD-V virtualization technology is enabled in BIOS settings, and also enable Hyper-V in your system because Docker uses Hyper-V to run containers on Windows Server.
Before installing Docker, for optimal use of Docker, download and install the Docker Desktop program from the Docker website on Windows Server. Now you can start installing and configuring Docker on Windows Server. You can install Docker on Windows Server using the Windows graphical environment and the Powershell tool. We teach both methods so you can install Docker on Windows Server with whichever method is more convenient.
Method 1: Docker installation on Windows Server via Powershell
After making sure that you have administrative privileges, you can start the Docker installation process on Windows Server by using the commands and capabilities of the Powershell tool:
1. Enable the Container’s Feature
Enter windows powershell and start installing Docker in Windows Server by enabling the container features because in Windows, container features are not enabled by default, and you are responsible for enabling the container features. Run the following command for this purpose:
Enable-WindowsOptionalFeature -Online -FeatureName Containers2. Docker installation
After enabling the containers feature on the Windows server, install the latest version of the docker engine and docker repositories by running the following commands:
Install-Module -Name DockerMsftProvider -Repository PSGallery -Force
Install-Package -Name docker -ProviderName DockerMsftProviderOutput:
WARNING: A restart is required to enable the containers feature. Please restart your machine.
Name                           Version          Source           Summary
----                           -------          ------           -------
Docker                         20.10.9          DockerDefault    Contains Docker EE for use with Windows Server.
After installing the required Docker repositories and packages, restart the Windows server using the following command:
Restart-Computer -Force3. Verify the Docker Installation
After the Windows server is started, run the following command in Powershell to make sure that Docker is installed on the Windows server by checking the installed Docker version:
Get-Package -Name Docker -ProviderName DockerMsftProviderOutput:
Name Version Source ProviderName
---- ------- ------ ------------
docker 20.10.9 DockerDefault DockerMsftProviderTo check the Docker version on Windows Server, you can use the following command instead of the previous one:
docker versionOutput:
Client: Mirantis Container Runtime
Version:           20.10.9
API version:       1.41
Go version:        go1.16.12m2
Git commit:        591094d
Built:             12/21/2021 21:34:30
OS/Arch:           windows/amd64
Context:           default
Experimental:      true
Server: Mirantis Container Runtime
Engine:
Version:          20.10.9
API version:      1.41 (minimum version 1.24)
Go version:       go1.16.12m2
Git commit:       9b96ce992b
Built:            12/21/2021 21:33:06
OS/Arch:          windows/amd64
Experimental:     false
To access more information about Docker, you can type the following command:
docker infoOutput:
Client:
Debug Mode: false
Plugins:
cluster: Manage Docker clusters (Docker Inc., v1.1.0-8c33de7)
Server:
Containers: 0
Running: 0
Paused: 0
Stopped: 0
Images: 0
Server Version: 19.03.2
Storage Driver: windowsfilter
Windows:
Logging Driver: json-file
Plugins:
Volume: local
Network: ics l2bridge l2tunnel nat null overlay transparent
Log: awslogs etwlogs fluentd gcplogs gelf json-file local logentries splunk syslog
Swarm: inactive
Default Isolation: process
Kernel Version: 10.0 14393 (14393.3808.amd64fre.rs1_release.200707-2105)
Operating System: Windows Server 2016 Standard Version 1607 (OS Build 14393.3808)
OSType: windows
Architecture: x86_64
CPUs: 4
Total Memory: 8GiB
Name: tc-win56
ID: BTXL:3ZPL:A7MZ:FNCV:UZRU:VG7I:YU7X:DERR:2Q2Y:2YNL:SYGN:AGYT
Docker Root Dir: C:\ProgramData\docker
Debug Mode: false
Registry: https://index.docker.io/v1/
Labels:
Experimental: false
Insecure Registries:
127.0.0.0/8
Live Restore Enabled: false
Method2: Configuring Docker on Windows Server via GUI
Many Windows users prefer Windows to other operating systems because of its graphical user interface. They run away from the Linux terminal environment and take refuge in the familiar and simple GUI of Windows. Therefore, installing Docker in the graphical user interface of Windows Server may be easier for many users; for this reason, we will teach how to install Docker in Windows Server by GUI.
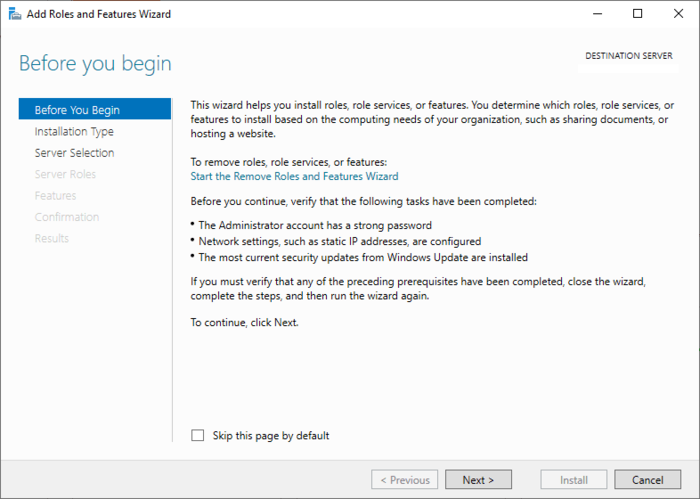
1. launch the server manager and run the Add Roles and Features Wizard.
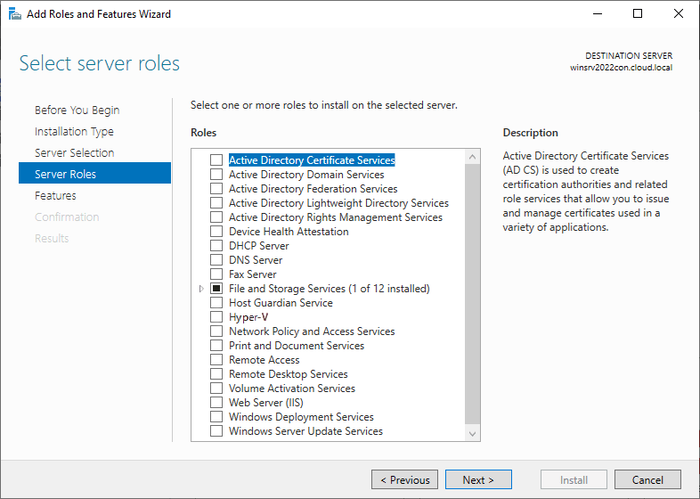
2. From the “Installation Type” tab, select the “Role-based” option and specify your server as the destination.

3. Go to the “Server Roles” tab and click Next.
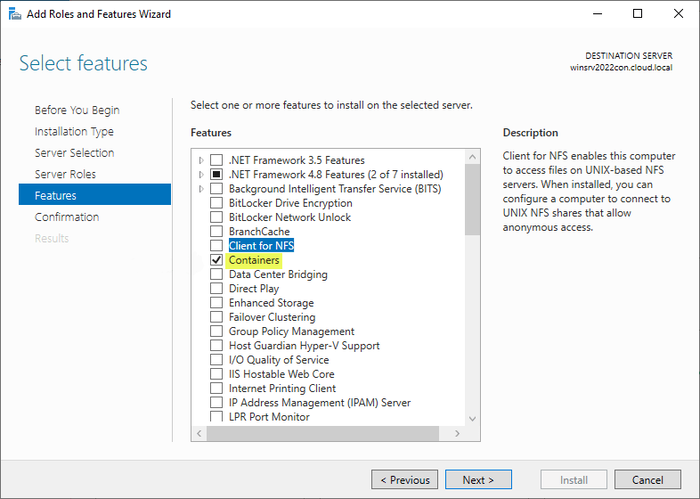
4. In the “Features” tab, check the checkbox next to “Containers” and continue.
5. Go to the “Confirmation” tab and confirm the installation of the containers.
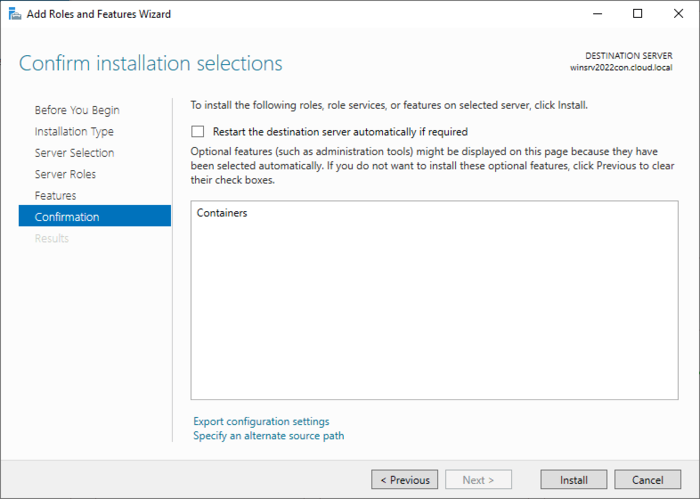
After completing the container installation process, you will be asked to reboot the Windows server.
After restarting the system, you can see Docker Engine in the services section.
Running and using Docker on Windows Server
Now that you have installed Docker on Windows Server, it’s time to familiarize yourself with useful Docker commands to run, manage, create Docker containers, and use Docker’s capabilities effectively. In the following, we provide a useful guide for running and using Docker so that you can easily use the features of Docker in Windows Server for various purposes.
Basic commands for managing containers in Docker
To specify a new name for launching a new container, use the-nameoption with Docker:
docker.exe container run --name [new container name][ Special images name]The-doption is used together with Docker to run the container in detached mode:
docker.exe container run -d [ Special images name]For example:
docker.exe container run -d debian:latestTo run the container in interactive mode, the-itoption is used along with Docker:
docker container run -it debian:latest /bin/bashCheck the status of containers after starting by running the following command:
docker.exe ps -aThe main syntax for starting the docker container is as follows:
docker container start container-nameThe main syntax for stopping the docker container is as follows:
docker container stop container-nameRemove the docker container using the following command:
docker container rm container-nameHow to run Docker Container
To run the Docker Container, first launch the Docker service using the following command:
Start-Service DockerThen download the Docker dotnet nano server container image:
docker pull mcr.microsoft.com/dotnet/samples:dotnetapp-nanoserver-2009After you have downloaded the image, which is a prerequisite for running the container, you can run the container using the downloaded image by using the following command:
docker run mcr.microsoft.com/dotnet/samples:dotnetapp-nanoserver-2009You can also start an interactive session in the container using the following command:
docker run -it mcr.microsoft.com/windows/servercore:ltsc2022 powershellTo exit the session, run the following command:
exitHow to run Docker Container by preserving their data
Creating and using Persistent Storage, a dedicated directory or Docker volume specified for a specific path, helps you run Docker Container while keeping Docker Container data. To create Persistent Storage for container data, you need to create a path:
mkdir C:\docker-container-storageTest the write permission on it using the following command:
Write-Output 'Docker Persistent Storage Test' | Out-File -Encoding default C:\docker-container-storage\index.htmlTo spin and map the container that was made from the storage space and map the contents of C:\disk01 in the container to your system’s C:\docker-container-storage, use the following command:
docker run -it -v C:\docker-container-storage:C:\disk01mcr.microsoft.com/windows/servercore:ltsc2022How to run Linux Container on Windows Server
Since Windows Server supports running Windows containers by default, what should we do to run Linux Containers? Fortunately, this problem also has its solution. You can run Linux Containers using Docker Enterprise Edition Preview, which supports running Linux containers by providing a LinuxKit system.
To run a Linux Container, the first step is to remove the Windows Docker engine and install Docker for Linux:
Uninstall-Package -Name docker -ProviderName DockerMSFTProviderInstall-Module DockerProvider
Install-Package Docker -ProviderName DockerProvider -RequiredVersion previewThen enable the LinuxKit system to run Linux containers:
[Environment]::SetEnvironmentVariable("LCOW_SUPPORTED", "1", "Machine")Start the Docker service:
Restart-Service dockerTo run the Linux container, enter the following command to download the latest Ubuntu container image, create the container based on it, and connect it to the container shell:
docker run -it --rm ubuntu /bin/bashThe previous command is executed for the Ubuntu container. To verify the Ubuntu version, you should now add the following commands in the newly created container:
cat /etc/os-releaseOutput:
NAME="Ubuntu"
VERSION="22.04.1 LTS (Jammy Jellyfish )"
ID=ubuntu
ID_LIKE=debian
PRETTY_NAME="Ubuntu 22.04.1 LTS"
VERSION_ID="22.04"
HOME_URL="https://www.ubuntu.com/"
SUPPORT_URL="https://help.ubuntu.com/"
BUG_REPORT_URL="https://bugs.launchpad.net/ubuntu/"
PRIVACY_POLICY_URL="https://www.ubuntu.com/legal/terms-and-policies/privacy-policy"
VERSION_CODENAME=Jammy Jellyfish
UBUNTU_CODENAME=Jammy Jellyfish
How to build Docker Images
DockerFiles are usually used to create Docker Images, so creating Docker Images requires creating a DockerFile. For this purpose, you must first create a special directory for DockerFile using the following commands:
mkdir docker-file
cd docker-file
We will use an example for better understanding. For example, create a Custom Dockerfile for the IIs test:
$str_file = @"
FROM mcr.microsoft.com/windows/servercore:ltsc2022
MAINTAINER  OperaVPS.com
RUN dism.exe /online /enable-feature /all /featurename: iistest /NoRestart
RUN echo Dockerfile test example > C:\inetpub\wwwroot\index.html
EXPOSE 80
CMD [ "cmd" ]
Export the desired values to the file by running the following command:
$str_file | Out-File Dockerfile -Encoding DefaultThen run the following command to build the docker image:
docker build . -t iistest:latestAfter a while, creating the custom Docker container will be finished, and you will successfully create the iistest Docker Images. Using this test, you can spin a new container. Since we’ve built our new IIs Docker container image, we can now use that container image to spin up an actual IIs container that contains the customizations added using the docker file as well as the files we want.
How to pull Windows Container image for Docker
Run the following command to pull the Windows container image for Docker:
docker pull [image-name]Or
docker pull mcr.microsoft.com/windows/servercore:ltsc2022The Docker Network Management Guide
With the help of Docker features, you can manage networks in Docker, that is, control the communication of containers in Docker with each other and the outside world. In the following, we will introduce several commands for managing networks in Docker:
- Viewing available networks in Docker:
docker network ls- Get more information about a specific network:
docker network inspect [network name]- Connecting the container to your desired network:
docker network connect [network name] [container name]- Create a new network using the NAT driver( because the containers are connected to the NAT network by default):
docker network create [network name] -d "nat"- Remove network:
docker network rm [network name]- Delete all the networks to which the container is not connected:
docker network pruneWrapping Up
Configuring and running Docker effectively is indispensable for business owners aiming to enhance operational efficiency, scalability, and application deployment speed.
By following the outlined steps—from installing Docker and configuring essential settings to managing containers and enforcing security—organizations can leverage the full potential of containerization.
Commitment to best practices, continuous monitoring, and security vigilance will ensure that Docker becomes a reliable cornerstone of your technology infrastructure, driving innovation and competitive advantage in your business.
FAQ
2. What are the system requirements to configure and run Docker on Windows Server?
Requires Windows Server 2016 or later, administrative access, virtualization enabled in BIOS, and Hyper-V feature enabled.
3. What methods can be used to install Docker on Windows Server?
Installation can be performed via PowerShell commands or the Windows Server GUI using Server Manager.
4. Can Linux containers run on Windows Server with Docker?
Yes, through supported Docker versions implementing Linux container support, typically via Docker Enterprise or updated Docker editions.
5. How is data persistence managed with Docker containers on Windows Server?
Data persistence is achieved by mapping host volumes to container directories, ensuring data survives container restarts.
6. What essential Docker commands should be known to manage containers?
Commands include: 'docker run', 'docker start', 'docker stop', 'docker rm', and 'docker ps' for effective container management.
7. How to build custom Docker images for applications?
Create Dockerfiles defining application setup and use 'docker build' to generate custom images.
8. How is networking handled in Docker on Windows Server?
Docker supports creating and managing container networks to control container communication securely.
9. Why restart the system after installing Docker?
Restarting applies system-level changes required for container features and Docker to run correctly.
10. How to verify Docker installation and operation?
Use 'docker version' and 'docker info' to confirm Docker is installed and running properly.
Is this process still supported in windows 2016 server? I'm getting dockerindex.json file not found. Please let me know
Yes, Windows Server 2016 and later still support Docker. Try the following solutions to solve the problem: • Restart the Docker daemon and the Docker service • Verify that the registry URL is correct by checking the Docker configuration file (daemon.json or docker.service). • Ensure access to the internet and the Docker registry. • Check that the necessary access permissions are set up for the Docker-related file and directory. • Use a DNS lookup tool to ensure your system can resolve the Docker registry's hostname. • Ensure that your Docker version is compatible with Windows Server 2016. • Check for Disk Space.