How to Connect to SSTP VPN?
To connect to SSTP VPN on various platforms such as Windows, Linux, macOS, iOS, and Android, First, you need to configure the VPS server as an SSTP VPN server and ensure you have the necessary VPN login credentials and an SSTP VPN server address.
Then, since Microsoft developed SSTP, it is built into Windows, and you can connect to SSTP VPN on Windows via Network & Internet settings and adding a VPN connection; but SSTP is not natively supported on Linux, macOS, iOS, and Android devices, so to connect to SSTP VPN on these devices you need to install SSTP client and configure VPN connection based on VPN server details.
How to set up an SSTP VPN client on Windows?
After having SSTP VPN details (VPN server’s IP address or hostname, username, and password) and ensuring to run Windows 7, Windows 8, and Windows 10, Windows 11, follow the steps below:
1. Open Network Settings:
Open the Start menu (Windows icon on the bottom left side of the screen) and click on “Settings” > “Network & Internet settings.”
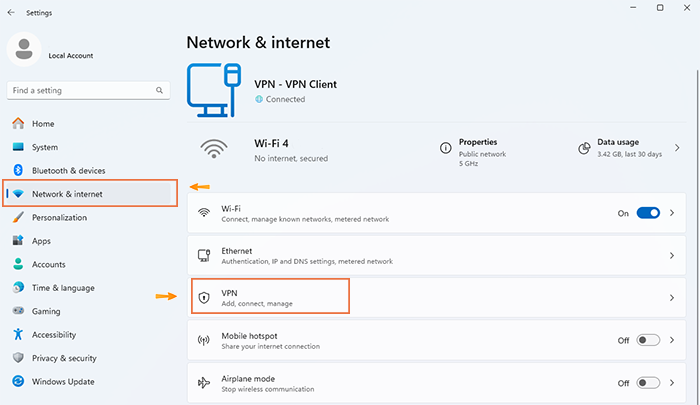
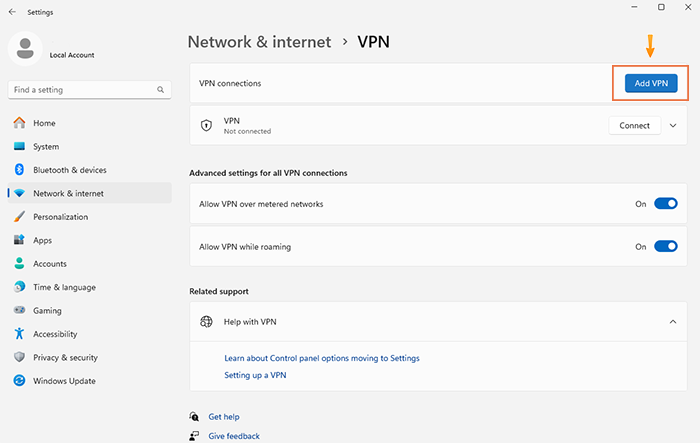
2. Add a SSTP VPN Connection:
In the Network & Internet settings window, select the “VPN” tab from the left pane menu and choose the “Add a VPN connection” button.
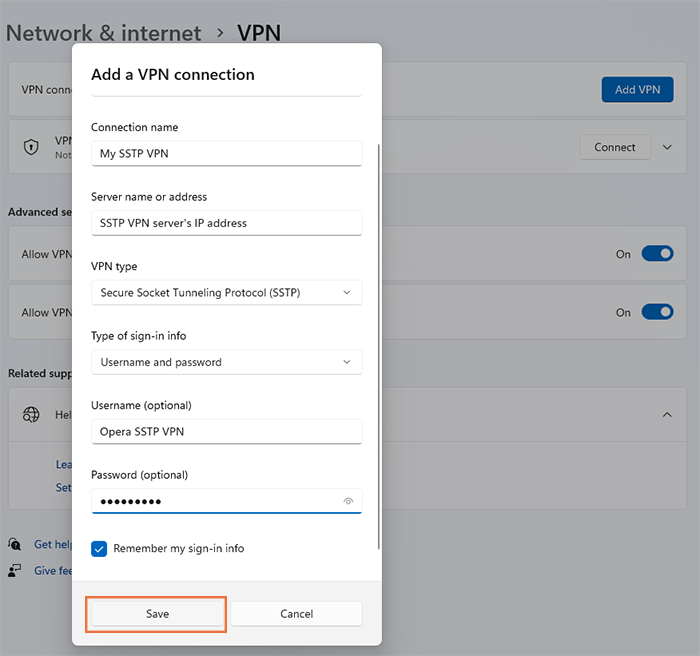
3. Configure SSTP VPN based on VPN server information:
- Set the “Windows (built-in)” for the “VPN Provider” field.
- Select the name for your VPN connection.
- Fill the “Server name or address” field with the IP address or domain name of the SSTP VPN server.
- Set “Secure Socket Tunneling Protocol (SSTP)” for “VPN type.”
- Choose “Username and password” as an authentication method for “Type of sign-in info.”
- Enter Authentication Details in the Username and Password fields.
- Check the “Remember my sign-in info” to save your Authentication Details.
- Click “Save” to save the VPN configuration.
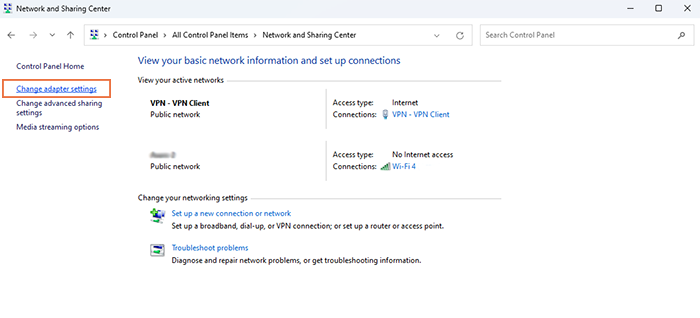
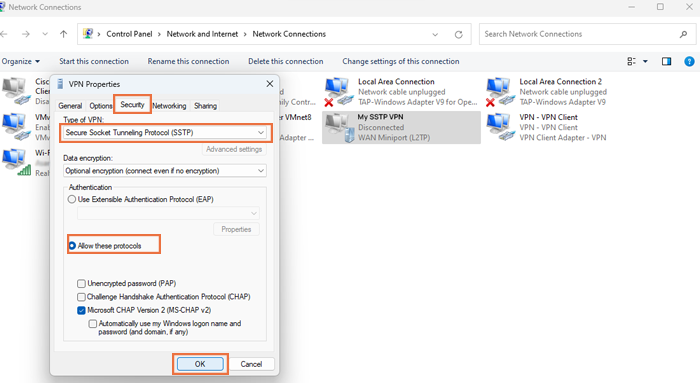
4. Configure advanced option:
- Go back to the VPN menu and find “Change adapter options” under the “Related settings” section. If you cannot find it, Go to Control panel > Network and Sharing Center > Change adapter options.
- Right-click on your VPN profile and select “Properties” from the drop-down menu.

- Navigate to the Security tab and select “Secure Socket Tunneling Protocol (SSTP)” for the type of VPN. Also, ensure that “Allow these protocols” is enabled and then click “OK.”
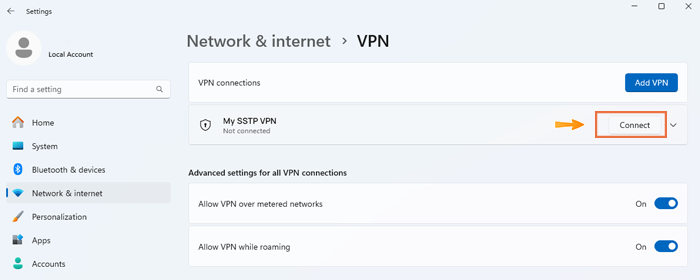
5. Connect to SSTP VPN on Windows:
Now, you can connect to a VPN by navigating to the VPN list, selecting the newly added VPN profile, and clicking on the “Connect” button.
6. Verify Connection:
Once connected, the “Connected” status under the VPN profile and VPN icon in the system tray will be displayed, indicating a successful connection.
You can also confirm your VPN connection by visiting the whatismyipaddress.com website and checking that your IP address has changed to the VPN server’s IP.
How to Connect to SSTP VPN on Linux?
SSTP VPN protocol is not natively built into Linux, so to connect to SSTP on Linux, you need to install an SSTP client. Get access to the SSTP VPN server’s information like server address (IP or domain) and VPN Account Credentials, and obtain the SSTP configuration file; then follow the below instructions with root /sudo privileges:
1. Add necessary repository:
Open Terminal by pressing Ctrl + Alt + T keys and add the necessary repository with the SSTP client in Ubuntu/Debian-based systems by running the following command:
sudo add-apt-repository ppa:eivnaes/network-manager-sstp2. Update Linux system package list
Update your Linux system package list using the special package manager of your current Linux distribution; for example, on Debian-based systems like Ubuntu, run the following command:
sudo apt update
sudo apt upgrade
3. Install SSTP Client
Once all packages in the system get up-to-date, install the SSTP client package using your distro’s special package manager. For example, on Debian/Ubuntu, install it using apt:
sudo apt install sstp-client4. Install GUI plugin for GNOME (Optional)
Installing the GUI plugin (Network Manager) allows you to connect to SSTP VPN directly from the default GUI (Gnome GUI for Ubuntu), so to do this, run the following command in Debian/Ubuntu:
sudo apt install network-manager-sstp5. Create SSTP VPN via Network manager configuration
- After installing Network Manager, open it by clicking on its icon in the top-right corner of the screen.
- Select Edit Connections from the menu.
- To add new VPN connection, click on the “+” icon in the VPN section.
- Import the VPN configuration file by selecting Import a saved VPN configuration and then clicking Create.
- Browse the saved VPN Configuration file and click Open.
- Select Secure Socket Tunneling Protocol (SSTP) as the VPN type.
- In the VPN tab, choose a unique name for your VPN connection.
- Type the hostname or IP address of the SSTP server in the Gateway field.
- Enter VPN account credentials in the User name and Password fields.
- To save the VPN connection configuration, click Save.
6. Connect to SSTP VPN on Linux
Open Network Manager, select the network icon, choose the newly added VPN, and click the “Connect” button.
If the VPN connection properly works, you should see a notification about the connection status or the VPN icon on the top bar of the screen.
How to disconnect SSTP VPN on Linux?
- Find the Network icon in your system tray or taskbar and expand it.
- Select VPN connection and your VPN.
- Click the “Disconnect” option for your VPN connection.
If you want to disconnect the SSTP VPN through the command line, you can use the nmcli command:
nmcli con down id <connection_name>How to configure SSTP VPN client on macOS?
SSTP protocol is not natively supported on macOS, so to add an SSTP VPN connection, you will need to use a third-party VPN client that supports SSTP. With the SSTP VPN server’s information in hand, go through the following instructions:
1. Install SSTP client on macOS:
You can download and install Popular SSTP client (including Tunnelblick, Viscosity, and iSSTP) on macOS from their respective websites; or open the terminal and install the SSTP client using Homebrew, which is a package manager for macOS:
brew update
brew install sstp-clientNote: you can download and install Mac Ports (open-source package manager for macOS) to simplify the installation of software.
2. Configure SSTP VPN connection:
Run the following command by replacing your VPN server’s details:
sudo sstpc --log-stderr --cert-warn --user "USERNAME" --password "PASSWORD" "IP_ADDRESS" usepeerdns require-mschap-v2 noauth noipdefault defaultroute refuse-eap noccpReplace your actual username, password, and IP address in the previous command.
Now, your traffic will be routed through the VPN tunnel.
How to connect to SSTP VPN on an iOS device?
Like macOS, iOS devices do not offer native support for SSTP VPN, so you will need to install an SSTP client.
So choose your desired SSTP client to install and have the VPN server details, including the server’s IP address, VPN account credentials, and VPN server configuration file to follow the below steps:
1. Download the SSTP app: Download and install the SSTP Connect Client app from the App Store on your iOS device.
2. Open SSTP client: Launch the SSTP Connect app and add a new VPN connection by tapping on the “+” icon.
3. Add VPN Configuration:
- You can import the VPN configuration file and enter your username and password.
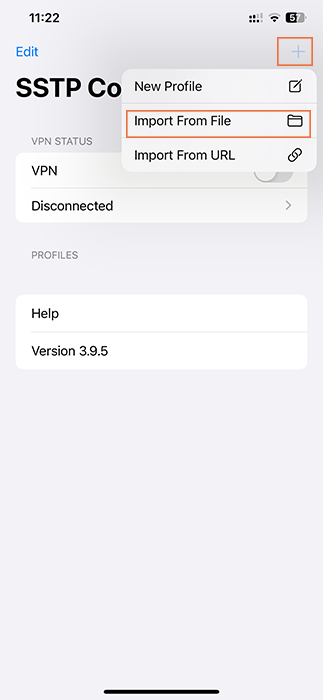
- You can manually configure SSTP VPN based on your SSTP VPN server’s details.
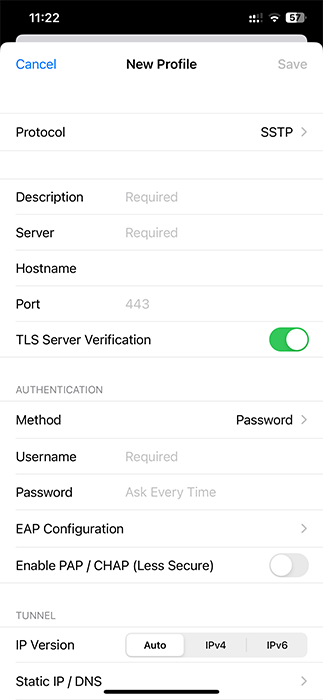
4. Enter VPN Details:
- Protocol: Set SSTP for protocol.
- Description: Select the name for your VPN connection.
- Server Address: Type the IP address of your SSTP VPN server.
- Port: Enter port if needed.
- Method: set a password for the Authentication method.
- Username: provide your VPN username.
- Password: type your VPN password.
- After entering all necessary information, save the VPN configuration by tapping on the “Save” button.
5. Connect to VPN: switch the toggle next to the newly created VPN profile to on to establish the VPN connection.
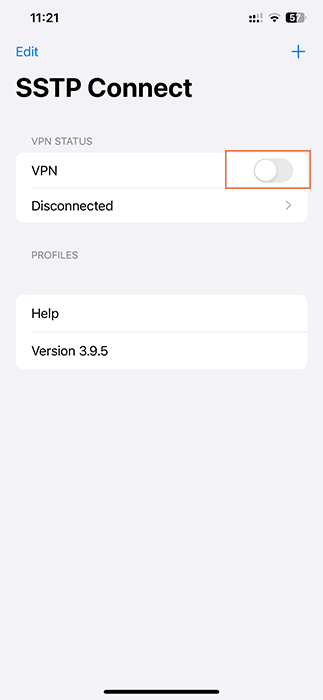
6. Verification: once connected, the VPN icon in the status bar of your iOS device’s screen should be displayed.
So the VPN is active, and your traffic will routed through an encrypted tunnel.
Note: The SSTP connect app is not free.
How to set up an SSTP VPN client on an Android device?
To connect to SSTP VPN on Android, you need to install a third-party VPN client that supports SSTP because SSTP is not a built-in protocol in Android devices.
Access the SSTP VPN server’s necessary information to add SSTP VPN to Android devices and follow the below steps:
1. Search for “SSTP VPN Client” on Google Play and download the appropriate app from the search results. (we recommended installing the Open SSTP Client app)
2. Open the SSTP client app on your device.
3. In the SSTP VPN Client app, select the option (typically “Add” or “Add Profile” item) to add a new VPN profile.
4. Enter SSTP VPN details (in the Open SSTP Client app):
- Enter the server’s hostname in the “Hostname” field under the HOME tab.
- Enter your credentials (username and password) in the “Username” and “Password” fields.
- Ensure to set SSTP as the VPN protocol in the VPN settings.
5. Save the VPN configuration by tapping on “Save.”
6. Tap on the SSTP VPN profile listed within the SSTP VPN client app to establish a VPN connection.
Once the VPN is connected, you should see the VPN icon in the status bar of the Android device screen.
Conclusion
Now, your data will be encrypted while transmitted, and your traffic will be routed through an encrypted VPN tunnel. So you can securely connect to the Internet via VPN and benefit from VPN’s features.
If you cannot connect to the VPN on your device, check that your VPN login credentials are valid and your VPN server details, including IP address, are configured correctly. Also, sometimes, restating the VPN app or your device can help you resolve connection issues.
Keep in mind that updating VPN software is always a good practice to benefit from bug fixes and security improvements.