How to Install FTP Server in Windows and Windows Server?
As a website administrator or developer, you certainly need FTP (File transfer protocol) to transfer files between computers over TCP/IP connections. This article presents all the required steps to Install FTP server in Windows to enable you to create FTP server on your current Windows version without switching to a Linux distribution. Although using a Linux server distribution is the most obvious method for creating an acceptable FTP server, you do not have to dual-boot your computer. Configure FTP server provides a private and fast environment in which you have full control over the amount and type of data you store and transfer. Additionally, there are no file size limitations, so you can send anything from a little text file to a 1000GB PC backup. You can even set up numerous accounts to enable friends and relatives to access or store anything remotely.
Regardless of using Windows 10/Windows 11 and Windows Server 2019/Windows Server 2022, you will be able to turn your Windows into an FTP and build your own FTP server in the end. So, if you are going to buy Windows VPS and you are concerned about transferring large files without paying a lot for cloud storage fees and restrictions, this guide is all you want to follow.
Let’s go through the steps of this tutorial to learn How to install and setup FTP server in Windows and Windows Server. The process of installing FTP server in Windows is not complicated but long.
Steps to Install FTP Server in Windows 10/11
An FTP server, also known as a File Transfer Protocol server, is a server that runs specialized software made solely for sending and receiving files. In the past, FTP servers were quite prevalent, and many businesses hosted them so that users could download files from the Internet.
To install FTP server in Windows need to follow all the below steps. In the end, you will know how to access and use your FTP server on Windows 10/11.
Step 1. Install FTP server on Windows 10/11
Install FTP on Windows 10/11 is simply possible since it comes with the necessary components to run an FTP server.
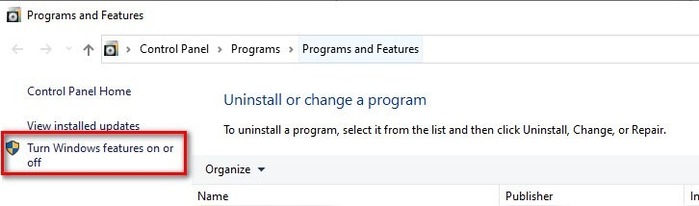
- First, open the Power User menu (Press Windows key + X) to select Program and Features.
- Click on the Turn Windows features on or off link.
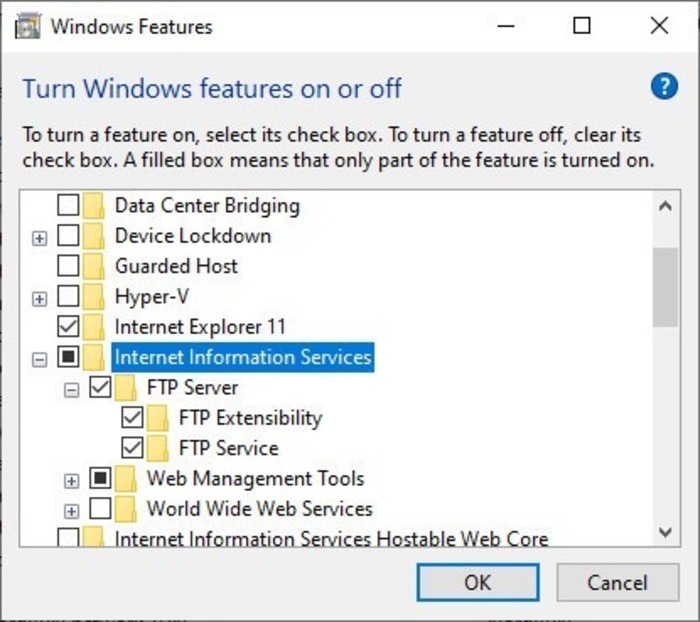
- Now, open Internet Information Services and check the FTP Server option, and to check FTP Extensibility option open the FTP Server.
- Then, Check Web Management Tools with the default selections and click OK to begin the installation.
- Finally, click Close.
Step 2. Configure FTP site on Windows 10/11
To install FTP server in Windows, you installed the required components to run an FTP server on your machine in the previous step. It is time to create FTP server on Windows. To do this, follow the below path:
- Open the Power User menu and select Control Panel. (Press Windows key + X).
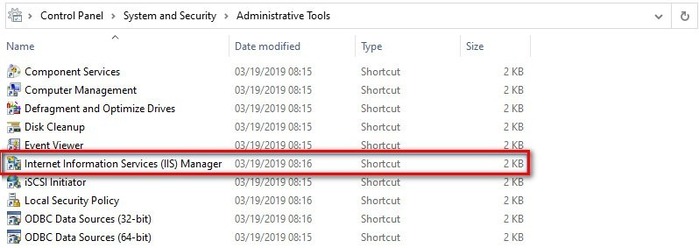
- Then, open Administrative Tools.
- Website content, service configuration, and security settings can be controlled by an administrator through the IIS management console. If you have not done so before, Install IIS in Windows Server and then double-click Internet Information Services (IIS) Manager.
- To select Add FTP Site, on the Connections pane, right-click Sites.
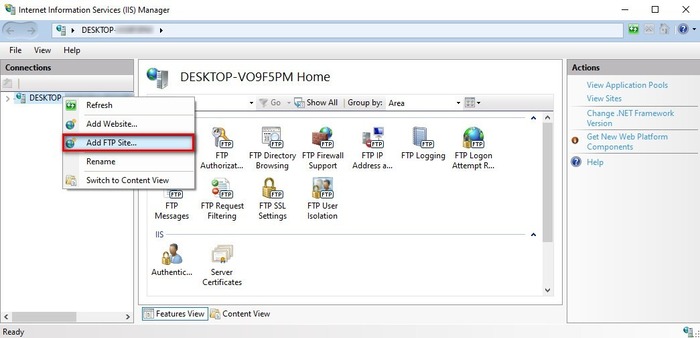
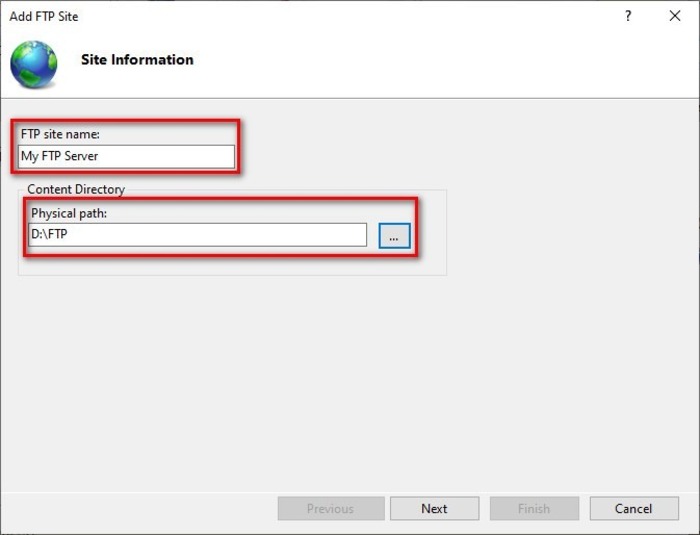
- Give your new FTP site a name, and then type the location of the FTP folder you wish to use for file sending and receiving. You may also create a dedicated folder to house your FTP files by clicking the Make New Folder option.
- Finally, click Next.
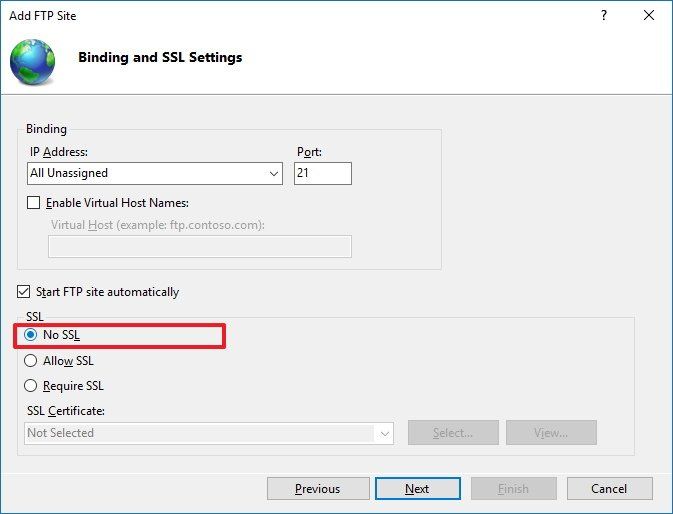
- Leave all the default parameters under Binding and SSL parameters, but select No SSL for SSL. It’s important to note that configuring the site to require SSL is great practice in a professional setting or on an FTP server that will contain sensitive data.
- When you are finished, click Next.
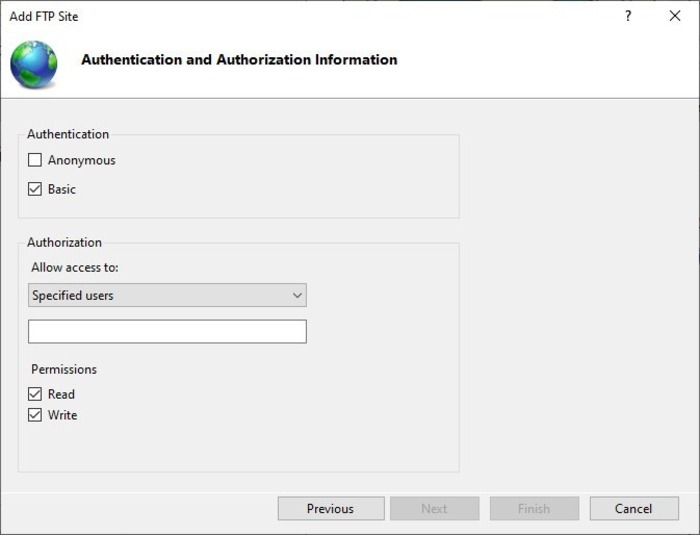
- Check the Basic box under Authentication and select Specified users from the drop-down menu.
- To gain access to the FTP server, use your local account name or the email address associated with your Windows 10/11 account.
- Check the options Read and Write and then click Finish.
In this way, you have an FTP server on your Windows 10/11. All the required steps to Install FTP server in Windows will take you here after a correct configuration.
Step 3. Configure Your Windows Firewall for FTP Server
Any connections attempting to reach the FTP server will be blocked if Windows Firewall is active on your PC. To allow the FTP server via the firewall, follow the instructions listed below.
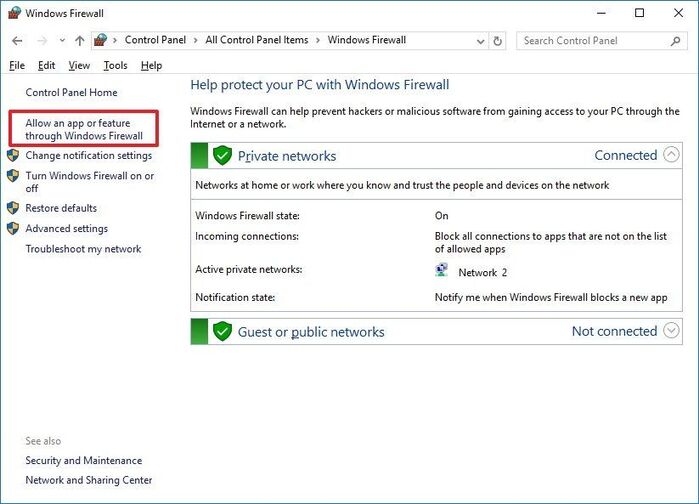
- To find Windows Firewall, search it from the start menu.
- From the left-hand menu, click on Allow an app or feature through Windows Firewall.

- Click on Change settings.
- Select FTP Server in the list and check mark public and private.
- Click Ok.
This enables you to create a local connection. Of course, opening the ports on your router is necessary if you wish to access the server online.
Install FTP server in Windows, configure it, and allowing the FTP server through Windows Firewall steps are successfully completed. In the next step, you will configure a router to allow external connections.
Step 4. Enable Port Forwarding on Your Route
You must set up your router to open TCP/IP port number 21 to permit connections to your PC in order for your FTP server to be accessible from the internet. The methods to configure the majority of routers are listed here. The instructions to forward a port will differ from router to router.
Enable FTP Windows 10/11 by following the path below:
- To search for cmd box, press Windows key + S and type its name.
- Open Command Prompt, type in
ipconfigand press Enter.
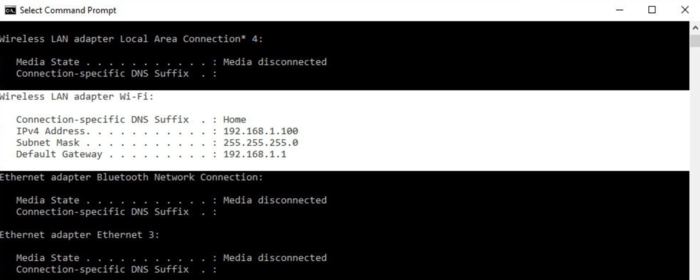
- Write down the Default Gateway number.
- Open your preferred browser, type the Default Gateway number on the address bar and press Enter.
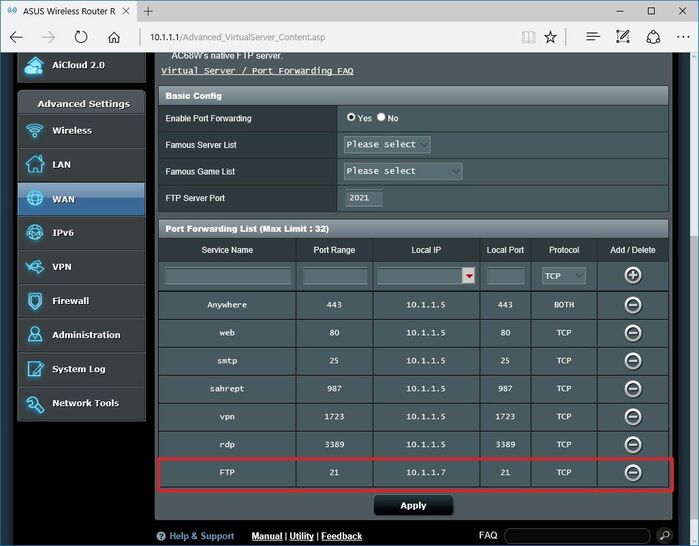
- Sign in to your router’s control panel and choose WAN from the left-hand menu.
- Use the following setup information to create a new port forwarding:
Give your item a name under Service Name:
Port Range: 21
Local IP: Use the IPv4 address on the ipconfig command explained above.
Local Port: 21
Protocol: TCP
- To apply changes, click on Apply and save the new router configurations.
In this way, the method of ”Enable Port Forwarding on Your Route” gives access to you or other users on the PC.
Is it possible to let your considered users log in using their specific username and password and access your FTP? In the next step, you will learn how to do this.
Step 5. Setup FTP Server in Windows 10/11 with Username & Password
When you install FTP server in Windows, you might want to let users access your FTP with their username and password. To do this, you just need to add a generic user with user-password authentication.
Follow the below steps to configure a new user account to access the FTP server:
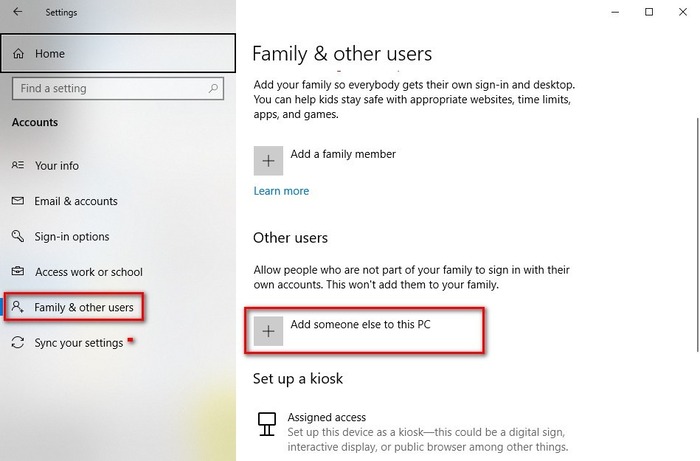
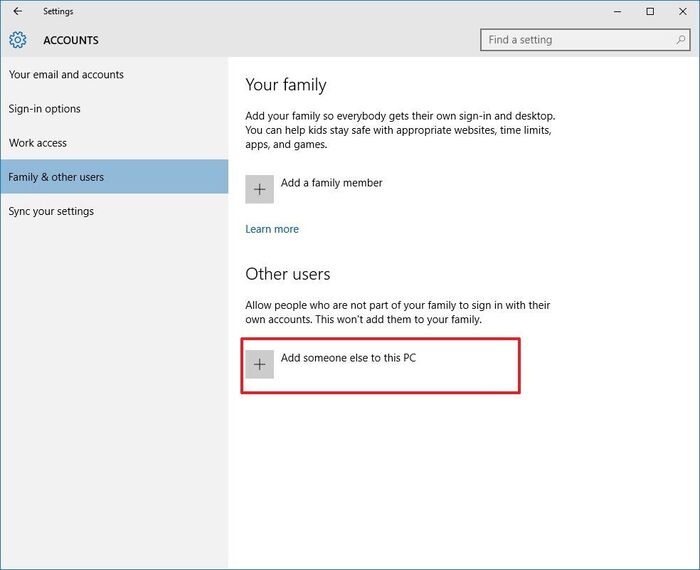
- Go to Settings and choose Accounts.
- Then, find Family & other users and click Add someone else to this PC.
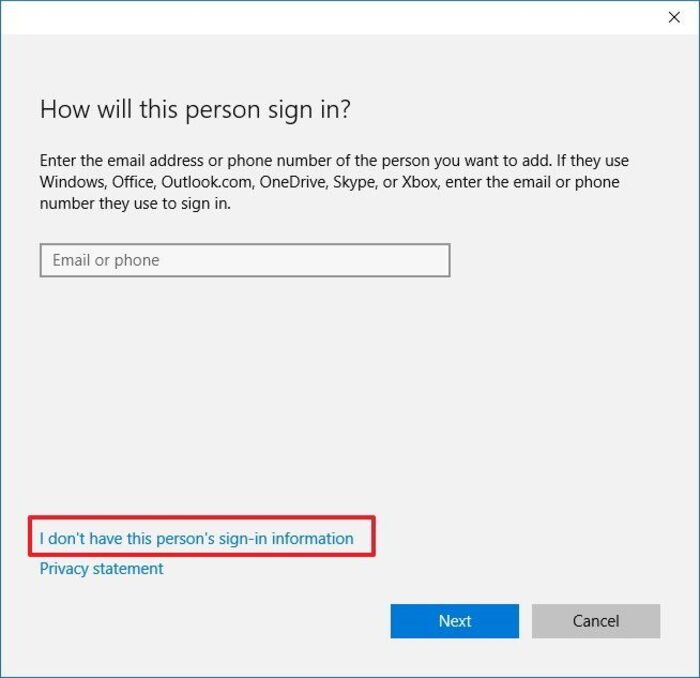
- Once you see the below Window, choose I don’t have this person’s sign-in information.
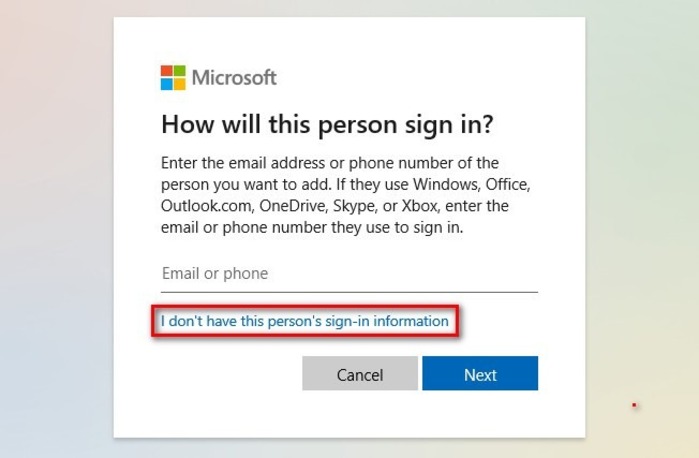
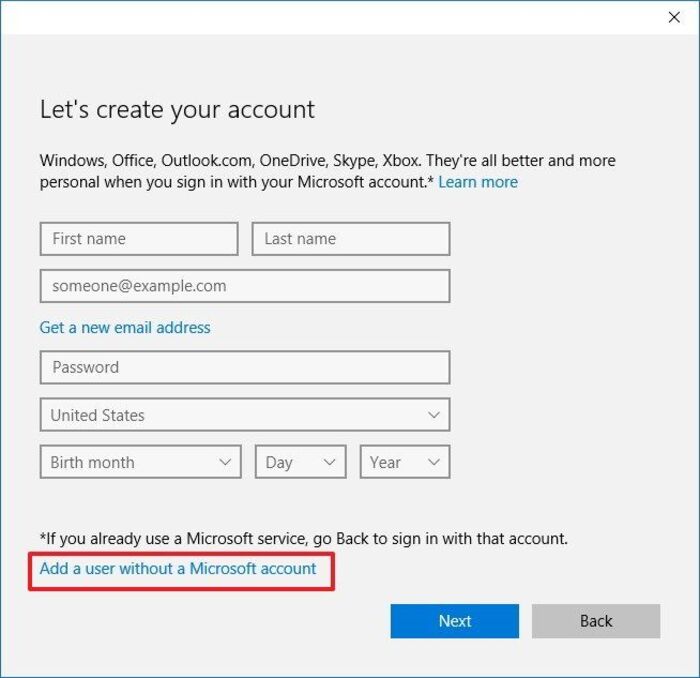
- Click on Add a user without a Microsoft account.
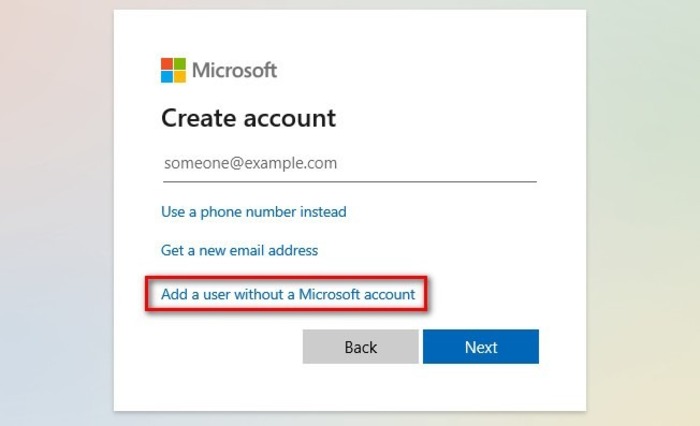
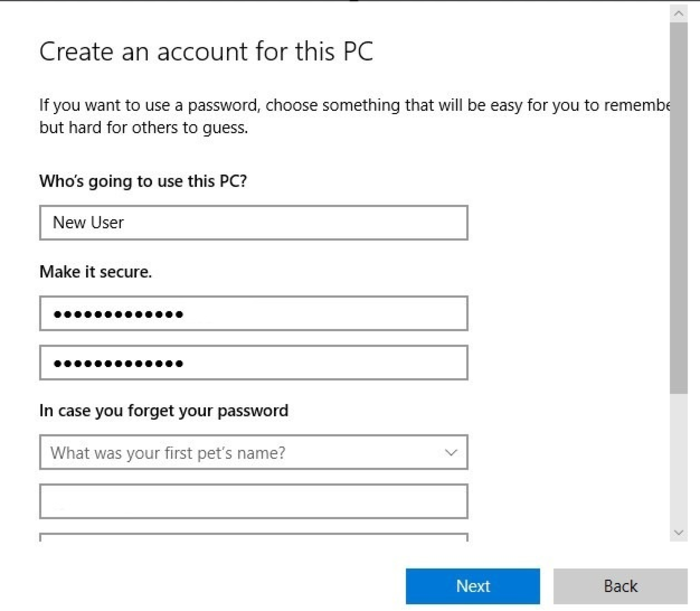
- Select a username, create a strong password, and answer the security questions.
- Click Next.
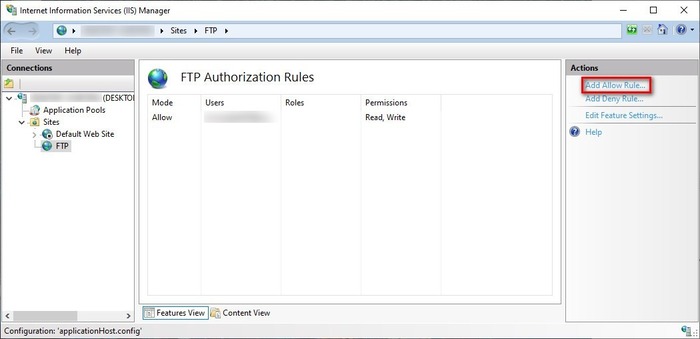
- Then, navigate to Windows Administrative Tools > Internet Information Services (IIS) Manager.
- Select your site from the left-hand panel.
- Click on FTP authorization rules.

- Choose the Add Allow Rule from the right-hand panel.
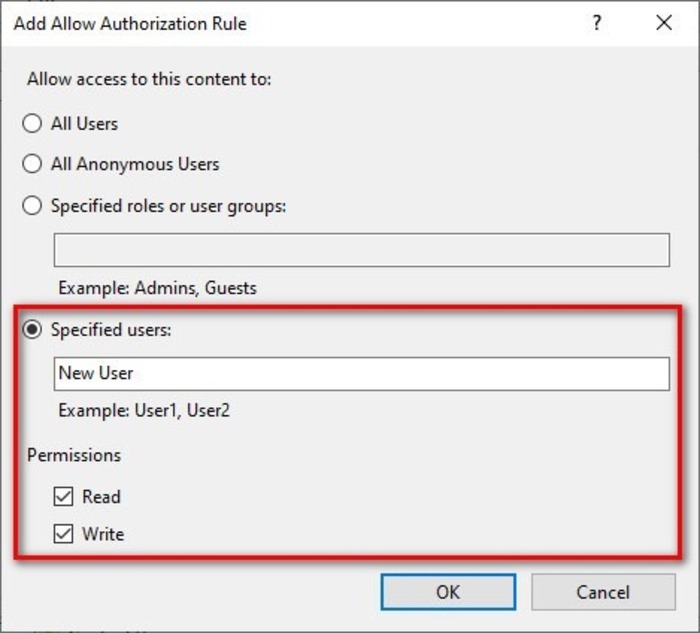
- Select the Specified user and enter the name of the Windows 10/11 user account you created above.
- Set the Read and Write permissions you prefer the new user to have.
- Click OK.
Also, grant the FTP folder permission as well. The new user should now be able to access the server using their own login information. To add extra users to your FTP server, repeat the previous steps.
Step 6. Create Multiple FTP Accounts on Windows 10/11
You can make several accounts with different download and upload permissions if you wish to give other people access to your FTP site. You must create separate Windows accounts for each user, link each account to the FTP home directory, and provide the necessary parameters in order to let others access your FTP server.
Follow the below path to complete this step and add a new user on Windows 10/11:
- Open the Settings app (Press Windows key + I) and click Accounts.
- Click Family & other users.
- Click Add someone else to this PC.
- On the below Windows, click I don’t have this person’s sign-in information link.
- To create an account on the below new Window, click the Add a user without a Microsoft account link.
In this way, you can continue the below steps to add permission to the FTP folder as well and access the FTP folder:
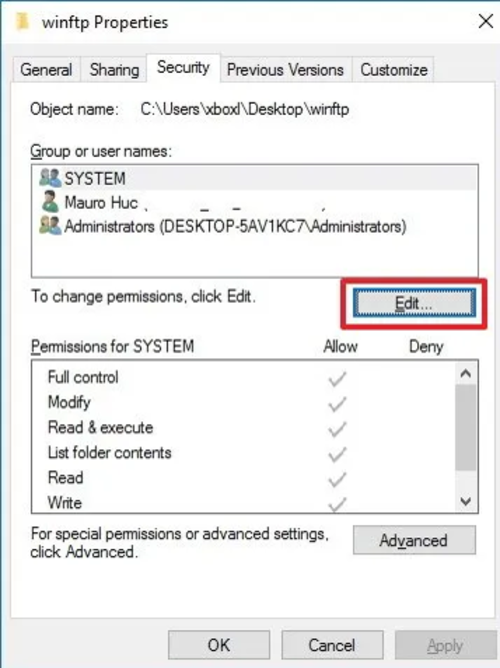
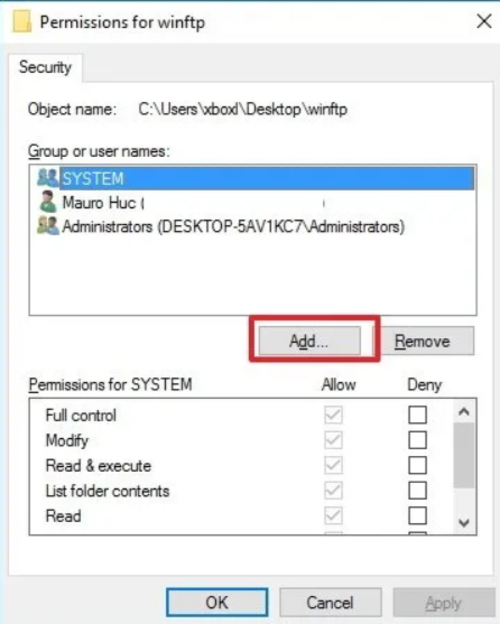
- Right-click the FTP folder and select Properties.
- Click the Security tab.
- Click Edit.
- On the below Window, click Add.
- Now, enter your considered user account name, click Check Name, and finally click OK.

- Choose the user account you just created by clicking on Group or user names, and select the relevant permissions.
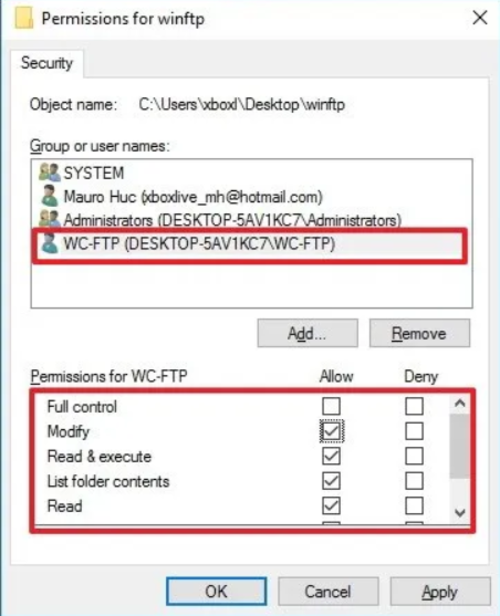
- Finally, click Apply and OK.
Step 7. Connect to an FTP Server on Windows 10/11
It’s time to connect and test your FTP server now that you have created and appropriately configured it. If you have an FTP client in Windows, you can use it to connect to an FTP server from your PC and download or change the files remotely. Otherwise, you can use your web browser.
To do this, follow the below instructions:
- Open your preferred browser and type in your IPv4 address with ftp:// at the beginning.
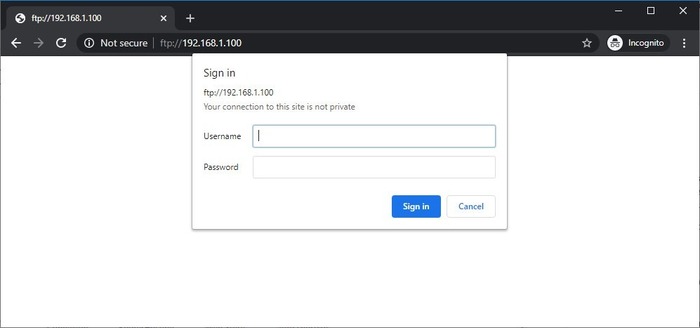
- To log in, enter your credentials and view your files.
Your Windows account is automatically added as the primary FTP account. This indicates that your credentials are your Microsoft email and password. To utilize a more independent technique, refer to step 5 on setting up user authentication. Alternately, as I previously indicated, utilize a new account by adding a different account to your FTP.
Step 8. Upload files to an FTP server on Windows 10/11
When you Install FTP server in Windows, you certainly need to download, upload, and browse files. Stay with us on the final step to learn how to browse, download, and upload files just like you would if the FTP server were a drive connected to your computer. You can use any FTP client to transfer files over a local or public network. Here, using File Explorer is explained:
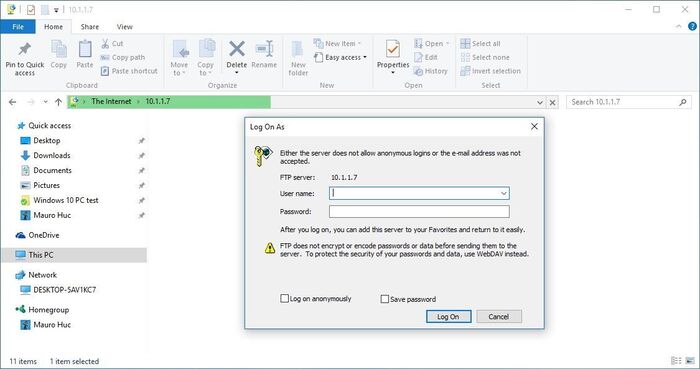
- Open File Explorer. (Press Windows key +E)
- Type your IP address on the address bar in an FTP format.
- When you are prompted, enter your username and password.
- Check the Save password option and click Log on.
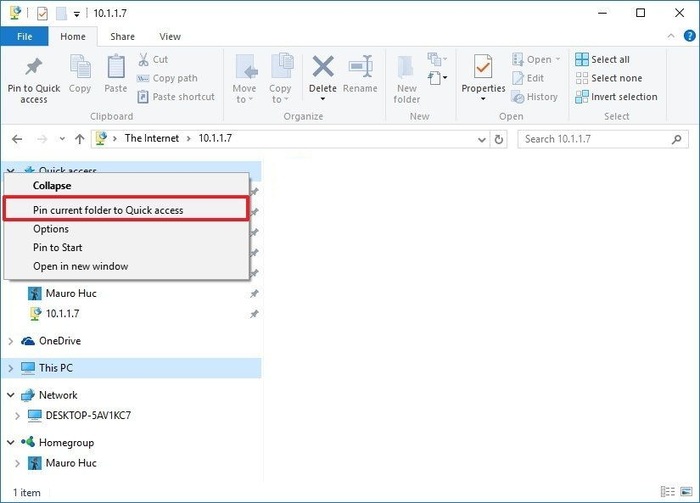
- To make it simpler to reconnect to the FTP server later, you can also right-click Quick Access in the left pane and choose Pin current folder to Quick Access.
Steps to Install FTP Server in Windows Server 2019/2022
If you are considering installing and configuring an FTP server in your Windows server, the instructions in this part would be helpful. The below visual steps explain how you can Install FTP server in Windows Server 2019 and Windows Server 2022.
Step 1. Install FTP Sevrer on Windows Server
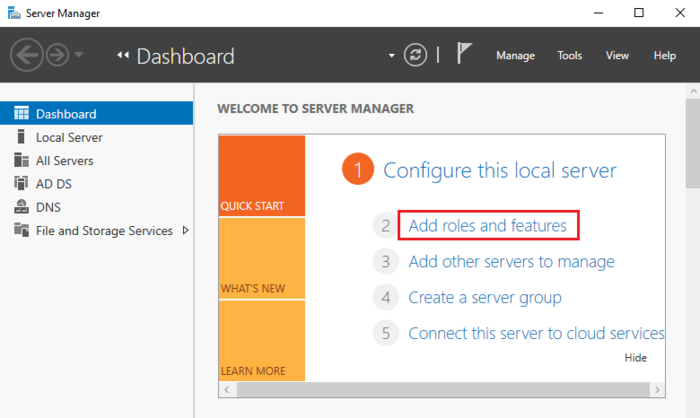
To begin the installation, you must go to the Server Manager. Press the Windows key and search for Server Manager:
- Open Add roles and features.
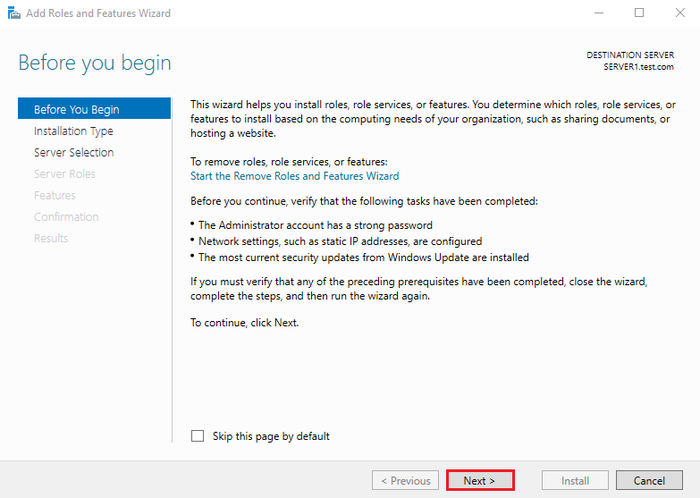
- On the below Wizard, click Next.
- Once you see the below Select Installation type page, select Role-based or feature-based-installation.
- Click Next.

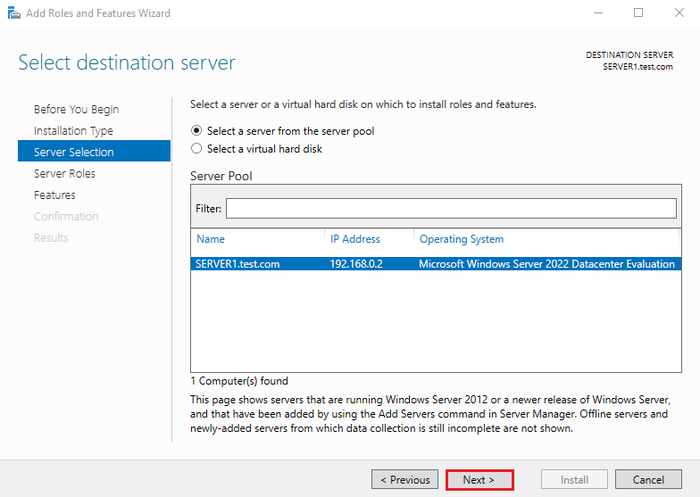
- On the Select destination server page, select the server you would like to add services to.
- Click Next.
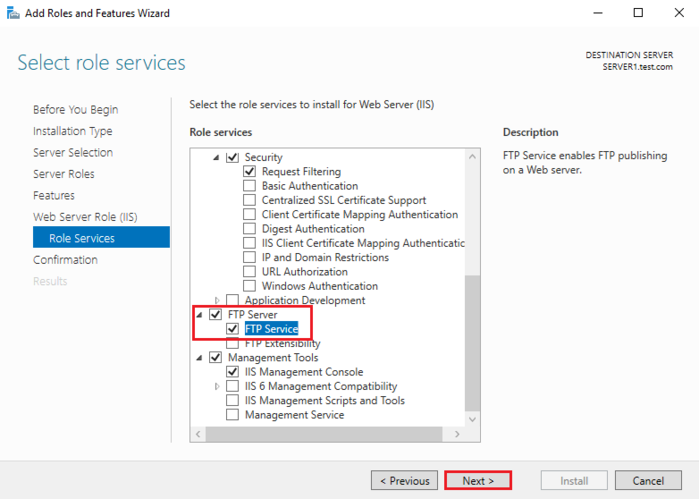
- From the server roles page, select Web Server (IIS) checkbox.
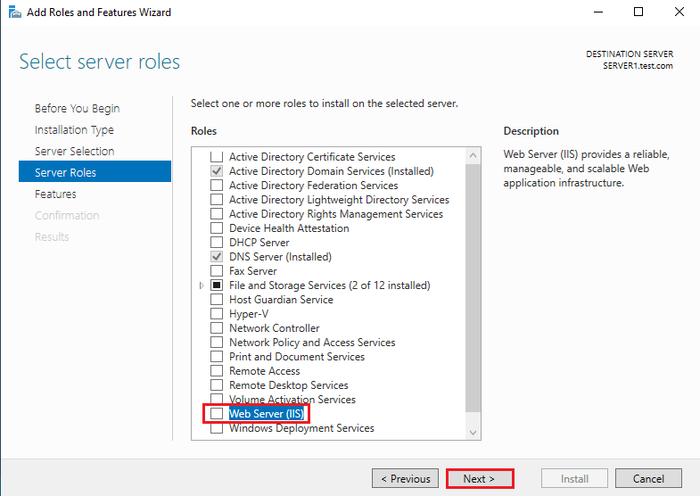
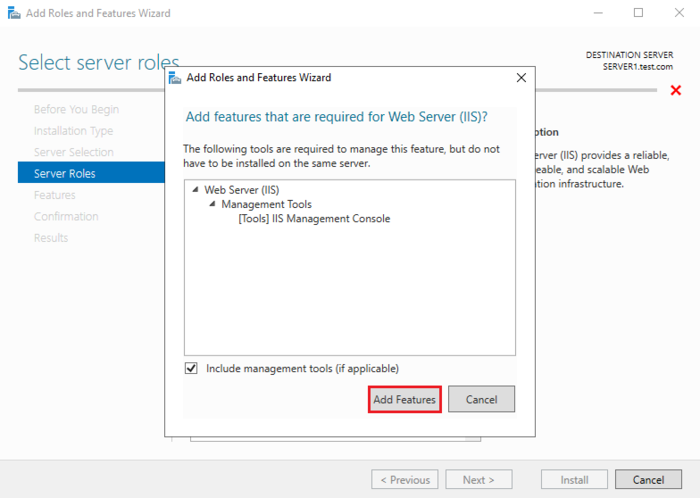
- Once pops up, click on Add Features.
- Click Next.
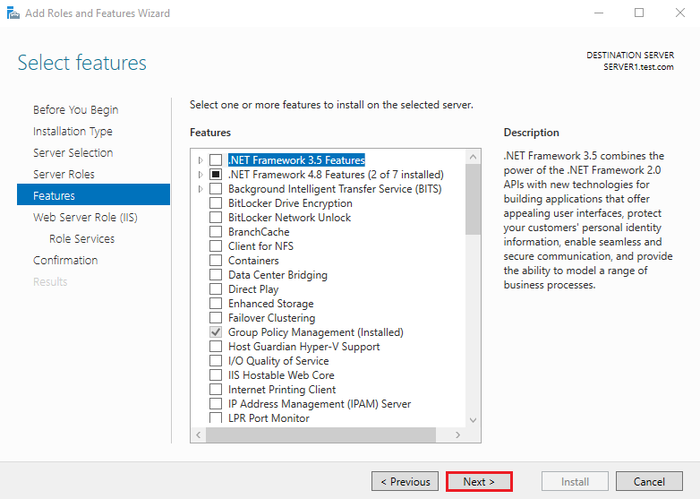
- When you see the below Select features console, click Next since you do not need any extra features.
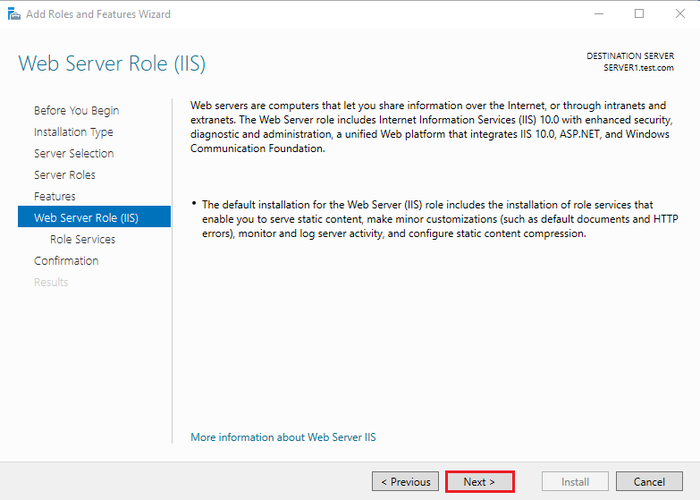
- Same as above, click Next on the Web Server Role (IIS) Wizard.
So close to Install FTP server in Windows 2019/2022:
- Select File Server checkbox.
- Click Next.
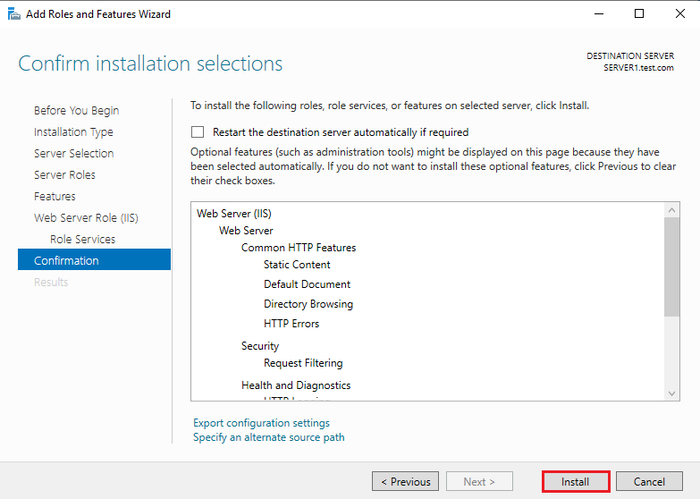
- On the Confirm installation selections console, select Install.
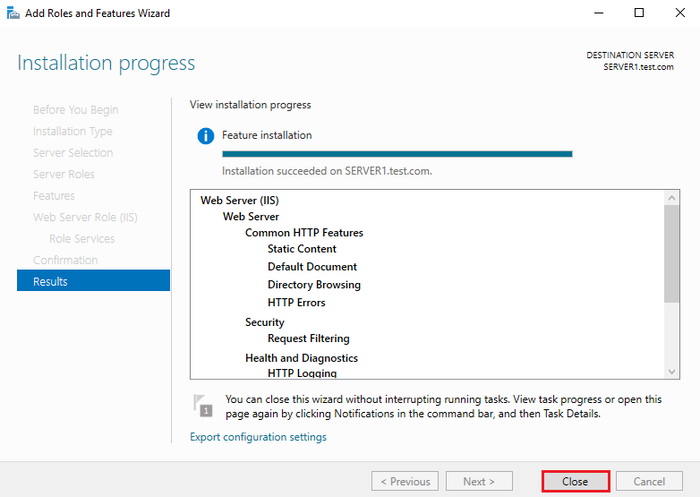
Once the installation process is completed by your server, you’re all done.
- Click Close.
To do the above steps by running a command in your PowerShell, type:
# Install-WindowsFeature Web-FTP-Server -IncludeManagementToolsStep 2. Configure Passive Mode Your FTP Server
Now that you have successfully installed your FTP server in Windows Server, you are ready to Setup FTP on Windows Server 2019/2022.
To configure your FTP server in Passive Mode, follow the below instructions:
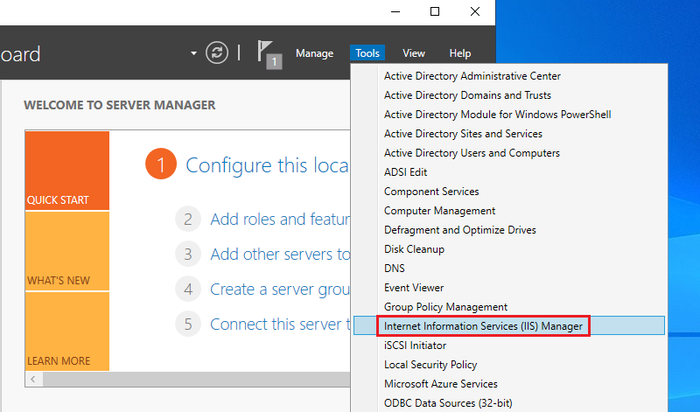
- Open the Server Manager dashboard.
- Click Tools.
- Select Interner Information Services(IIS) Manager.
After opening it, click on your server.
- Select FTP Firewall Support.
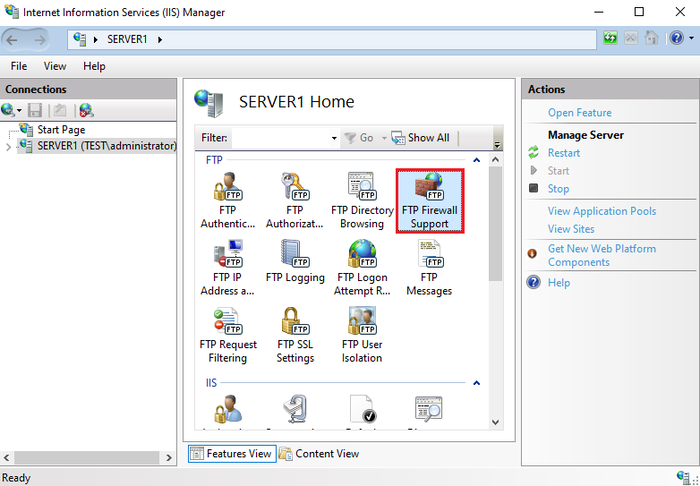
Double-click on FTP Firewall Support or click on Open Feature on the right pane:
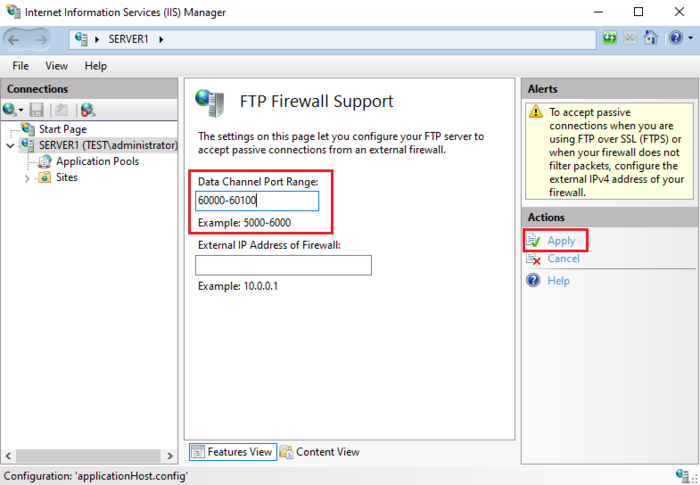
- Configure the Data Channel Port range.
- Click Apply.
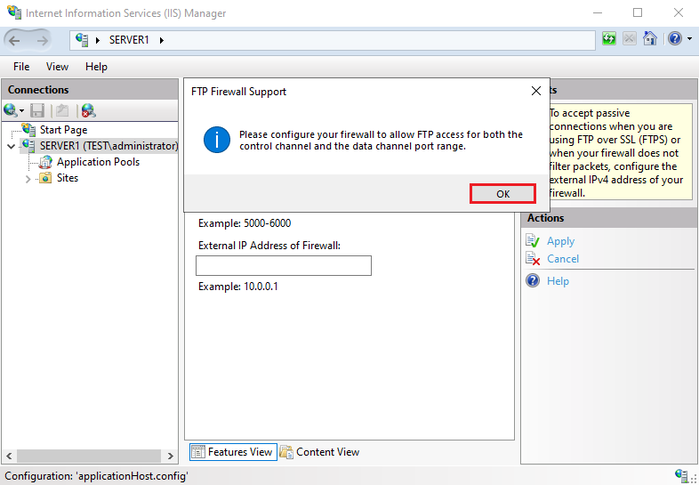
- Once you see the below pop-up, click OK. It asks you to allow the port range you configured in the firewall.
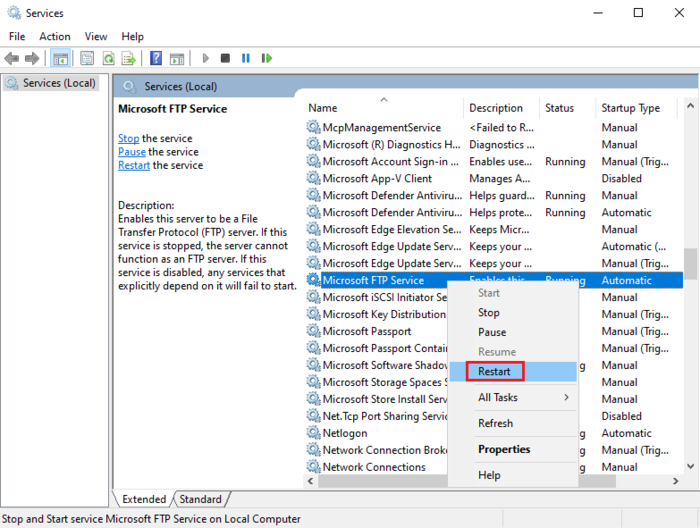
Step 3. Restart FTP Service
To make the above changes applied you need to restart your new Microsoft FTP service. To do this, follow the path below:
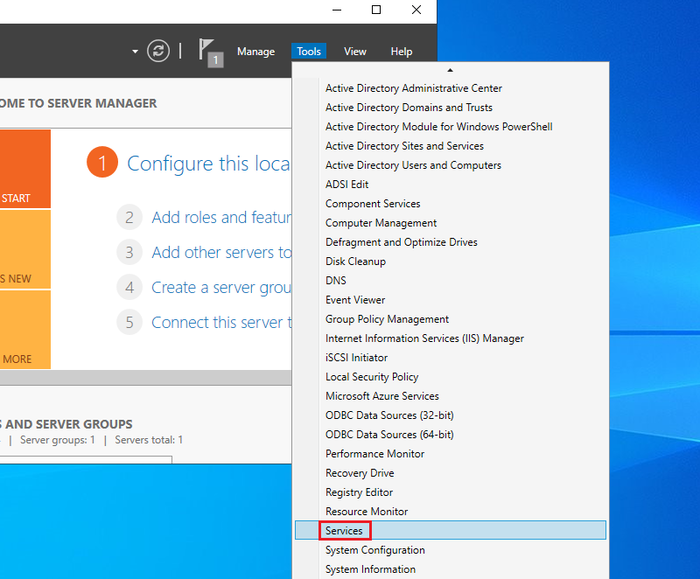
- Open the Server Manager dashboard.
- Click Tools.
- Select Services.
- Right-click on Microsoft FTP Service.
- Select Restart.
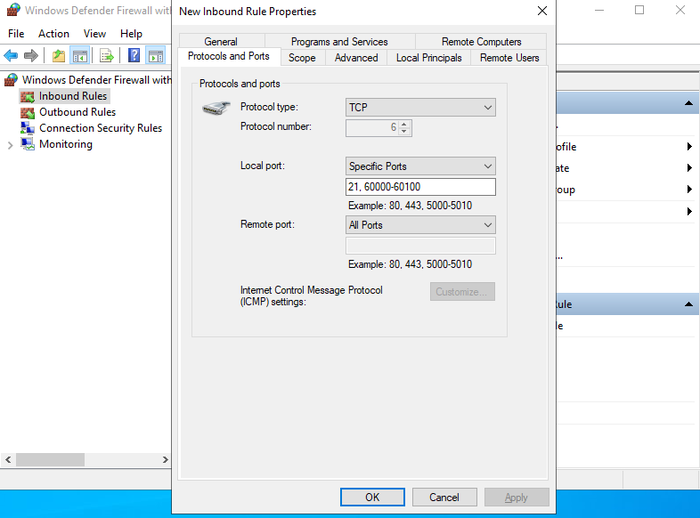
Step 4. Add the Ports in Firewall
In the final step, you need to open a port on Windows VPS Firewall to add a port allow rule on Windows Firewall.
- Add an inbound rule to allow passive ports you set and also 21 port FTP Service.
As you reviewed, the ideal approach to send files and sensitive data between a server and a client is through an FTP server. Now that you have your own FTP server, you can use it to build Backup Server and protect your important information, including data, files, programs, and databases.
Conclusion
In this article, you learned How to Install FTP server in Windows. Using this guide, you can Configure an FTP server on your Windows and Windows server to access your files remotely. Now, you can set up and manage your own private FTP server without third-party software. Attention that for the FTP server to function, your computer must be turned on and connected to the internet. If your computer is in Sleep or Hibernation mode, you won’t be able to view any files.
Following the above steps enable you to install FTP server in Windows and Windows servers without any errors but do not hesitate to contact us if you encounter any problems. Our technical support team will try their best to solve your problems.