How to Setup VPS?
A Virtual Private Server (VPS) offers more control, performance, and security than shared hosting, making it a top choice for businesses and developers. However, understanding how to setup VPS is crucial to unlocking its full potential.
While beginners can follow a structured VPS configuration guide, basic knowledge of server management, networking, and security is beneficial.
This step-by-step guide to setting up a VPS covers 6 essential stages:
- Buy VPS Hosting Plan
- Access and Secure Your VPS via SSH
- Update and Configure Your VPS
- Create a New User and Manage Privileges
- Strengthen Security with Public Key Authentication
- Configure a Firewall for Your VPS
6 Steps to Setup VPS [Beginner’s Guide for Windows & Linux]
Whether you are setting up a Windows VPS or Linux VPS, this guide simplifies the first VPS setup process, making VPS hosting for beginners easier and more efficient.
Step 1: Choose and Buy a VPS Hosting Plan
Choosing the right VPS hosting plan from a reliable VPS hosting provider sets a strong foundation for secure, high-performance hosting, whether for websites, applications, or remote work environments.
Once you buy VPS server, follow the below steps to begin the first VPS setup process:
- Log in to your provider dashboard and locate your purchased VPS plan.
- Click on “Setup VPS” and enter the required details.
- Select your preferred operating system template.
- Confirm and deploy your server; your VPS will be ready in minutes.
Note: While you can switch between Windows or Linux later, reinstalling the operating system will erase all existing data. So, choose wisely based on your specific needs!
Step 2: Access and Secure Your VPS via SSH
After purchasing a Windows or Linux VPS, the next step in your VPS setup is establishing a secure connection to your server.
SSH access for VPS enables you to manage and configure your server remotely with full control.
Linux VPS Users
Open the Terminal and use the following command to connect, replacing server_ip with your actual VPS IP address:
ssh root@server_ipOnce prompted, enter your root password to complete the connection. If you’re new to SSH, check out this guide on enabling SSH for Linux to get started.
Windows VPS Users
You will need an SSH client like PuTTY to connect:
- Download and open PuTTY.
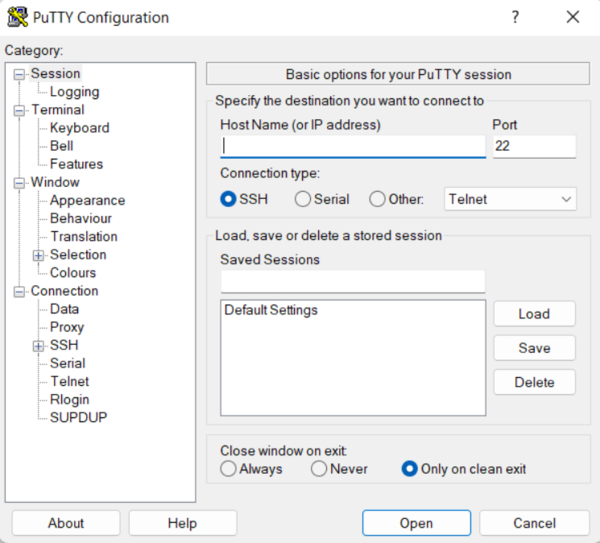
- Enter your server IP address and SSH port (default: 22).
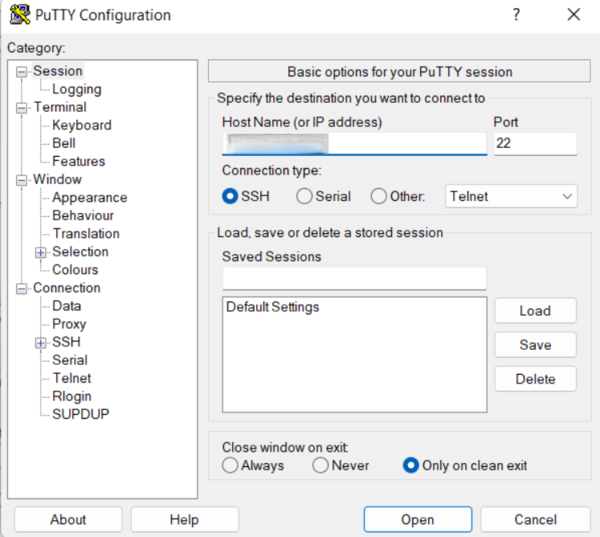
- Click Open and log in using your root credentials.
If you are unfamiliar with this process, refer to this guide on using SSH in Windows for step-by-step instructions.
Once connected, you can execute commands to secure your VPS setup, configure firewall rules, and install necessary packages.
Note: For web-based access, some hosting providers also offer an in-browser terminal for quick SSH management.
Step 3: Update and Configure Your VPS for Security & Performance
Keeping your VPS updated is a crucial step in a secure VPS setup and ensures optimal performance, security patches, and access to the latest features.
Whether you are using a Linux VPS or Windows VPS, updating the system should be your priority in the VPS installation step-by-step process.
Linux VPS Users
Open an SSH session and run the appropriate commands based on your distribution:
sudo apt update && sudo apt upgrade -yCentOS/RHEL:
sudo dnf update -y && sudo dnf upgrade -y- Older CentOS Versions:
sudo yum update -yOnce updates are installed, reboot your VPS to apply the changes:
sudo rebootCompleting a VPS update ensures a secure VPS setup, reducing risks and keeping your system running efficiently.
Windows VPS Users
- Connect to your Windows VPS via Remote Desktop Protocol (RDP).
- Open the Windows Update Settings by searching for “Check for updates” in the Start menu.
- Install all available updates and restart your VPS to apply changes.
Regular updates are essential for VPS server configuration, as outdated software can expose your server to vulnerabilities.
Note: Consider configuring private networking to enhance security and enable secure internal communication between VPS instances
Step 4: Create a New User and Manage Privileges
When setting up your VPS server configuration, it’s essential to create a separate user account instead of relying solely on the root user.
This helps enhance security, prevent accidental system modifications, and allow controlled access for multiple users.
Linux VPS Users
- Log in as root via SSH.
- Create a new user by replacing the username with your preferred account name:
adduser username- Grant administrative privileges by adding the user to the sudo group.
usermod -aG sudo username- Set a strong password for the new user:
passwd usernameNow, instead of executing commands as root, log in with the new user and use sudo when necessary. This minimizes the risk of system-wide errors.
Windows VPS Users
- Log in via RDP and open Computer Management.
- Navigate to Local Users and Groups → Users and click New User.
- Enter the username, set a password, and configure security options.
- Assign the appropriate administrative privileges under the Groups section if needed.
By following the above VPS setup steps, you establish a secure and controlled environment, reducing the risk of unauthorized modifications while ensuring smooth server management.
Step 5: Strengthen Security with Public Key Authentication
Implementing best VPS security practices is essential after your VPS hosting setup to protect your server.
One of the most effective methods to secure your VPS after installation is enabling public key authentication, which replaces traditional passwords with a more secure public-private key pair.
This method prevents unauthorized access and enhances VPS security.
Linux VPS Users
Generate an SSH key pair on your local system:
ssh-keygen -t rsa -b 4096Copy the public key to your VPS:
ssh-copy-id username@your-vps-ipEnsure proper file permissions for security:
chmod 700 ~/.ssh
chmod 600 ~/.ssh/authorized_keys
Additionally, you may need to change file ownership in Linux to ensure the correct user has access:
sudo chown username:username ~/.ssh -REdit the SSH configuration file using the Nano text editor to disable password authentication:
sudo nano /etc/ssh/sshd_configDisable root login via SSH
Locate PasswordAuthentication yes, change it to no, then save and exit.
Restart the SSH service to apply changes:
sudo systemctl restart sshWindows VPS Users
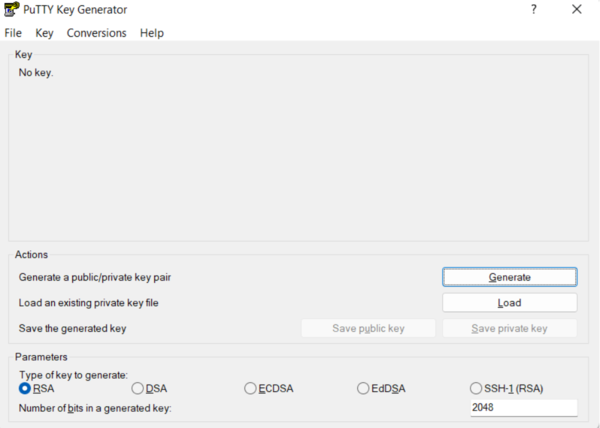
- Save the private key securely on your device.

- Copy the public key and paste it into C:\Users\YourUser.ssh\authorized_keys on your Windows VPS.
- In PuTTY, navigate to Connection → SSH → Auth and select your private key file.
- Modify the SSH configuration in C:\ProgramData\ssh\sshd_config to disable password authentication, then restart SSH.
By integrating public key authentication, your VPS setup becomes significantly more secure, reducing the risk of brute-force attacks while ensuring seamless access for authorized users only.
Note: To Implement automated security monitoring and intrusion detection to safeguard your VP, check out Server Monitoring Tools to keep your server secure and optimized.
Step 6: Configure a Firewall for Your VPS
A crucial step in VPS installation step by step is VPS server firewall configuration to safeguard your system from unauthorized access and cyber threats.
Unlike shared hosting, a VPS requires manual security configurations to ensure optimal protection.
Linux VPS Users
One of the most effective ways to secure a Linux VPS is by setting up iptables, a powerful firewall tool that filters incoming and outgoing traffic based on predefined rules.
Configuring iptables firewall ensures that only legitimate connections reach your server. If you’re new to firewall setup, refer to our step-by-step guide on IPTABLES Firewall.
To get started with iptables, use the following command to check existing rules:
sudo iptables -LTo allow SSH access while blocking unnecessary traffic, apply these rules:
sudo iptables -A INPUT -p tcp --dport 22 -j ACCEPT
sudo iptables -A INPUT -j DROP
Save the rules to persist after reboot:
sudo iptables-save > /etc/iptables/rules.v4Consider that, a solid backup strategy ensures your VPS can recover from accidental deletions, cyberattacks, or hardware failures.
So, you can use BorgBackup to create lightweight incremental backups:
sudo apt install borgbackup -y
borg init --encryption=repokey /path/to/backup
borg create --progress /path/to/backup::{now} /var/www /etc /home
Windows VPS Users
- Windows users can configure the Windows Defender Firewall to block unauthorized access:
- Open Windows Defender Firewall with Advanced Security.
- Navigate to Inbound Rules → New Rule.
- Select Port, choose the protocol (TCP/UDP), and specify allowed ports.
- Set the rule to Allow or Block traffic based on security needs.
To consider backup and disaster recovery strategy for Windows, you can enable Windows System Restore and Shadow Copies to keep historical data:
wbadmin start backup -backupTarget:E: -include:C:By configuring a firewall and regularly testing backups, your VPS setup gains an extra layer of security, ensuring a safer hosting environment against cyber threats.
Steps to Hosting a Website with VPS?
Now, it’s time to setup VPS to deploy your website and bring your online presence to life
When you setup VPS for website hosting, choosing the right control panel is essential for managing domains, databases, security, and overall server operations.
While cPanel is the most widely used option due to its user-friendly interface and extensive features, there are other alternatives like Plesk, DirectAdmin, and CyberPanel, each catering to different user needs:
- Plesk: Ideal for developers and agencies, offering Windows & Linux support with a modern UI.
- DirectAdmin: A lightweight and cost-effective alternative with a simple interface and essential features.
- CyberPanel: A free, LiteSpeed-powered panel designed for high performance and speed.
Among these, cPanel remains the preferred choice for VPS hosting due to its extensive third-party integrations, powerful WHM (WebHost Manager), and automated tools.
In this guide, we will focus on setting up a website on a cPanel VPS, ensuring a smooth and secure hosting experience.
1. Load Balancing & Scalability
For high-traffic applications, setting up a load balancer ensures smooth traffic distribution across multiple VPS instances.
This enhances performance, prevents server overload, and improves uptime.
- To Use NGINX as a Load Balancer on Linux VPS, follow the below steps:
Install NGINX:
sudo apt install nginx -yConfigure load balancing:
upstream myservers {
    server 192.168.1.101;
    server 192.168.1.102;
}
server {
    listen 80;
    location / {
        proxy_pass http://myservers;
    }
}
Restart NGINX:
- Windows Load Balancing with IIS:
Windows VPS users can configure Network Load Balancing (NLB) via IIS Manager, ensuring high availability.
Load balancing is crucial for VPS scalability, allowing websites and applications to handle increasing traffic smoothly.
1. Install cPanel on Your VPS
Run the command below to setup VPS and use SSH to log in to your server:
ssh username@your_vps_ipTo update your system, run:
sudo yum update -yUse a fully qualified domain name (FQDN) to set a hostname:
hostnamectl set-hostname server.yourdomain.comRun the installation command to download and install cPanle:
cd /home && curl -o latest -L https://securedownloads.cpanel.net/latest && sh latestNote: The installation process may take some time.
Once installed, use the command below to log in and access cPanel & WHM:
https://your_vps_ip:2087Note: Use root as the username and your server’s root password.
2. Set Up Your Website
Now that cPanel is installed, let’s create and manage your website.
- Adding a Website & Domain:
- Log into WHM.
- Go to “Account Functions” → “Create a New Account”
- Enter Your Domain Name and Set a Password.
- Select Package & Theme.
- Click “Create”
Your website is now hosted on your VPS!
3. Secure Your Website with SSL
- To enable a free SSL certificate:
- Log in to WHM and go to “Manage AutoSSL”
- Choose “cPanel (powered by Sectigo)”
- Click “Run AutoSSL”
Now your website is secure and encrypted!
4. Install WordPress (or Other CMS)
cPanel makes it super easy to install WordPress using Softaculous. If you need a detailed step-by-step guide, check out our Install WordPress on cPanel article for in-depth instructions.
- Steps to Install WordPress:
- Log in to cPanel.
- Navigate to Softaculous Apps Installer.
- Click on WordPress → Install Now.
- Enter Site Name, Admin Username, and Password.
- Click Install.
Your WordPress site is now live!
5. Optimize and Maintain Your VPS
Enhance speed and stability by optimizing your setup VPS through fine-tuning server settings, enabling caching, and managing resources efficiently.
Track Resource Usage: Monitor CPU, RAM, and disk performance in WHM to prevent slowdowns.
Automate Backups: Enable scheduled backups to safeguard your website data.
Boost Speed & Security: Use Cloudflare’s CDN and security features for better performance and protection.
Implementing these strategies is key to Improve VPS Performance and ensuring a smooth hosting experience.
Conclusion
Setting up a VPS unlocks greater control, performance, and security compared to shared hosting, making it an excellent choice for businesses and developers.
By following this guide, you can confidently configure your VPS server, strengthen security, and optimize performance for a seamless hosting experience.
A reliable VPS hosting provider is essential, especially if it is your first VPS hosting setup, ensuring stability, support, and easy management.
To secure your VPS after installation, always implement best practices like firewalls, regular updates, and backups.
With the right approach, your VPS will provide a powerful, scalable, and secure foundation for your online projects.